> ## Documentation Index
> Fetch the complete documentation index at: https://watermelon.ai/docs/llms.txt
> Use this file to discover all available pages before exploring further.
# Picqer template
The Picqer Custom Action connects your Agent to Picqer so it can retrieve order information and use it when answering customer questions.
This setup includes:
* A predefined OpenAPI schema for Picqer
* Basic authentication
* The required Picqer API BaseURL
* A health check configuration
After setting up the Action, you can validate it, activate it, and test it in the Playground.
## Set up the action
1. Go to **Actions** in Watermelon.
2. In the **Actions catalog**, click **Custom action**.
3. Click **Create new Action**.
4. Fill in the fields below.
### General details
**Action name**
`Picqer`
**Description**
`This action lets you get status information from your orders and use it in your chatbot when customers ask for it.`
**BaseURL**
`https://example.picqer.com/api/v1/`
Replace `example` with your Picqer subdomain.
### Authentication
For **Authorization Header**, select **Basic**.
**Username**
`api_key`
Replace this with your Picqer API key.
**Password**
Leave this field empty.
### Health check
**Health check URL**
`https://www.yourdomain.com/health_check`
Replace this URL with the health check endpoint you want Watermelon to use.
**Instruction**
> You should respond with the following message or a similar variation: Sorry, something went wrong on our end. Can I assist you with anything else? Please let me know how I can help.
### Schema
Paste the Picqer schema into the **Schema** field:
```text theme={null}
```
```text theme={null}
[PICQER SCHEMA]
```
Click **Validate** to check the schema.
### Example in Watermelon
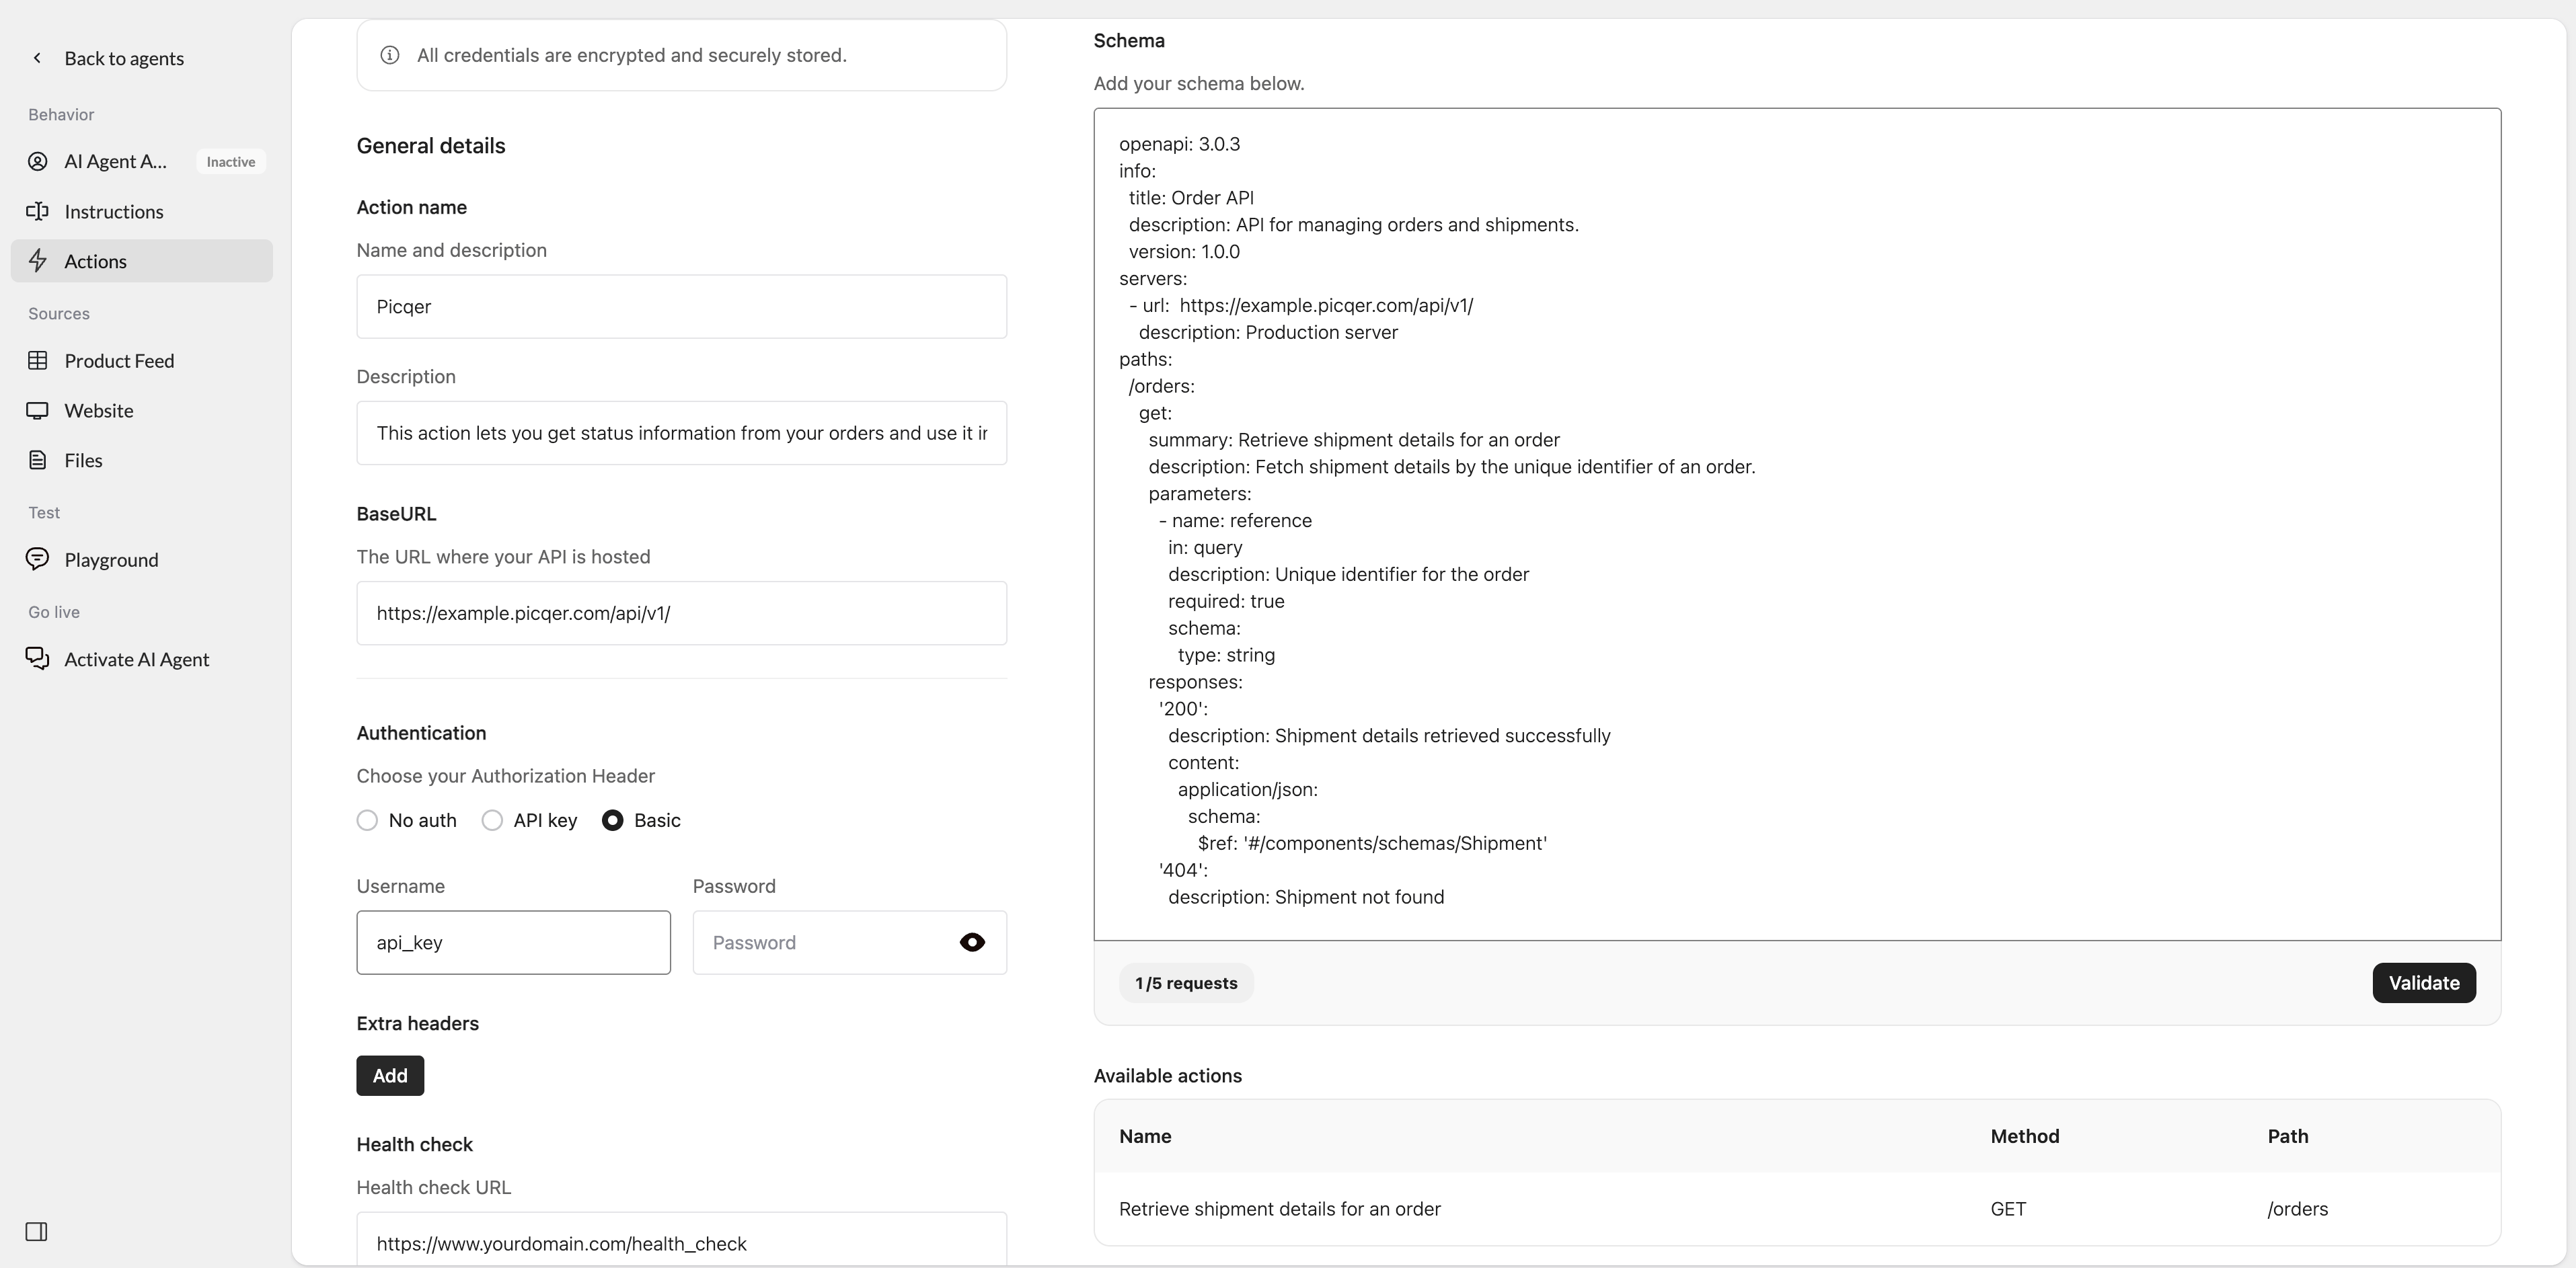 When everything is configured correctly, click **Save** and then **Activate**.
Finally, test the Action in the **Playground** to make sure your Agent can retrieve the expected Picqer data.
## Editing an Action Template
After setting up an Action, you can adjust it to your use case. For example, you can add endpoints to the schema, change parameters, or update the name and description.
Be careful when changing authentication settings or existing endpoints, as this can prevent the Action from connecting to the API.
## Troubleshooting
| Issue | Likely cause | What to check |
| :------------------------------------------- | :-------------------------------------- | :-------------------------------------------------------- |
| **Validation failed** | Invalid OpenAPI schema | Check the schema for missing or unsupported fields. |
| **401 Unauthorized** | Incorrect credentials | Check your API key, token, username, or password. |
| **404 Not Found** | Incorrect endpoint | Check the BaseURL and endpoint path. |
| **Action does not return the expected data** | Schema or parameter mismatch | Check the endpoint parameters and API response structure. |
| **Health check fails** | Health check endpoint cannot be reached | Check the Health check URL and authentication. |
When everything is configured correctly, click **Save** and then **Activate**.
Finally, test the Action in the **Playground** to make sure your Agent can retrieve the expected Picqer data.
## Editing an Action Template
After setting up an Action, you can adjust it to your use case. For example, you can add endpoints to the schema, change parameters, or update the name and description.
Be careful when changing authentication settings or existing endpoints, as this can prevent the Action from connecting to the API.
## Troubleshooting
| Issue | Likely cause | What to check |
| :------------------------------------------- | :-------------------------------------- | :-------------------------------------------------------- |
| **Validation failed** | Invalid OpenAPI schema | Check the schema for missing or unsupported fields. |
| **401 Unauthorized** | Incorrect credentials | Check your API key, token, username, or password. |
| **404 Not Found** | Incorrect endpoint | Check the BaseURL and endpoint path. |
| **Action does not return the expected data** | Schema or parameter mismatch | Check the endpoint parameters and API response structure. |
| **Health check fails** | Health check endpoint cannot be reached | Check the Health check URL and authentication. |