> ## Documentation Index
> Fetch the complete documentation index at: https://watermelon.ai/docs/llms.txt
> Use this file to discover all available pages before exploring further.
# Add users
> You can add multiple users to your Watermelon account.
Each user within Watermelon needs their own account, allowing multiple users to handle live chats simultaneously or training the Agent.
Extra users are available in Starter, Advanced, Business licences. \
Additional costs a €25,00 per user apply, see our [pricing page](/help-center/plans-pricing/pricing-overview) for more details.
If you are on a Legacy licence, other costs might be applicable. You can check this with our Support team.
## Adding users
Follow the steps below to add your colleagues as users. You can select their rights during adding.
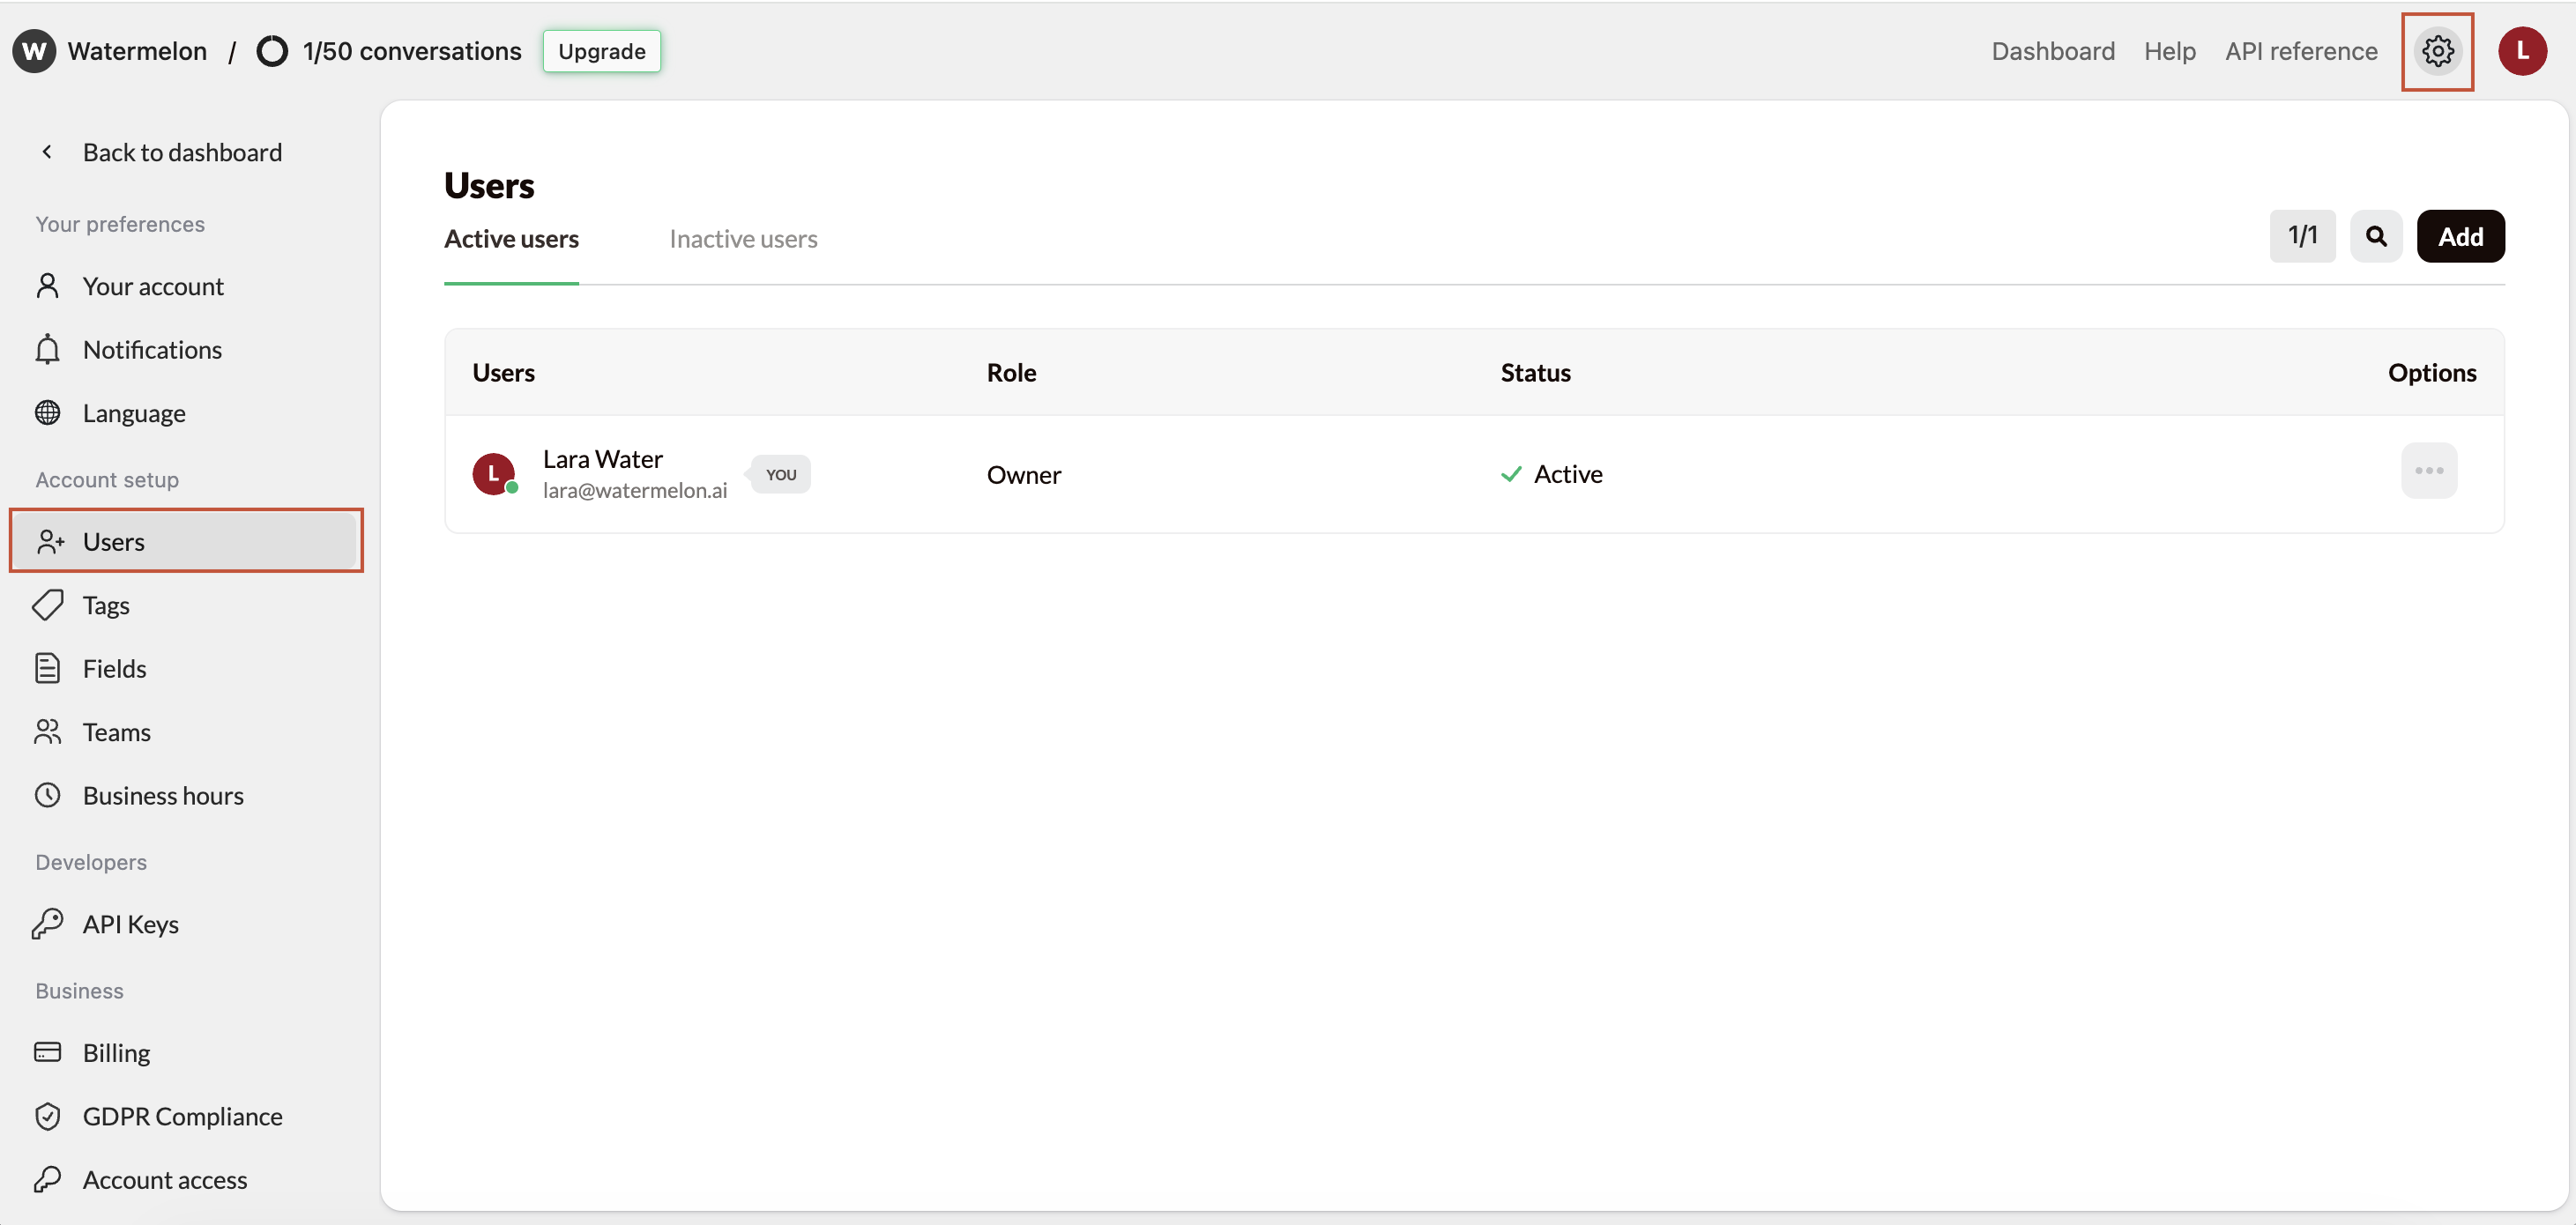
Go to **Settings**. Under **Account Setup**, click on **Users**.
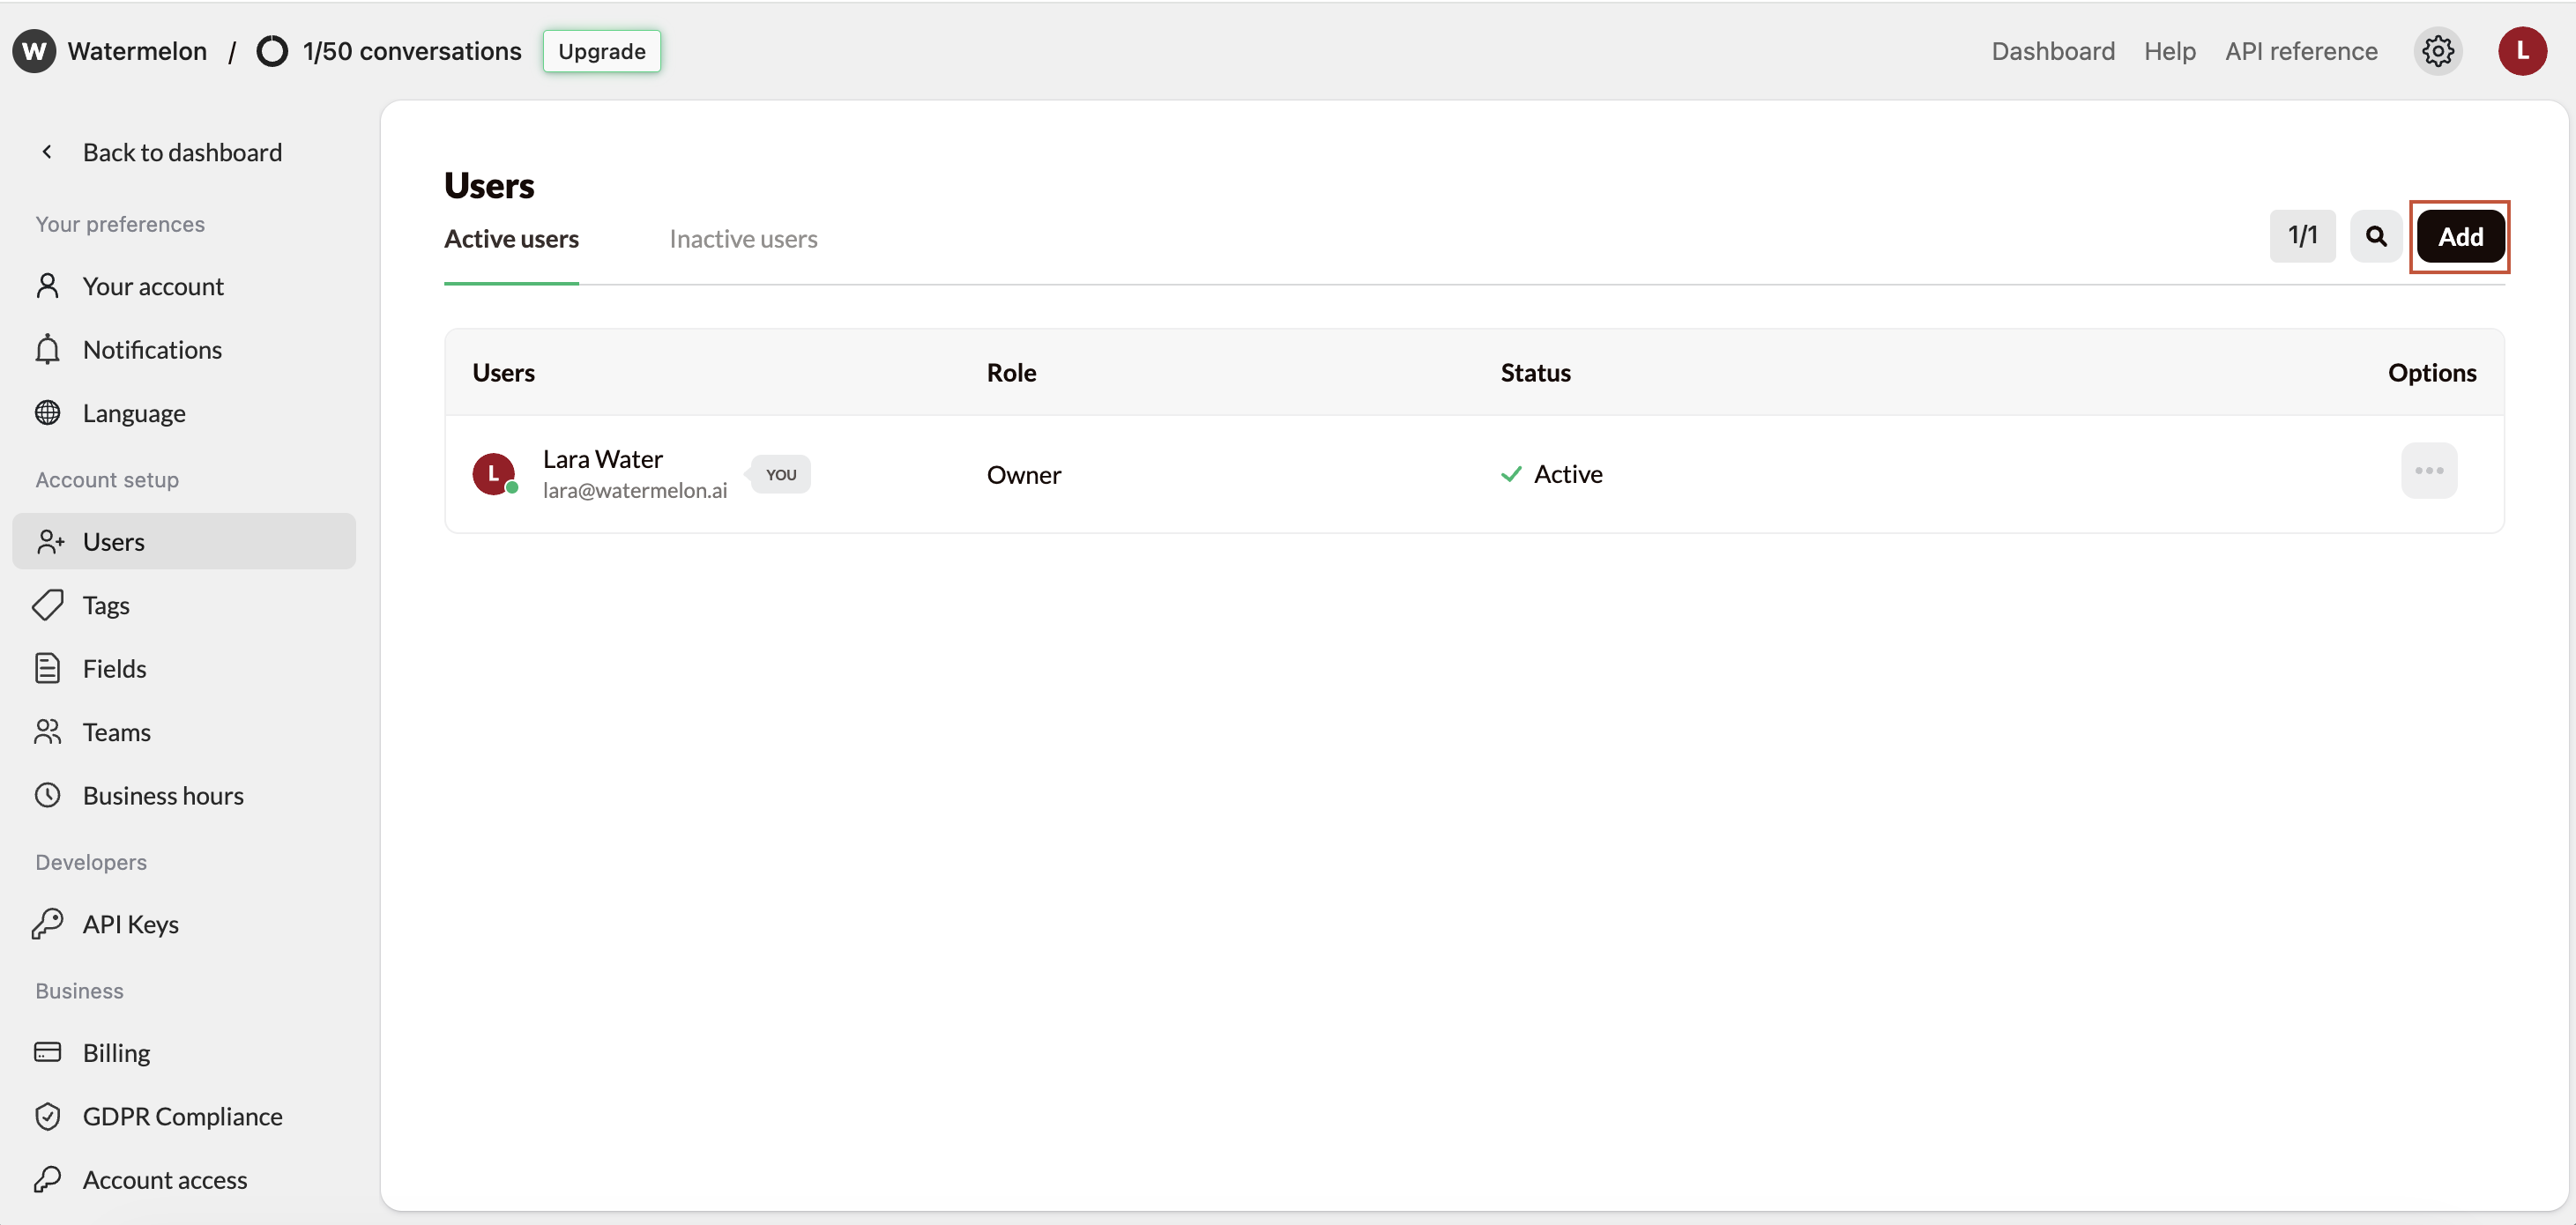
 Click on **Add** to add a user
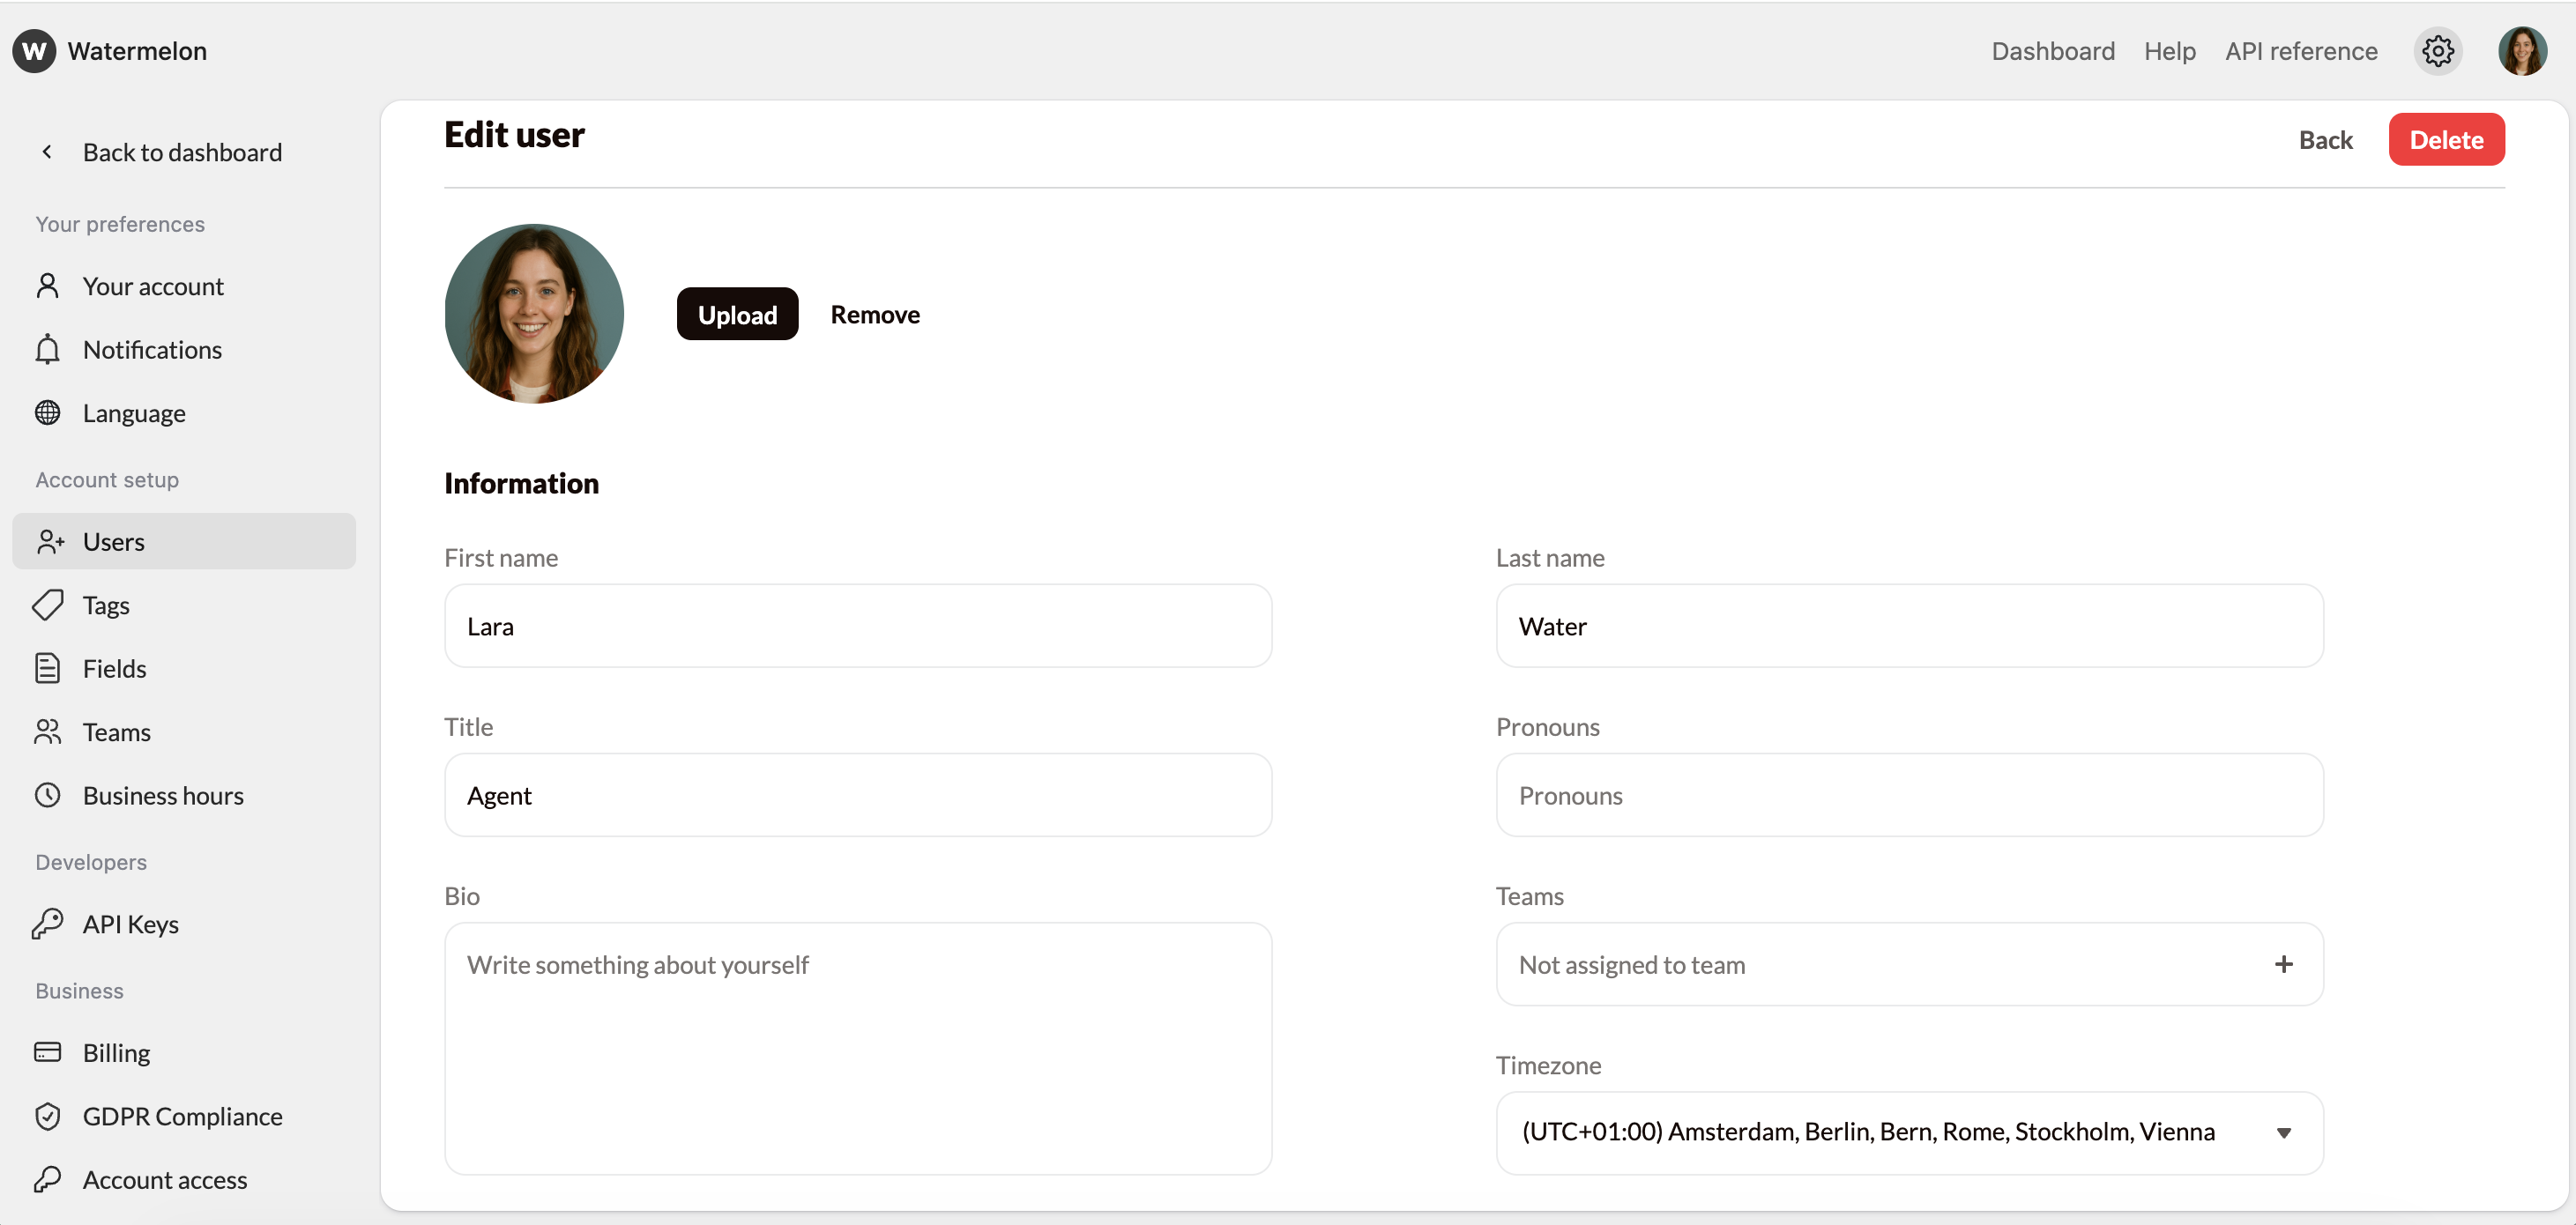
 You'll now see the user profile and can add all details here. For a new profile the following details are mandatory:
* First name
* Last name
* E-mail address
You'll now see the user profile and can add all details here. For a new profile the following details are mandatory:
* First name
* Last name
* E-mail address
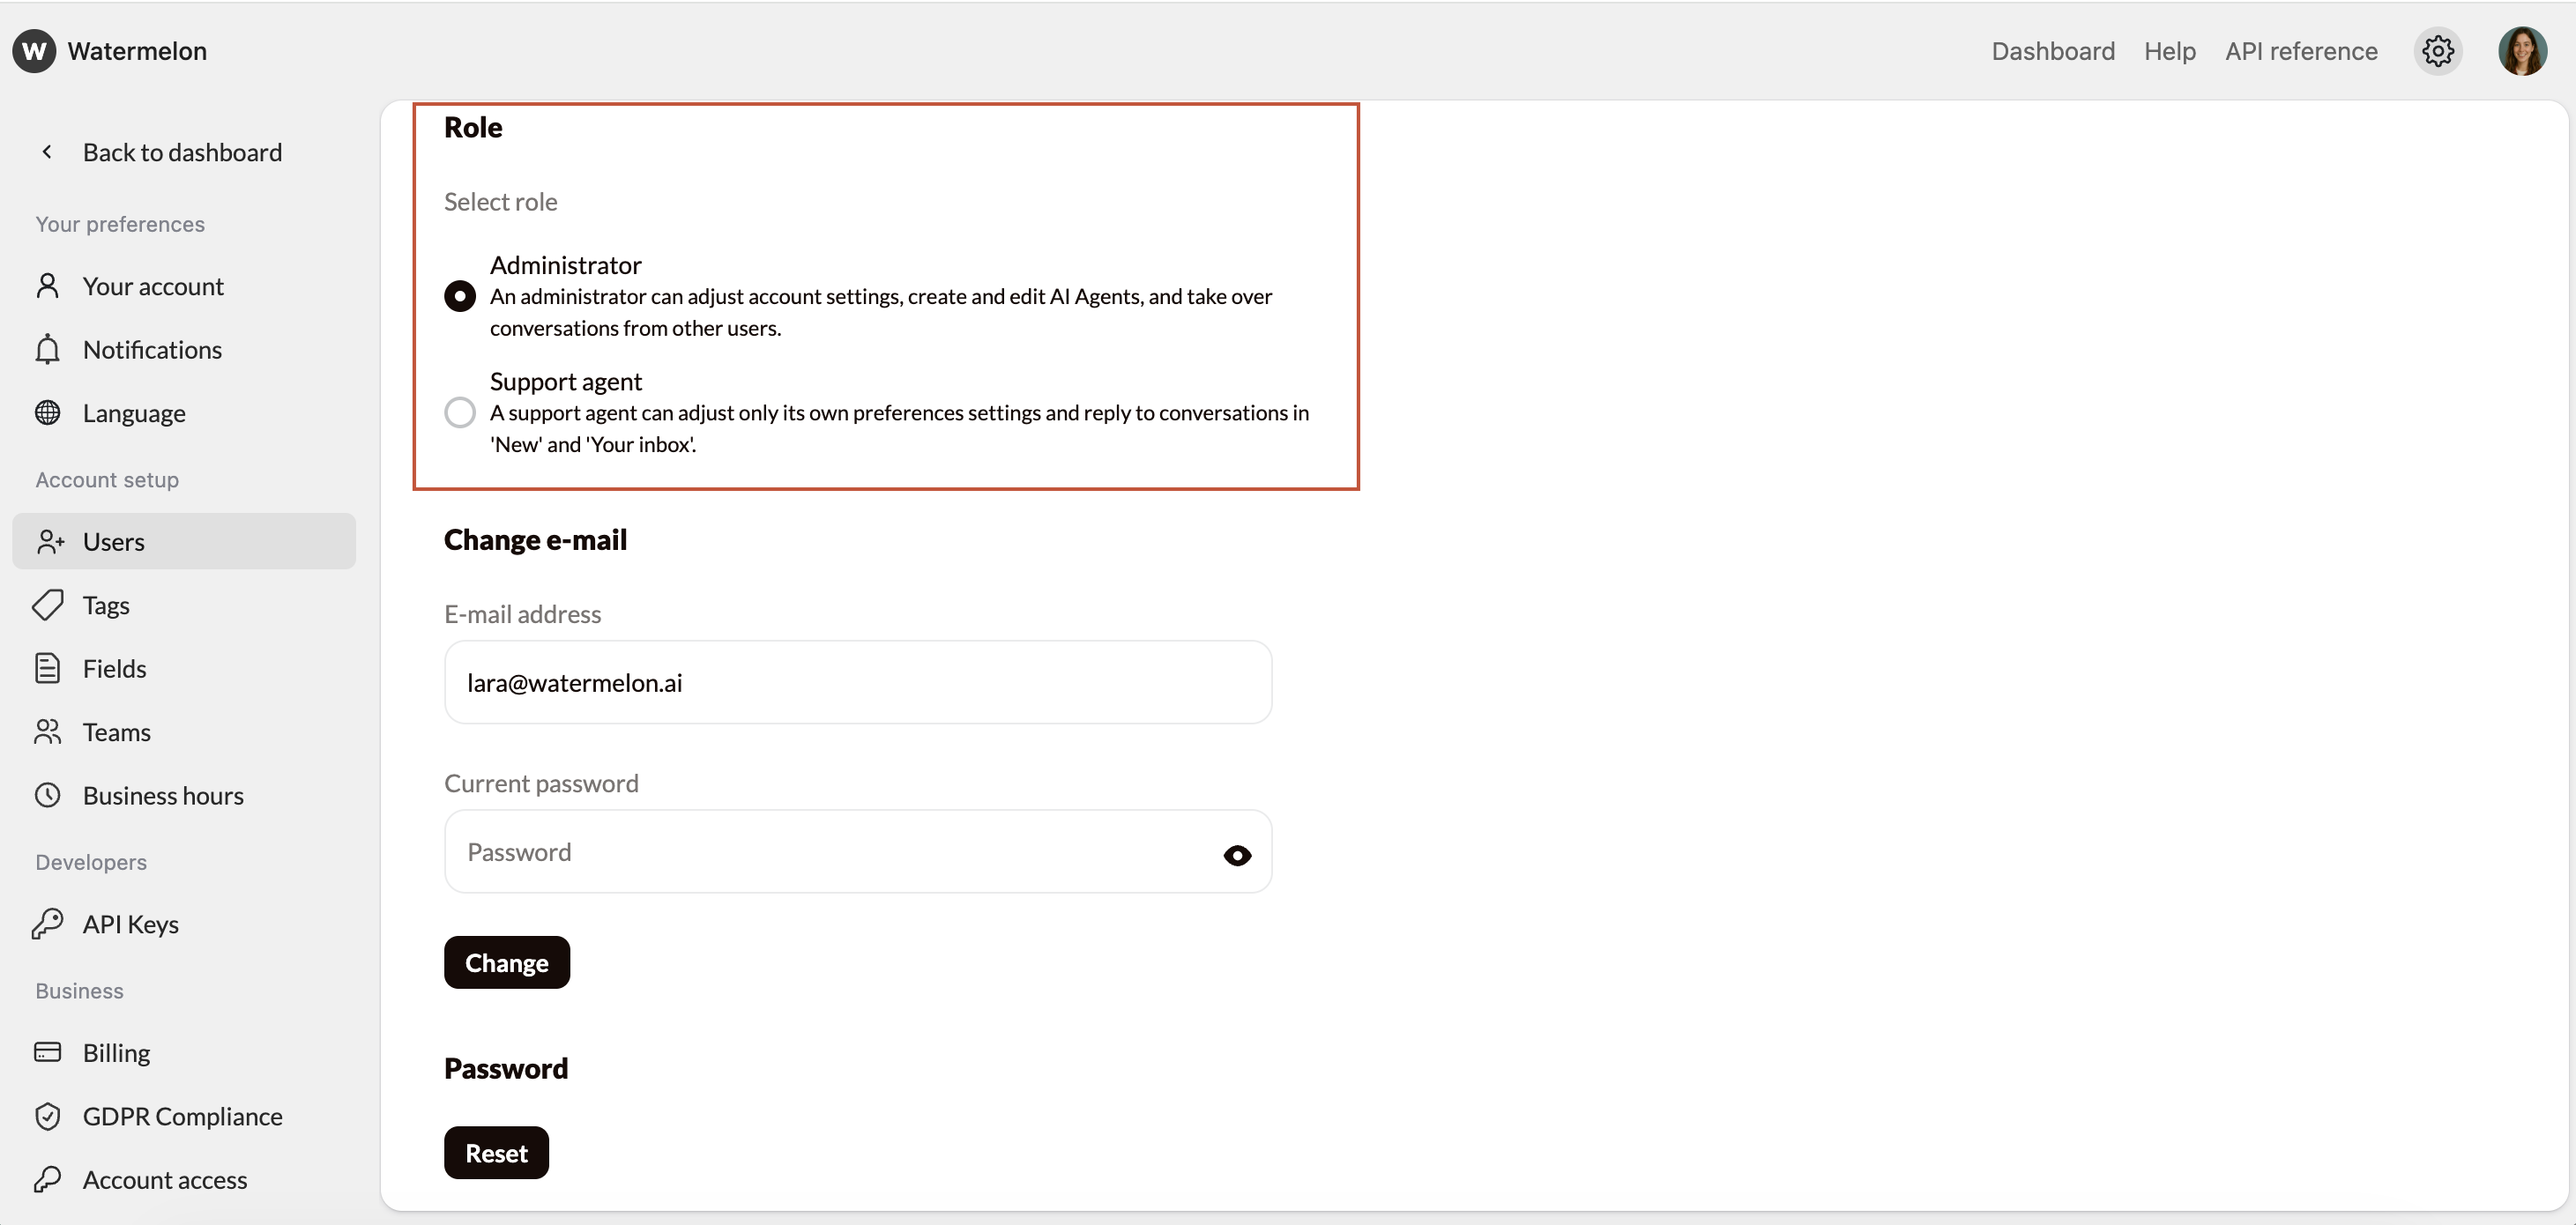
 Choose which rights you want to give to the user:
* **Admin:** Can adjust settings, edit and create Agents, and take over chats from other users.
* **Support** **Agent**: Can help customers in the inbox and adjust personal settings.
Choose which rights you want to give to the user:
* **Admin:** Can adjust settings, edit and create Agents, and take over chats from other users.
* **Support** **Agent**: Can help customers in the inbox and adjust personal settings.
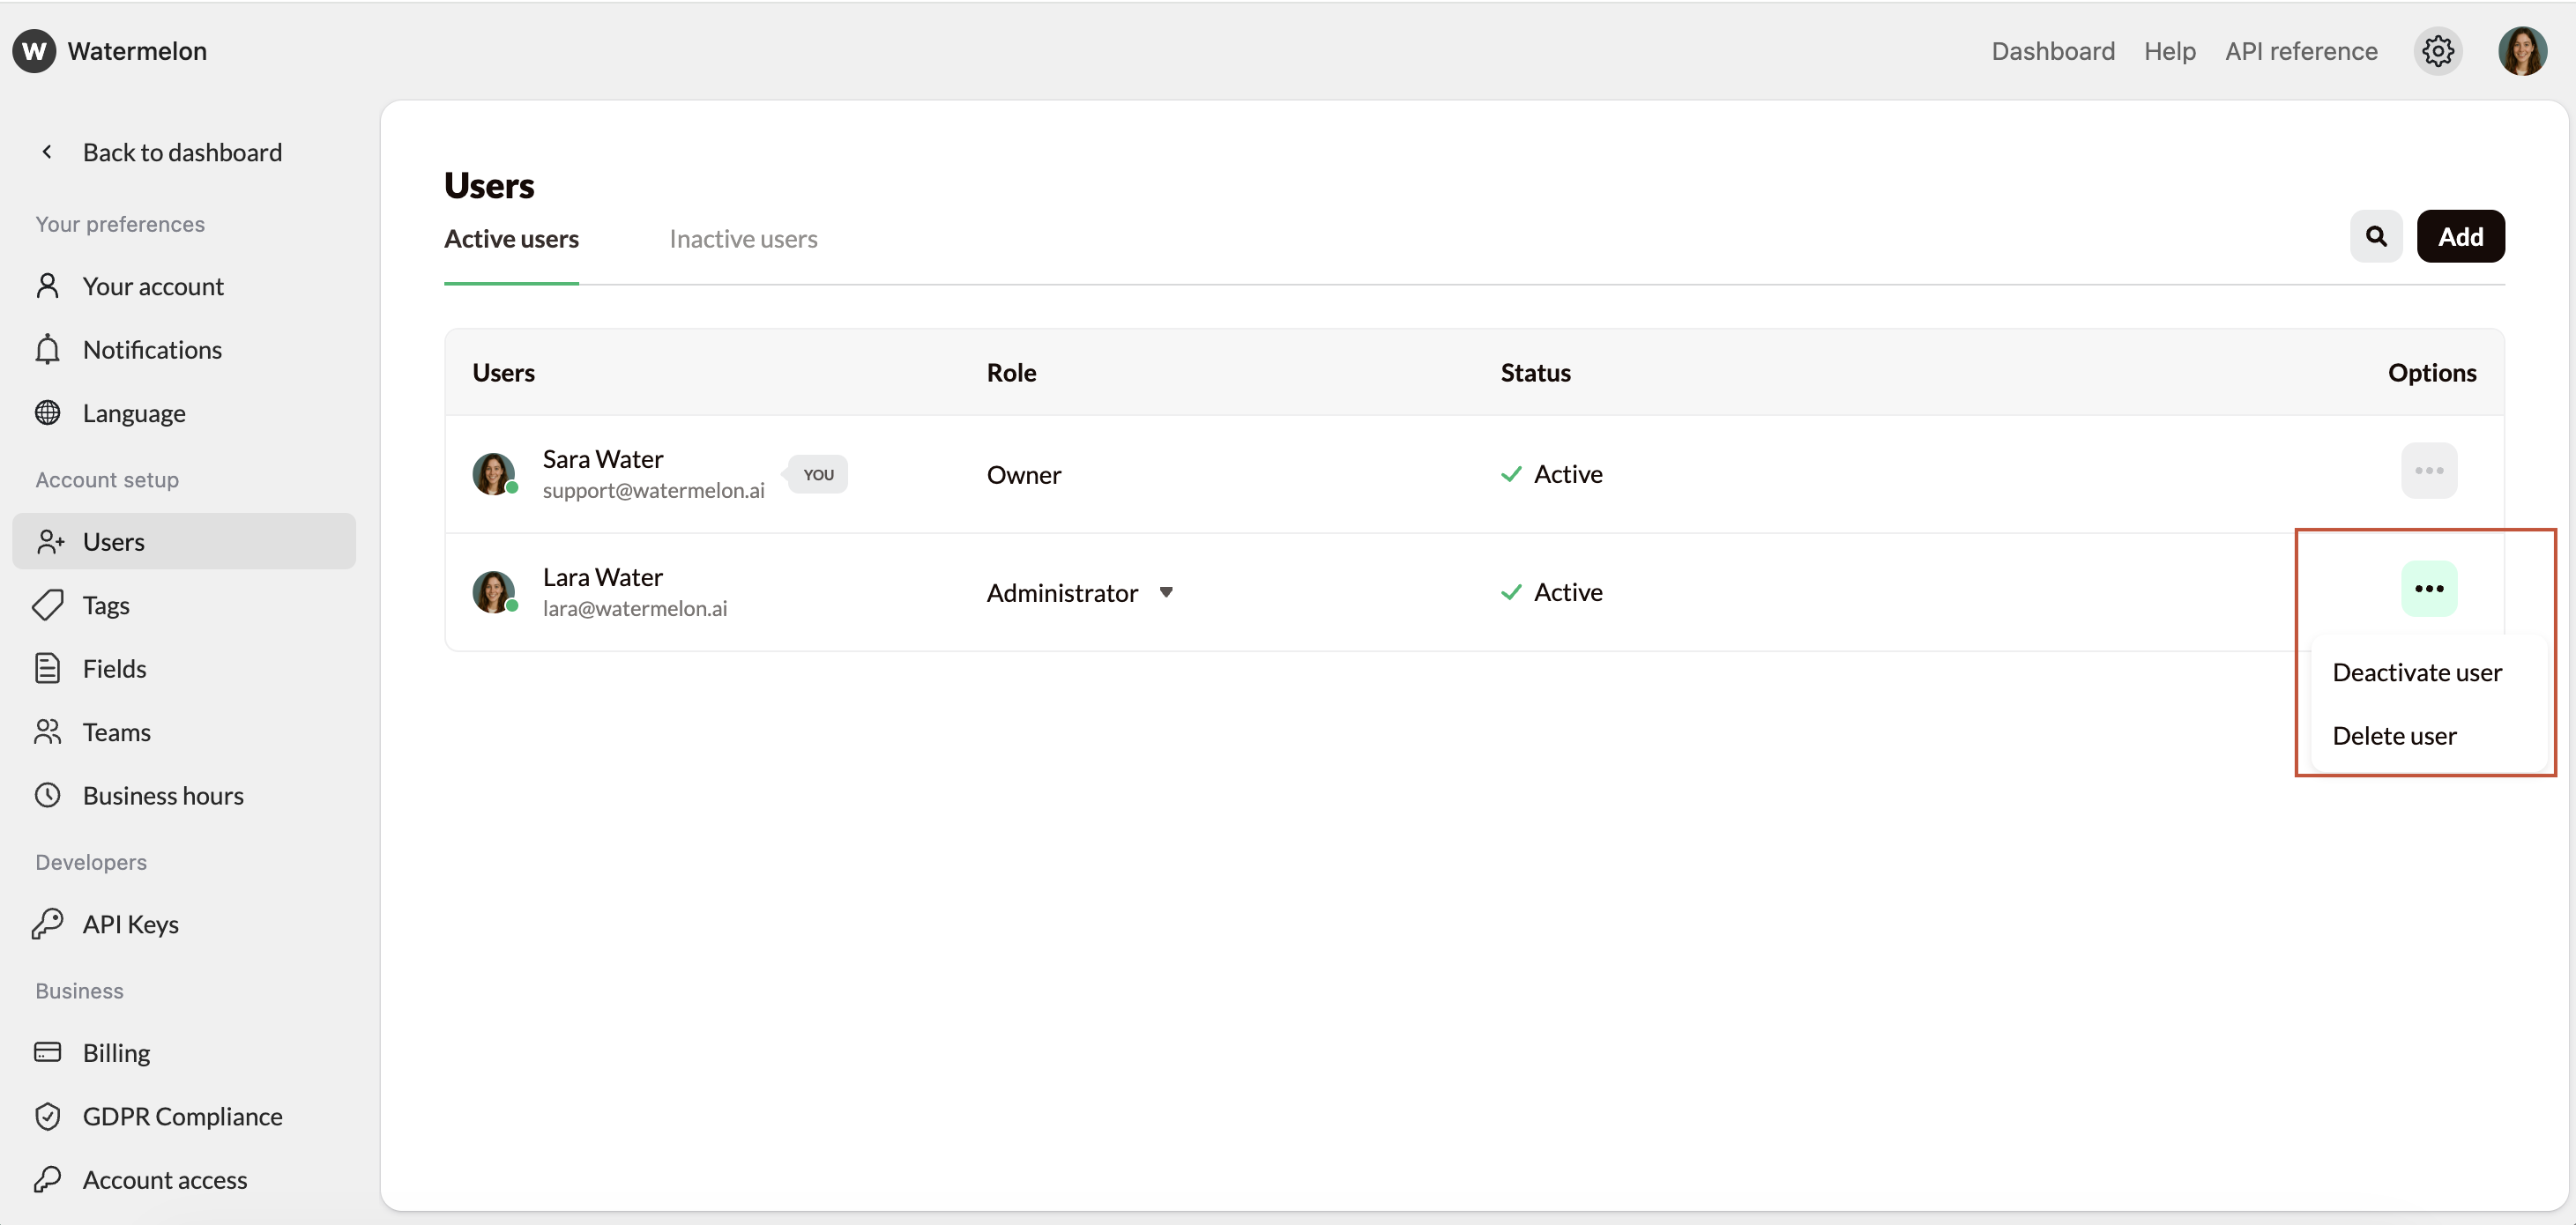
 ## Deactivate or delete user
You can deactivate or delete a user by clicking the options button and selecting deactivate.
* **Delete user**: Choose **Delete** to **permanently remove all data** from this user.
* **Deactivate user:** Choose **Deactivate** to **block access but keep all data** from a user.
## Deactivate or delete user
You can deactivate or delete a user by clicking the options button and selecting deactivate.
* **Delete user**: Choose **Delete** to **permanently remove all data** from this user.
* **Deactivate user:** Choose **Deactivate** to **block access but keep all data** from a user.
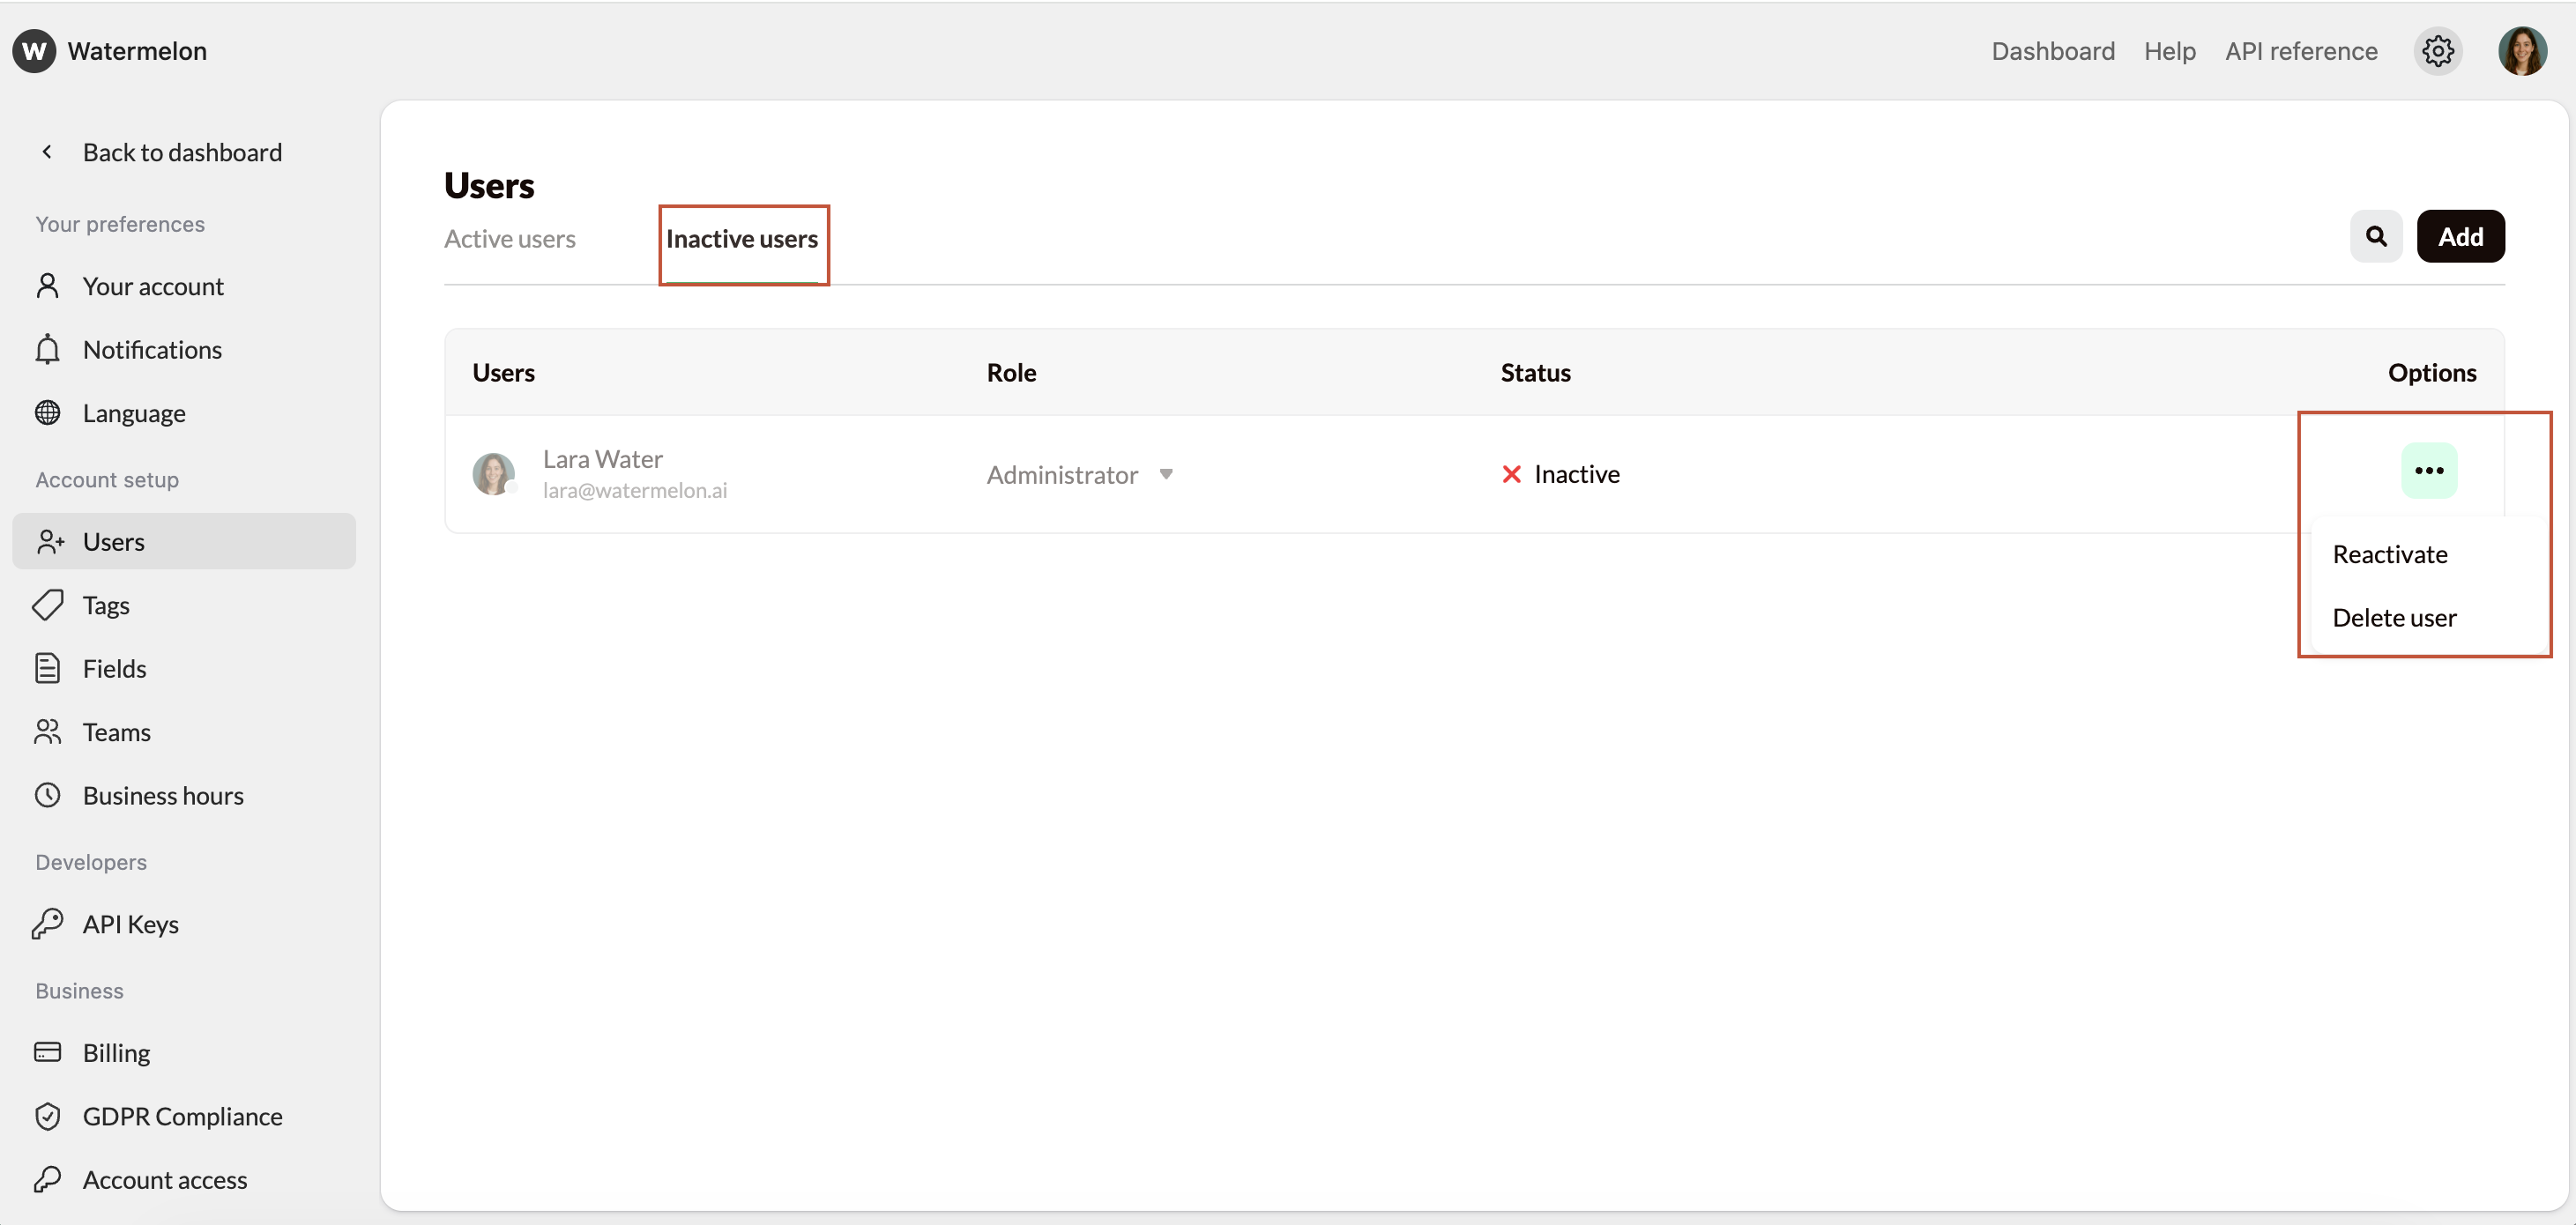
 ## Reactivate user
Deactivated users can be found in the **Inactive** **users** tab. Click the options button to **reactivate** the user.
## Reactivate user
Deactivated users can be found in the **Inactive** **users** tab. Click the options button to **reactivate** the user.
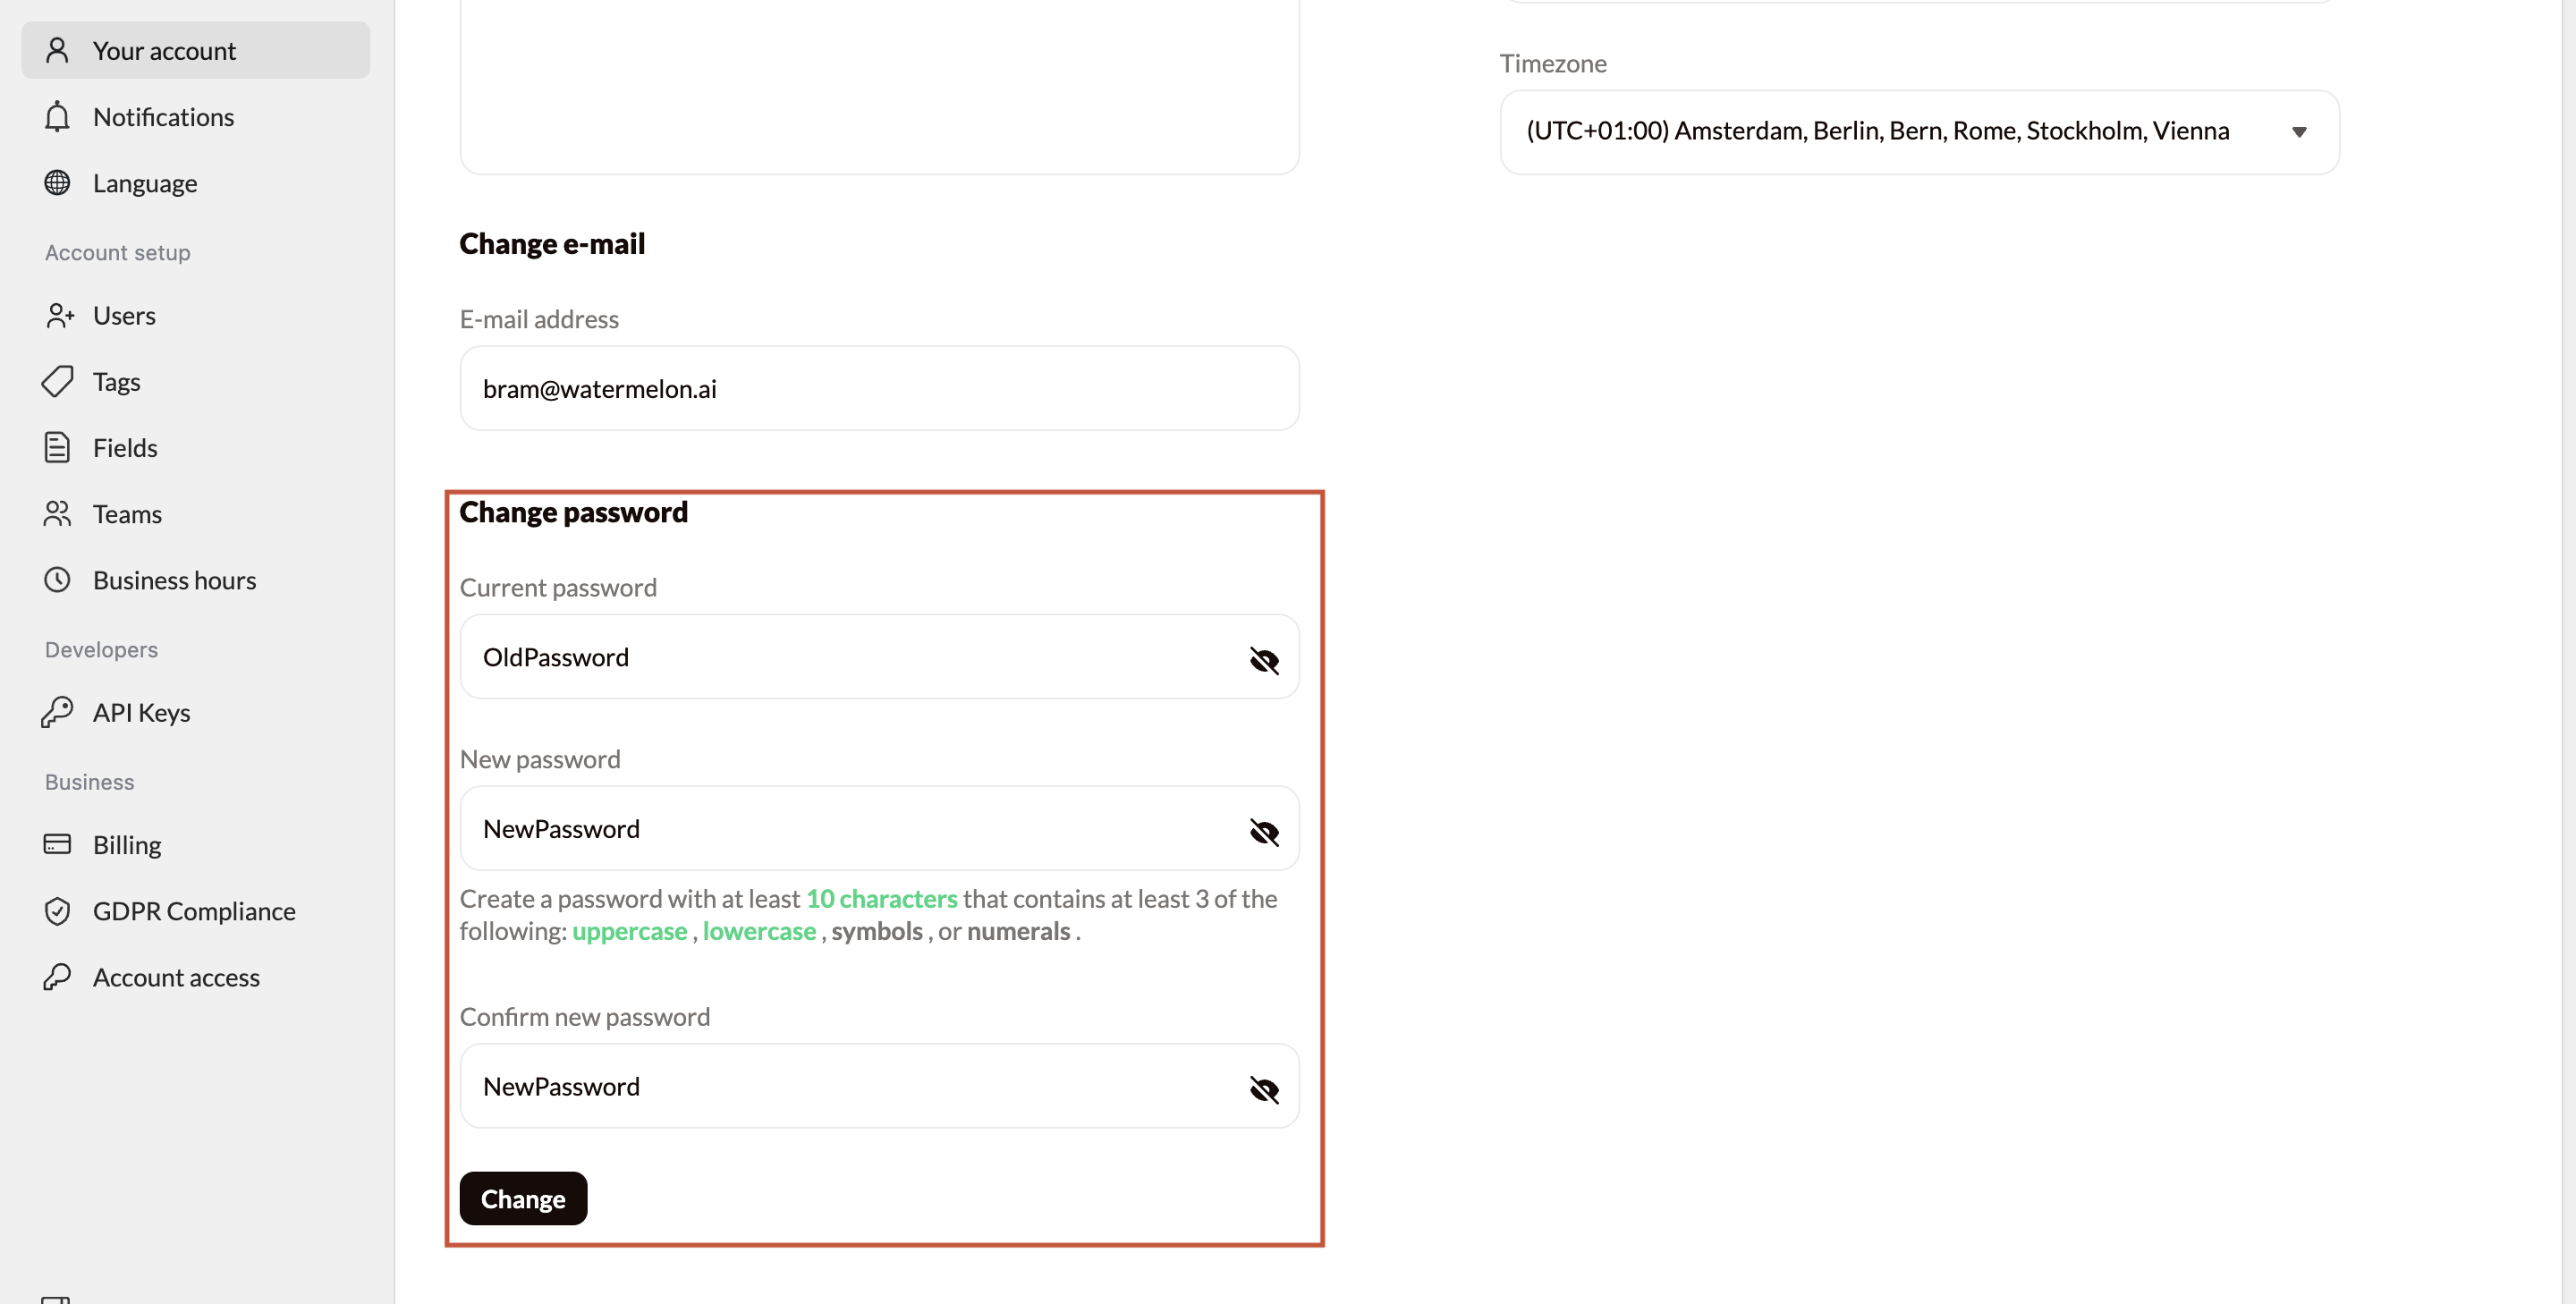
 ## Change owner
If you want to transfer ownership to another person, you’ll need to follow the steps below.
Update the password of the current Owner account and share this password securely with the new Owner.
## Change owner
If you want to transfer ownership to another person, you’ll need to follow the steps below.
Update the password of the current Owner account and share this password securely with the new Owner.
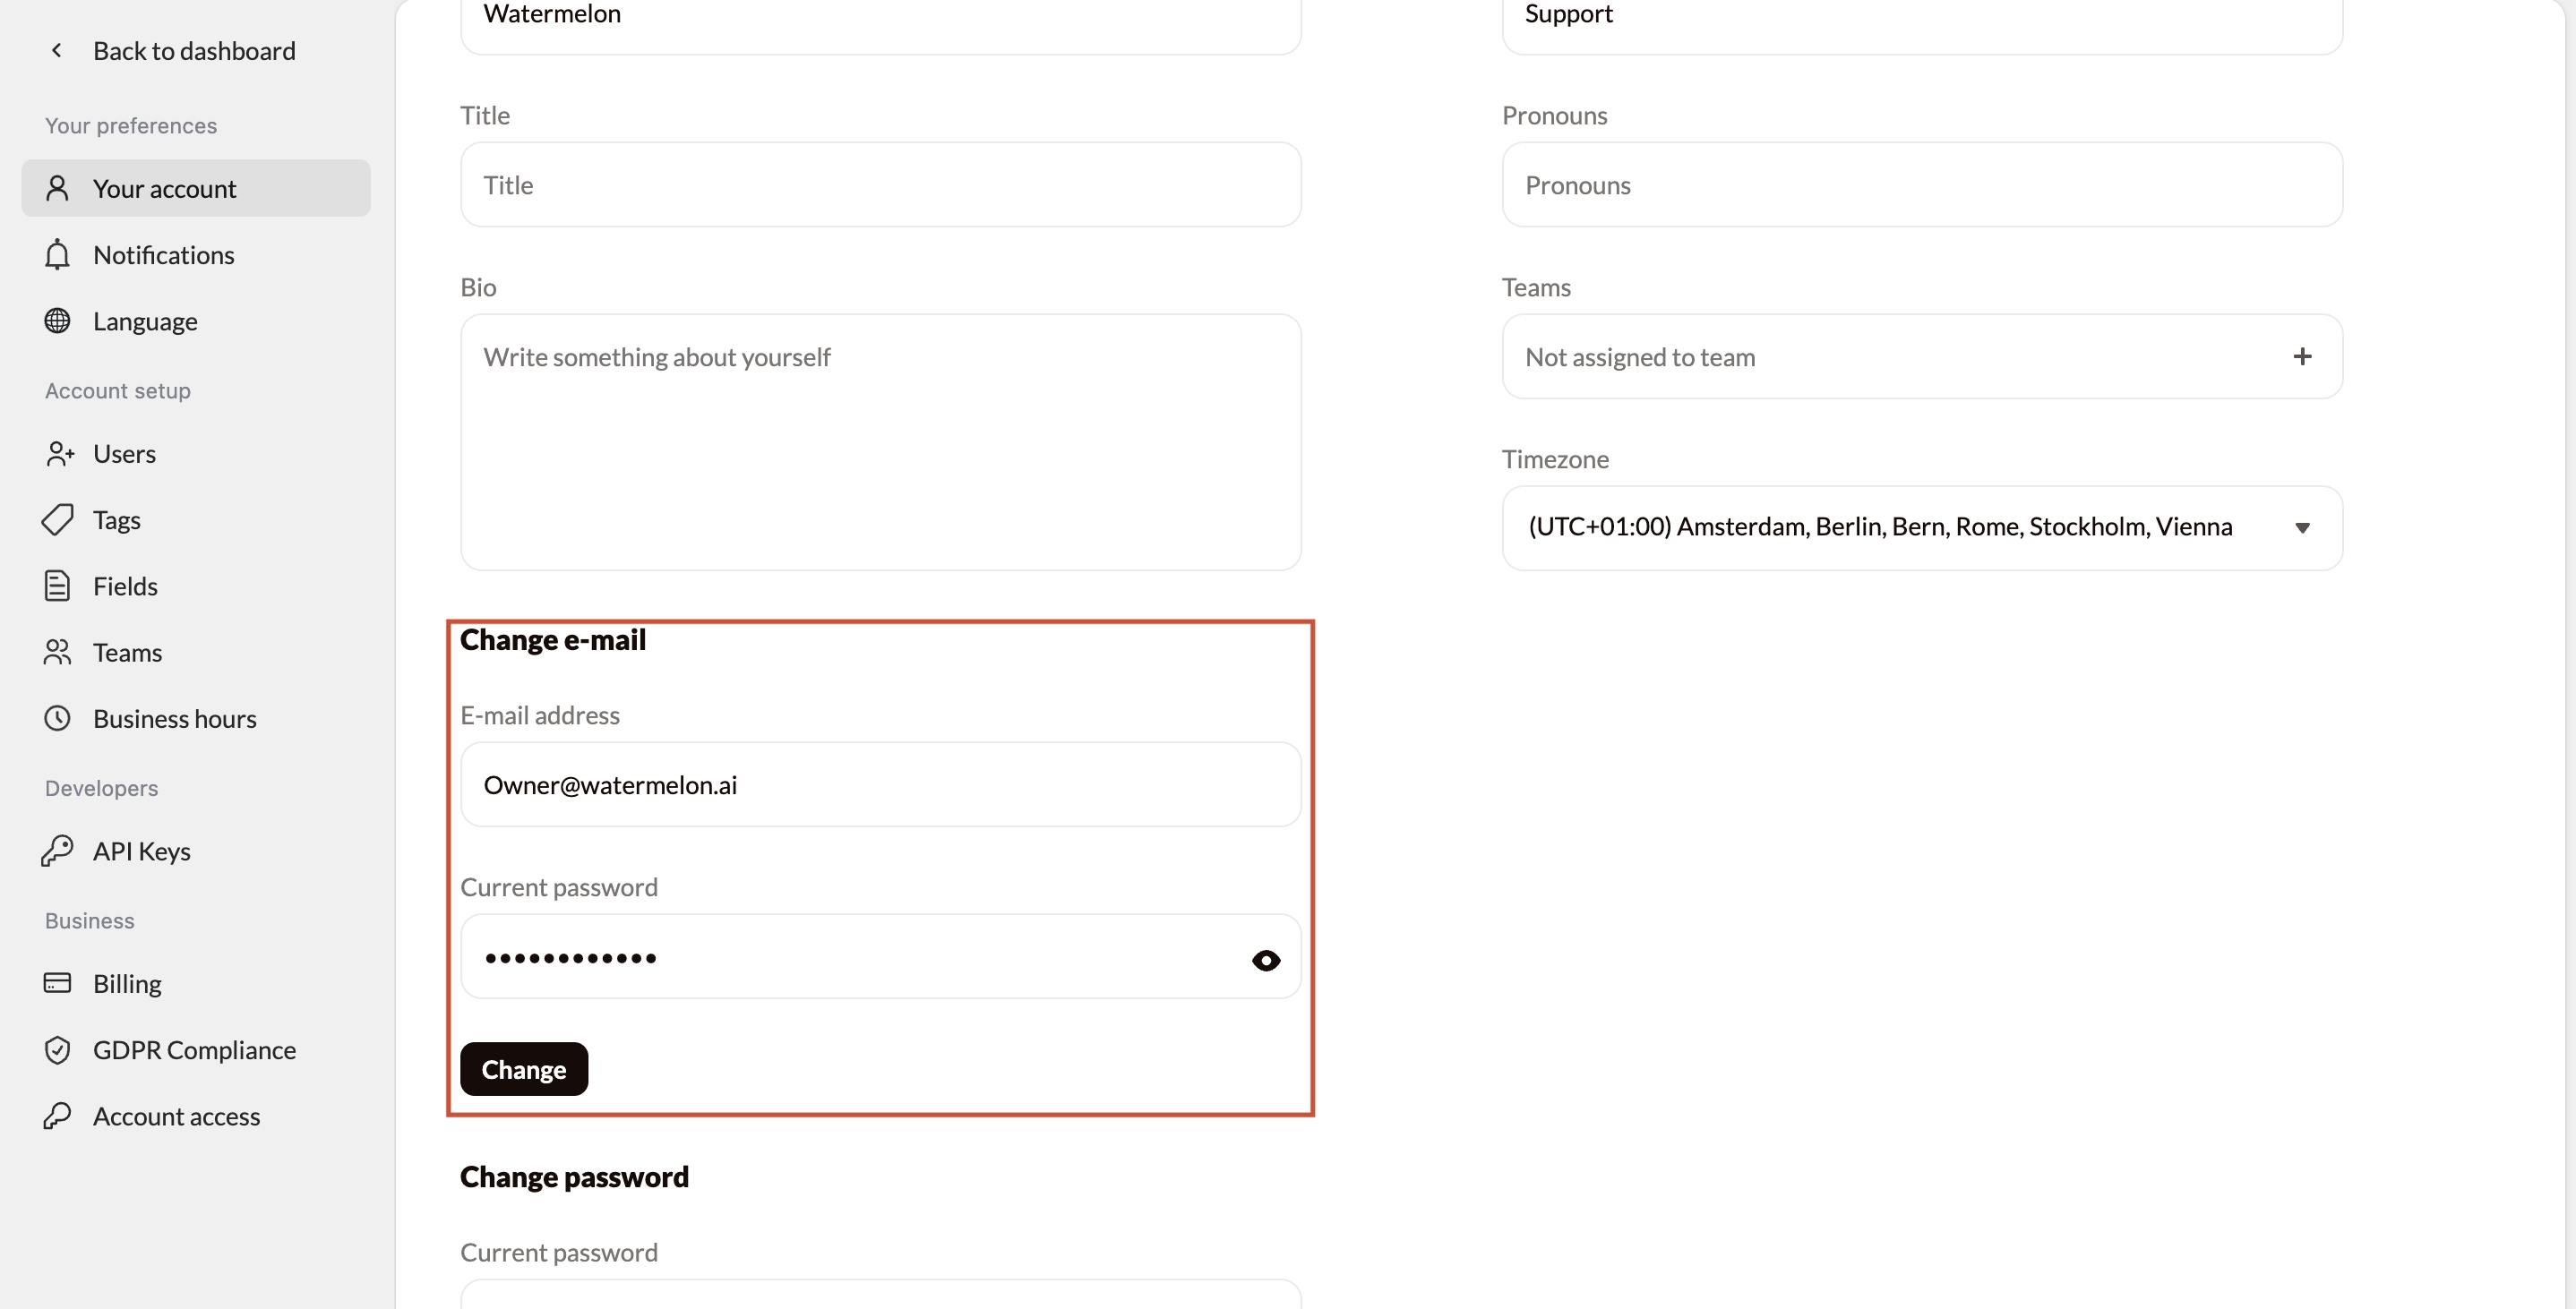
 Change the email address of the Owner account to the email address of the new Owner.
 If the new Owner’s email address is **already registered as a user in Watermelon**, you can still complete the handover:
* Add `+1` to the username part of the email address (before the `@`)
**Example:**\
`alex@company.com` → `alex+1@company.com`
This ensures the ownership transfer works smoothly without email conflicts.
If the new Owner’s email address is **already registered as a user in Watermelon**, you can still complete the handover:
* Add `+1` to the username part of the email address (before the `@`)
**Example:**\
`alex@company.com` → `alex+1@company.com`
This ensures the ownership transfer works smoothly without email conflicts.