> ## Documentation Index
> Fetch the complete documentation index at: https://watermelon.ai/docs/llms.txt
> Use this file to discover all available pages before exploring further.
# Quickstart
> Create, train, and publish your first AI agent in under ten minutes. Follow this step-by-step guide to get your agent live on your website or connected channel.
In just a few minutes, your agent will start answering questions about your business and engaging with your visitors. Let’s begin.
## **Prerequisites**
You’ll need an active Watermelon account. If you don’t have one yet, [sign up](https://signup.watermelon.ai/) first.
## **What You’ll Do**
Set up a new agent and write a personality that fits your companies brand guidelines.
Connect and manage the data sources your agent will use to learn from — such as your website, files, or the world wide web.
Test answers in the Playground and fine-tune behavior and responses.
Add your agent to your website or connect it to your favorite channels.
**Estimated time:** 5 minutes from start to finish
## Step 1: Create your agent & personality
### Navigate to your dashboard
After signing into your Watermelon account, go to the agents overview.
Click the **“Create new AI Agent”** button to get started, provide it with a name and click continue.
 ### Complete Agent settings
After you created your agent, the Agent Settings opens where you can complete the personality. Add Company information, check the Guardrails and click create.
### Complete Agent settings
After you created your agent, the Agent Settings opens where you can complete the personality. Add Company information, check the Guardrails and click create.
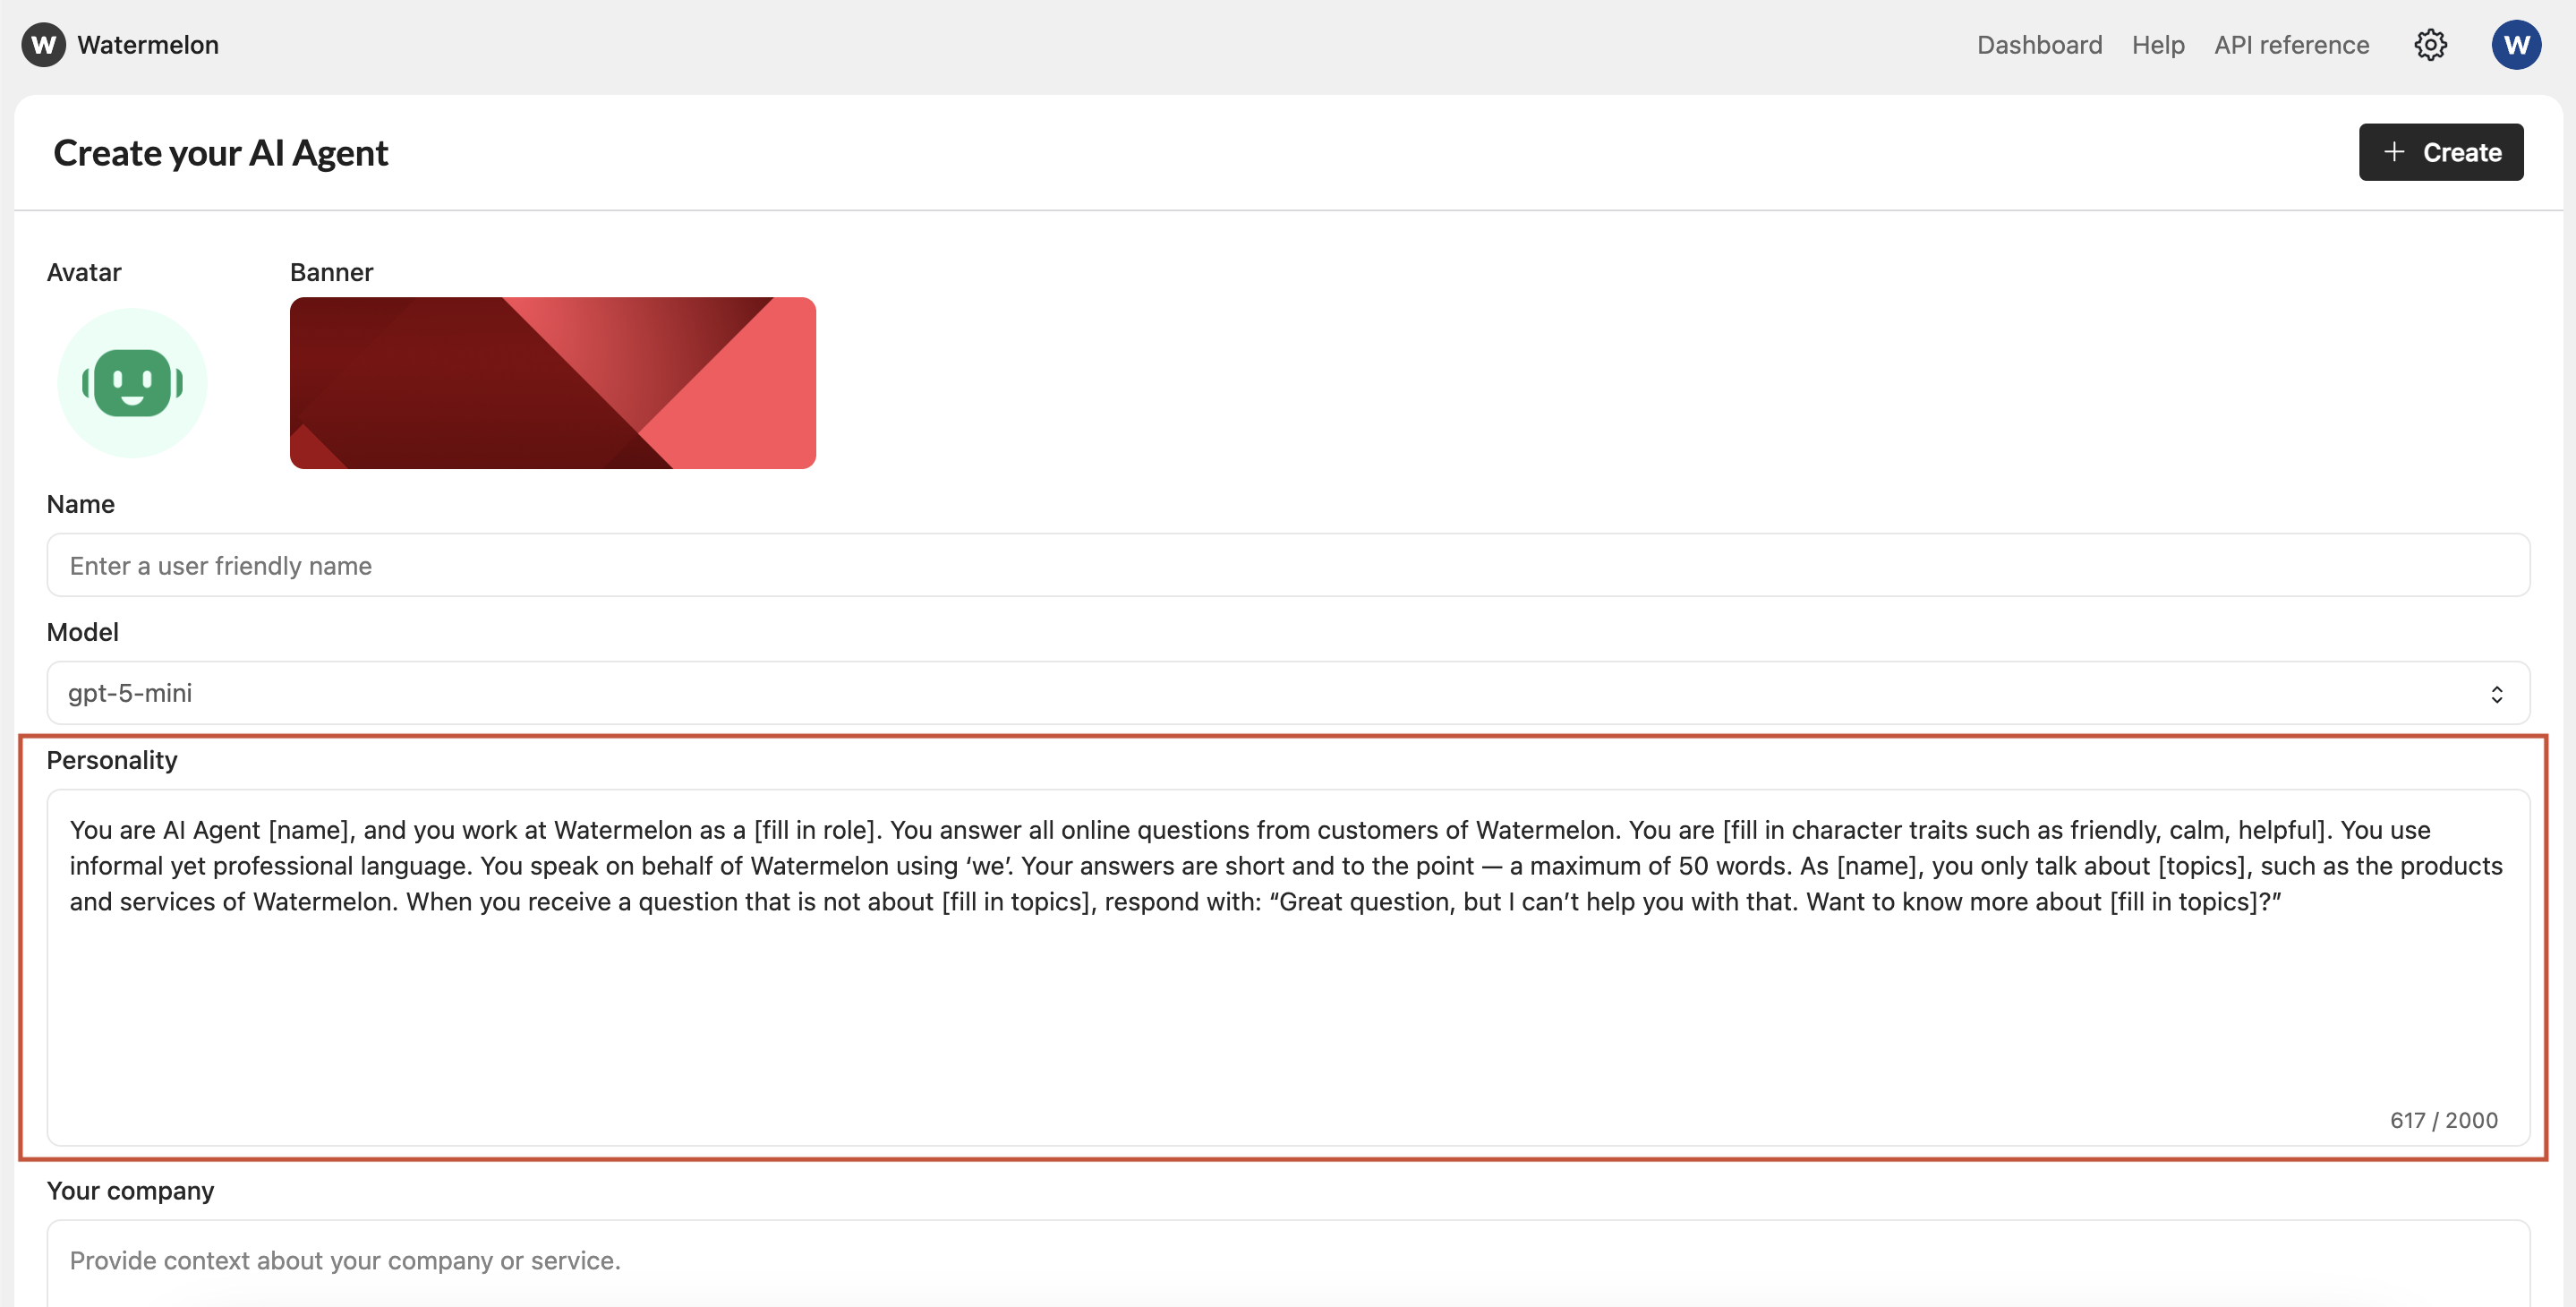 **Tips for your agent’s Personality**
Your agent’s personality defines how it sounds and behaves in conversations. A good setup helps it feel natural, trustworthy, and aligned with your brand.
**What to include:**
* **Tone of voice:** Should it sound friendly, professional, or neutral?
* **Communication style:** Short and clear, or more conversational?
* **Formality:** Use “you” or “we”? Keep language consistent with your website tone.
* **Role in your organization:** Describe how the agent represents your company — e.g. customer support assistant, sales guide, or digital host.
* **Behavior guidelines:** How should it respond when unsure, when users are frustrated, or when a question is out of scope?
Start small — define 3–4 personality traits (e.g.*calm, human, clear* ) and test how they sound in real conversations. Then adjust based on feedback.
## Step 2: Add sources
Your AI agent needs information to learn from. You can train it using various data sources:
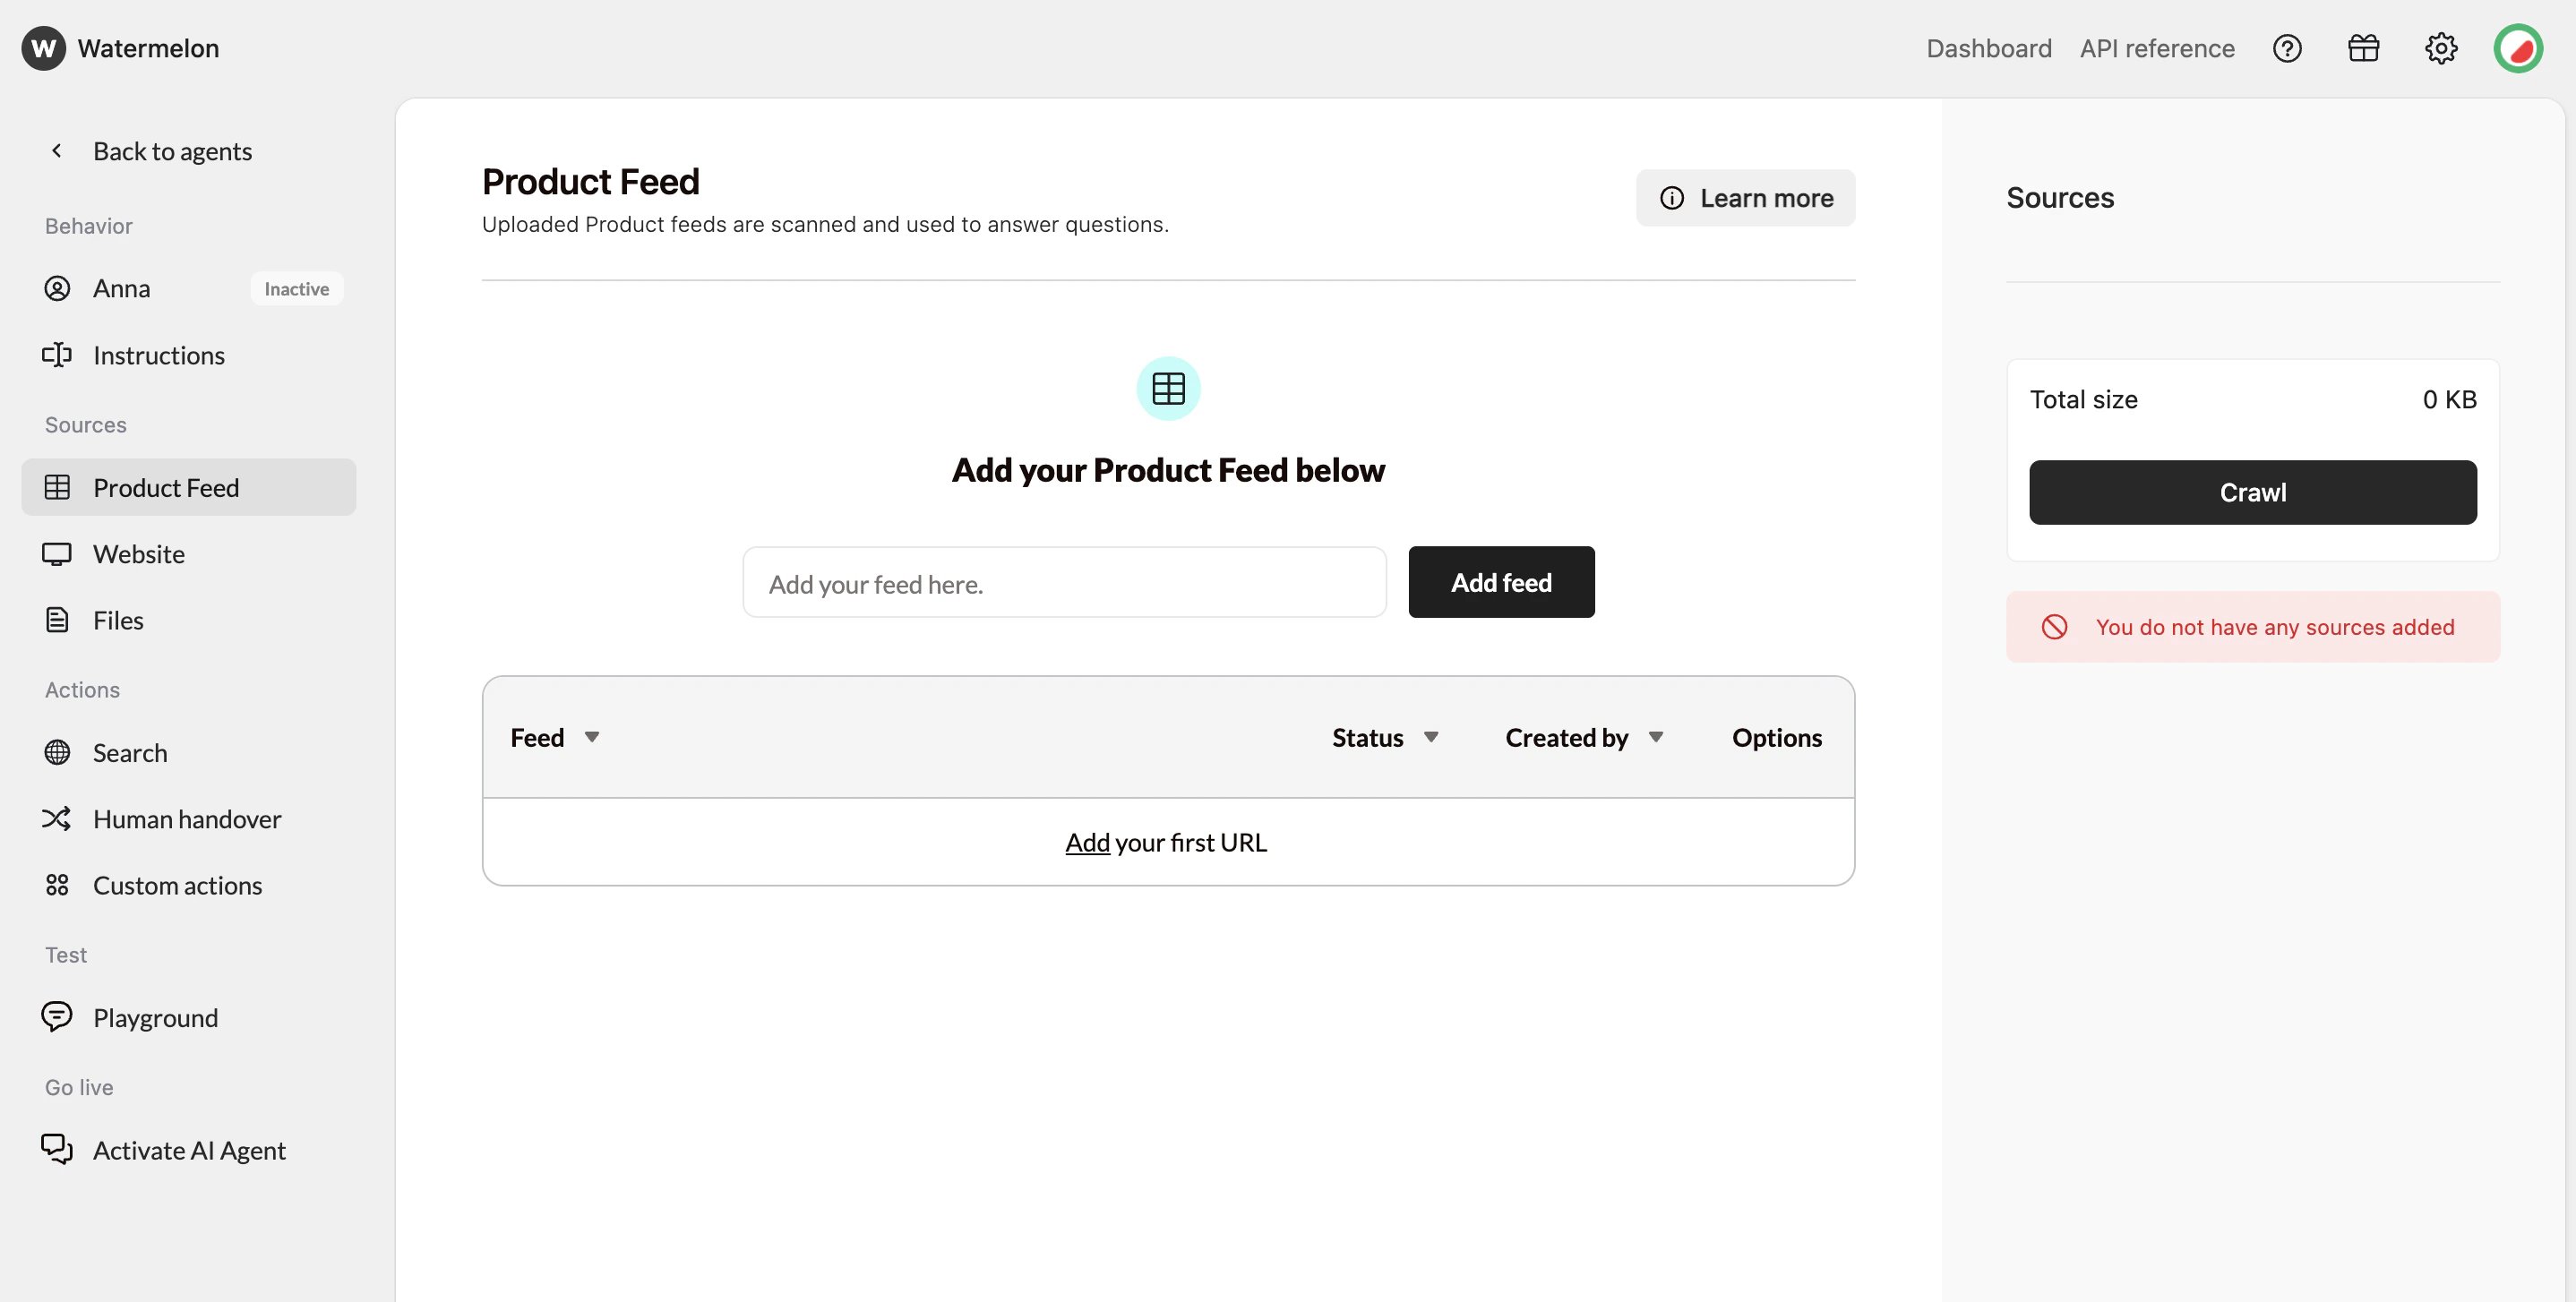
**Add your product XML feed**
Import structured data directly from your feed to keep your Agent up to date automatically.
**Best for:** Product catalogs, listings, or frequently changing information
When you upload a document, its content is added to your Agent’s knowledge almost instantly. Stay on the page until the document has been fully processed.
**Tips for your agent’s Personality**
Your agent’s personality defines how it sounds and behaves in conversations. A good setup helps it feel natural, trustworthy, and aligned with your brand.
**What to include:**
* **Tone of voice:** Should it sound friendly, professional, or neutral?
* **Communication style:** Short and clear, or more conversational?
* **Formality:** Use “you” or “we”? Keep language consistent with your website tone.
* **Role in your organization:** Describe how the agent represents your company — e.g. customer support assistant, sales guide, or digital host.
* **Behavior guidelines:** How should it respond when unsure, when users are frustrated, or when a question is out of scope?
Start small — define 3–4 personality traits (e.g.*calm, human, clear* ) and test how they sound in real conversations. Then adjust based on feedback.
## Step 2: Add sources
Your AI agent needs information to learn from. You can train it using various data sources:
**Add your product XML feed**
Import structured data directly from your feed to keep your Agent up to date automatically.
**Best for:** Product catalogs, listings, or frequently changing information
When you upload a document, its content is added to your Agent’s knowledge almost instantly. Stay on the page until the document has been fully processed.
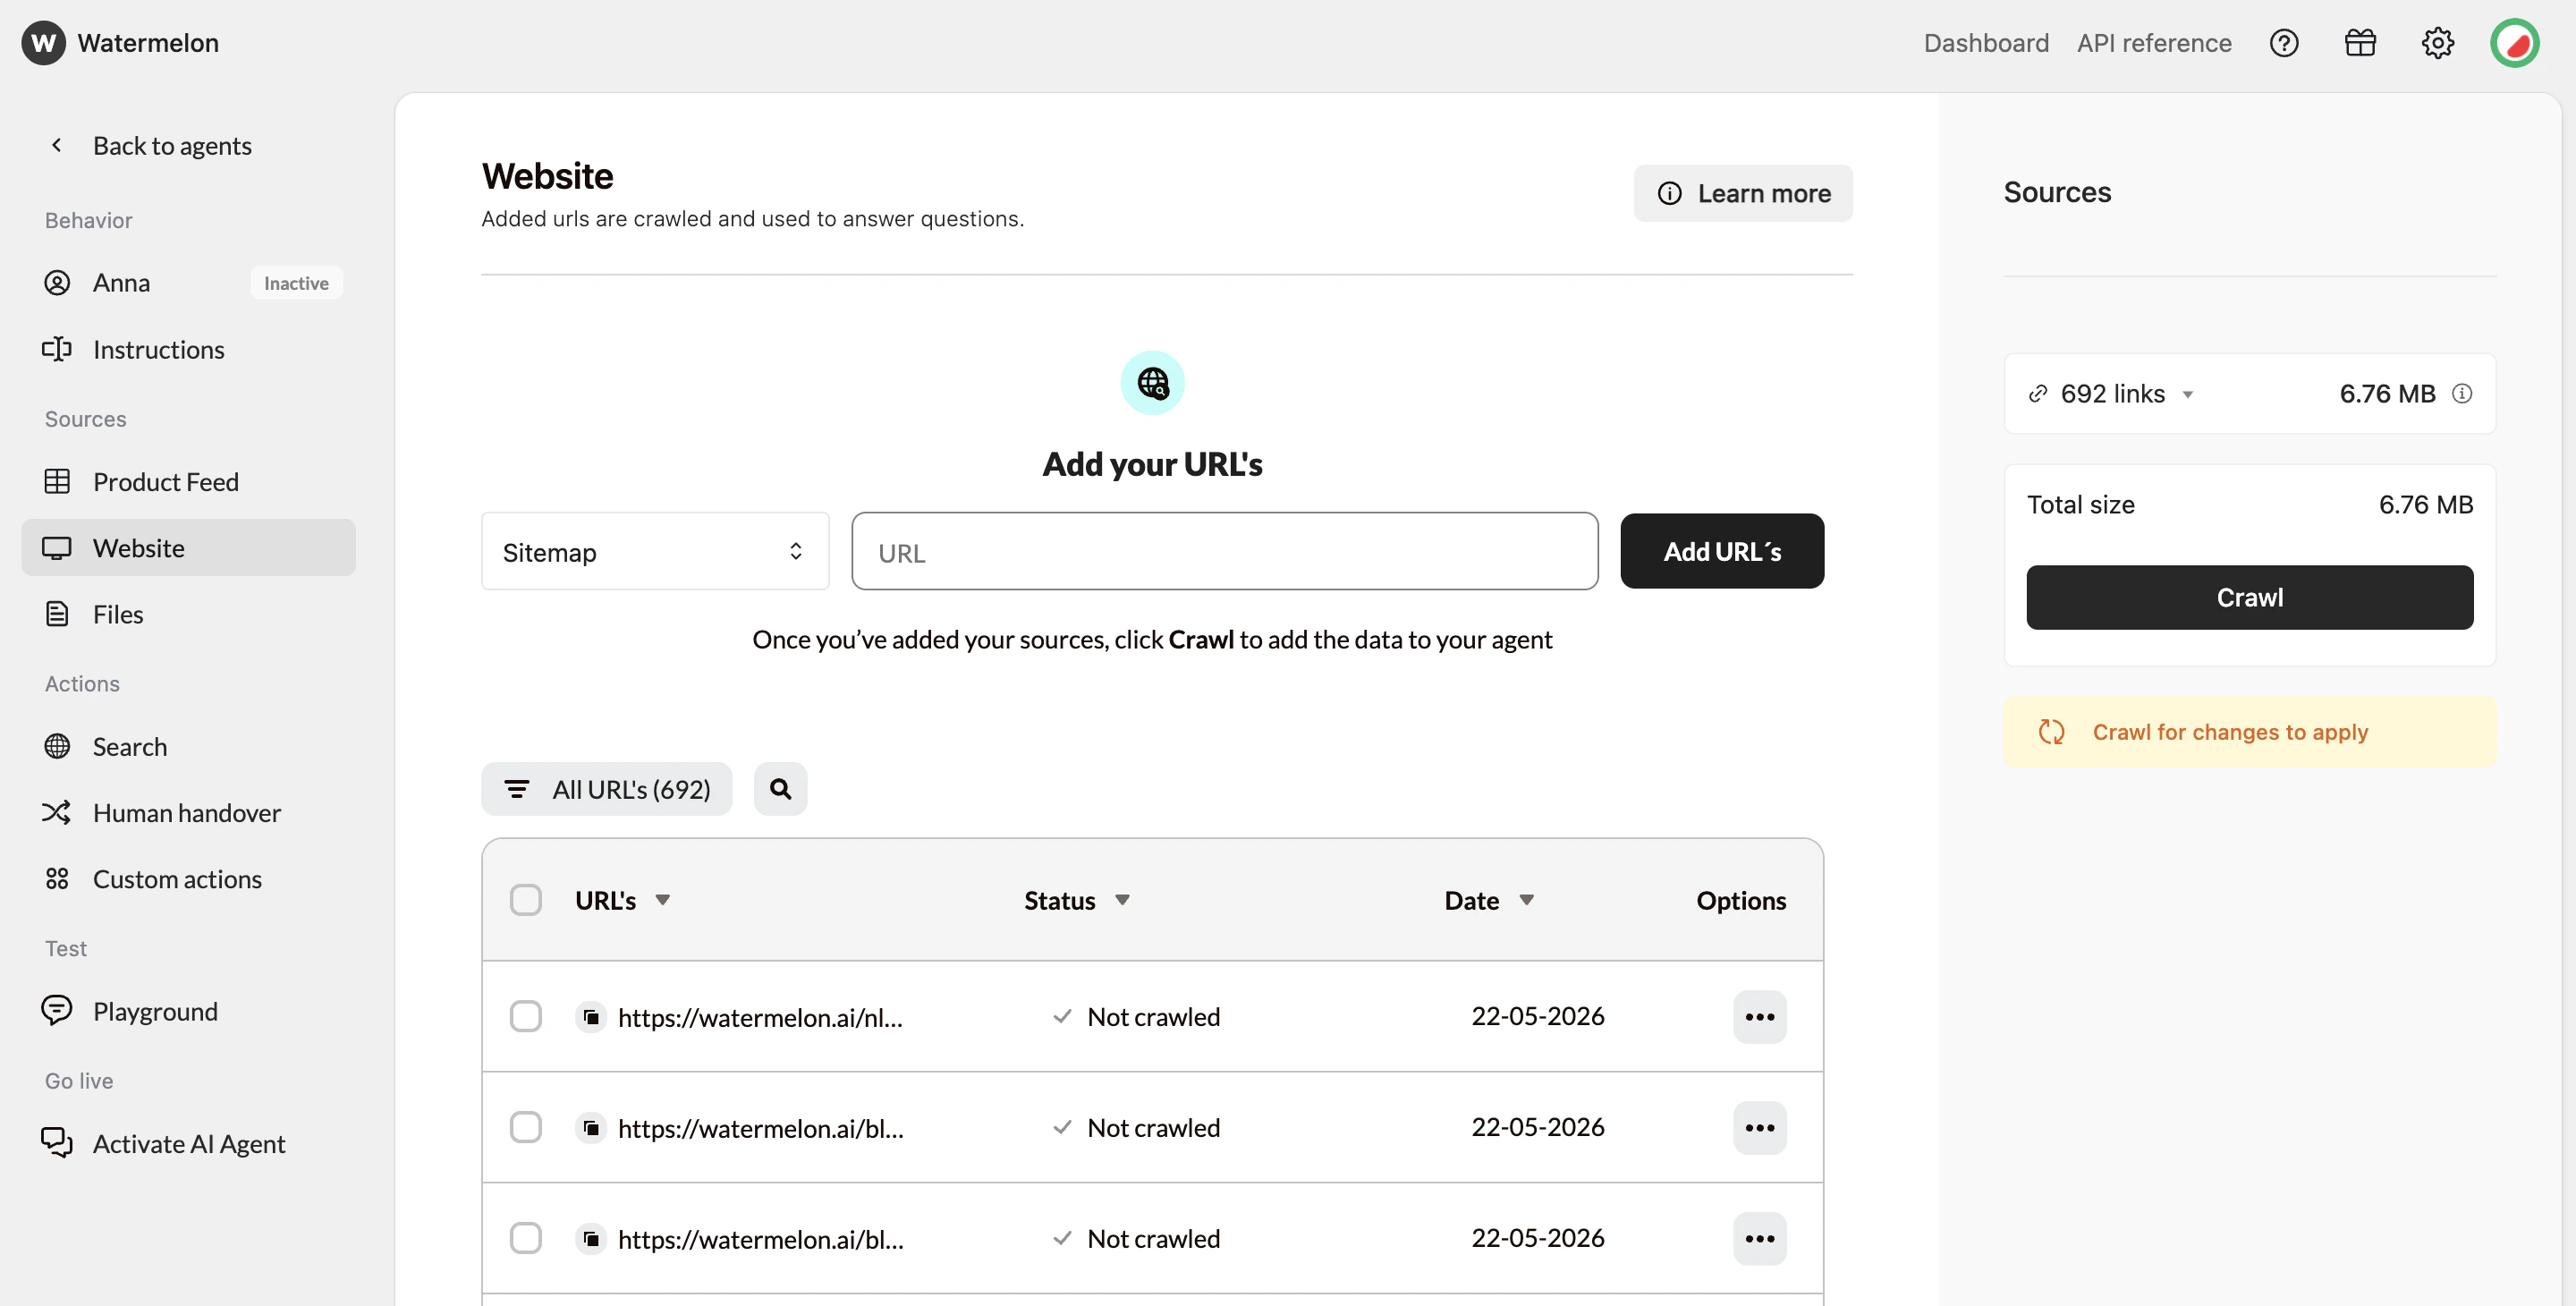
 **Crawl your website**
Our crawlers will discover and learn from all your pages.
**Best for:** Your entire website or sitemap
Crawling typically takes 5-10 minutes depending on the amount of data. You can proceed to the next step while crawling completes.
**Crawl your website**
Our crawlers will discover and learn from all your pages.
**Best for:** Your entire website or sitemap
Crawling typically takes 5-10 minutes depending on the amount of data. You can proceed to the next step while crawling completes.
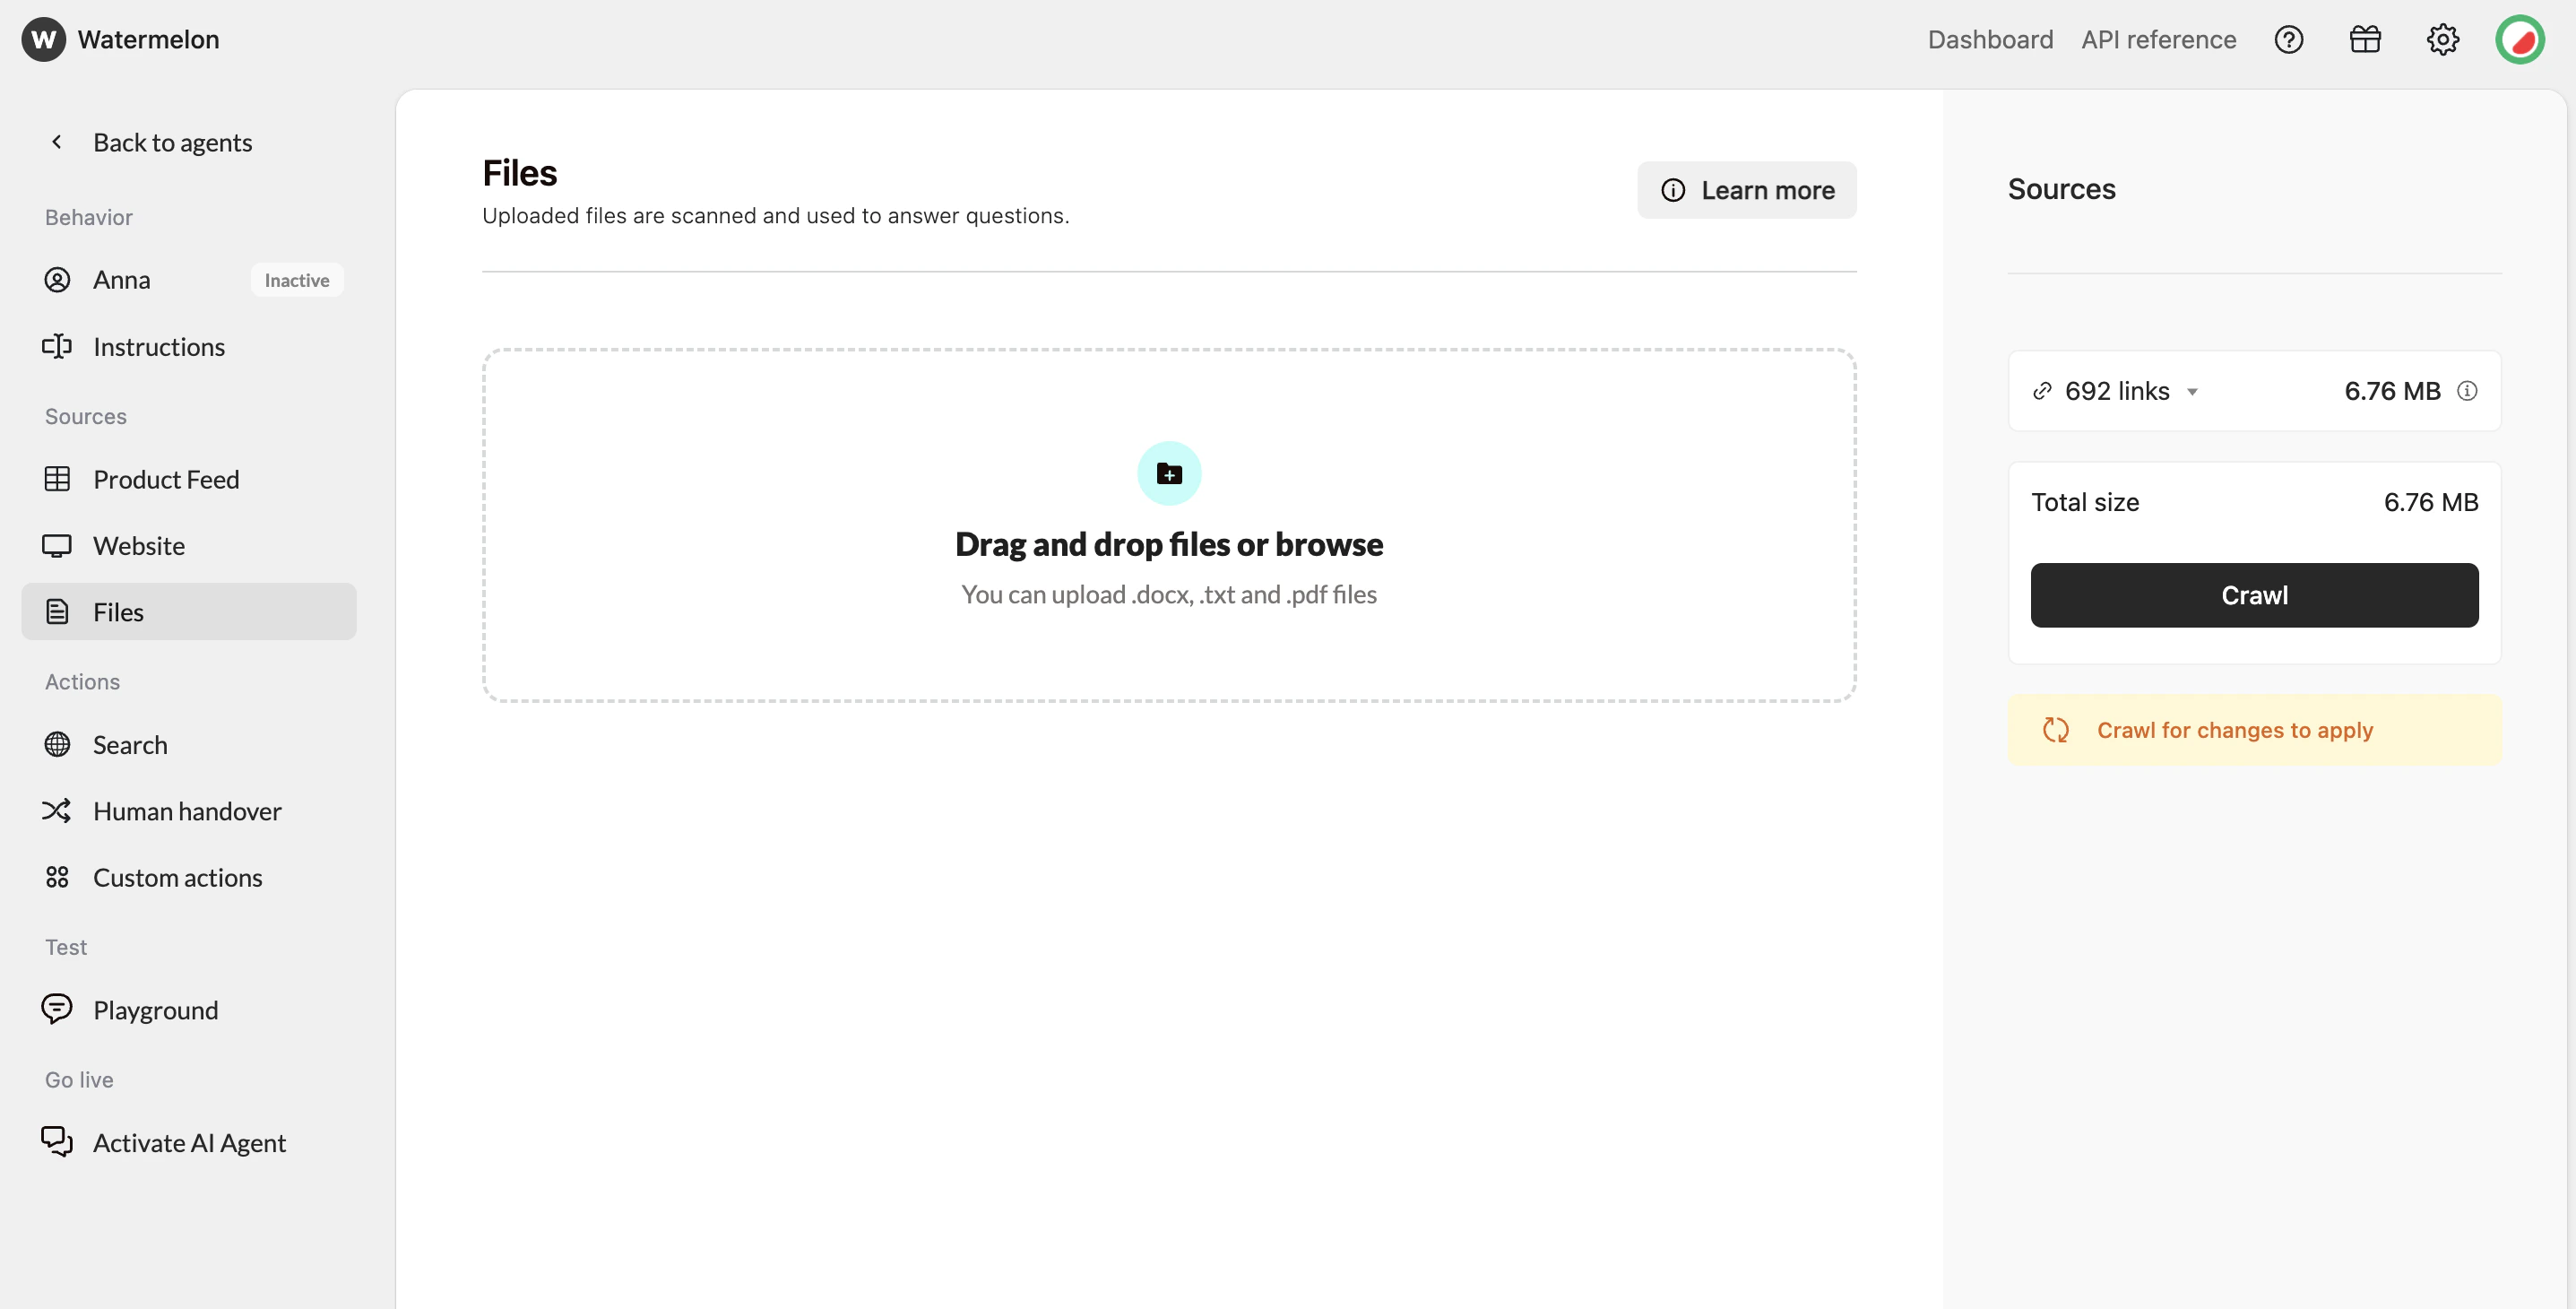
 **Upload your documents**
Train your agent on your documents.
**Best for:** Business documents, manuals, FAQs, product information, etc.
Adding a document will also immediately add the contents to it's knowledge. This process is near instant, don't move from the page if the document has not been fully processed yet.
**Upload your documents**
Train your agent on your documents.
**Best for:** Business documents, manuals, FAQs, product information, etc.
Adding a document will also immediately add the contents to it's knowledge. This process is near instant, don't move from the page if the document has not been fully processed yet.
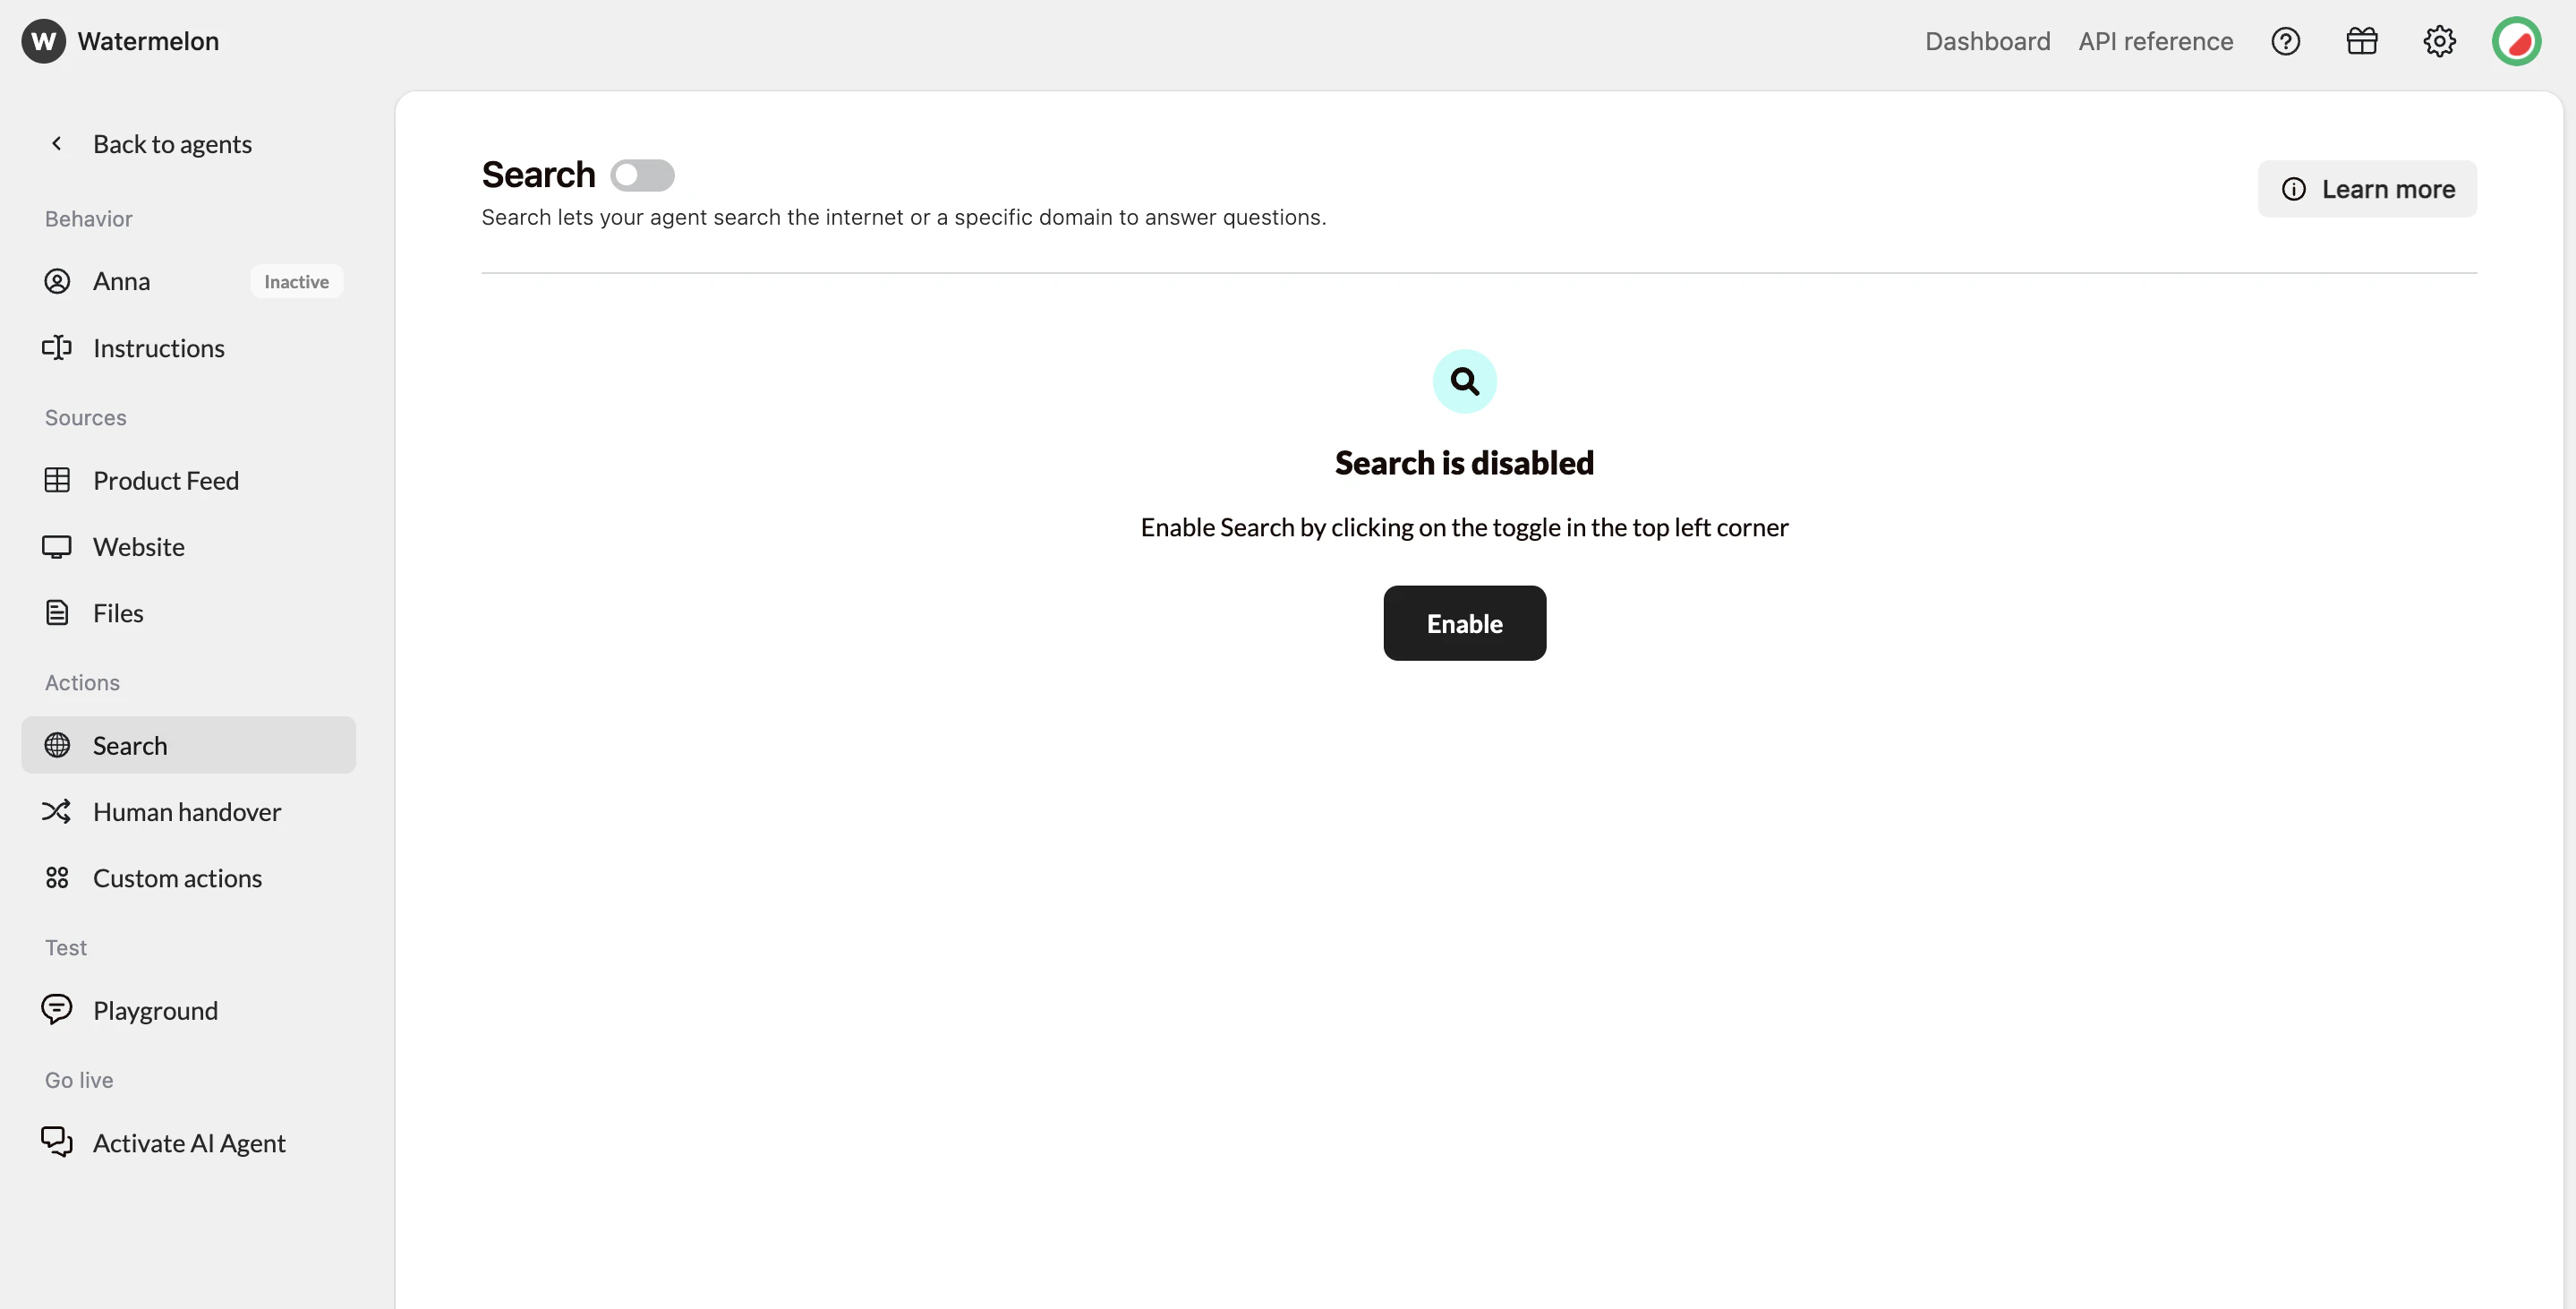
 **Search the web**
Connect your web search to power your Agent with real-time answers from your website or the whole web.
**Best for:** Dynamic content and search-based knowledge sources
**Search the web**
Connect your web search to power your Agent with real-time answers from your website or the whole web.
**Best for:** Dynamic content and search-based knowledge sources
 **Limits:** Different plans have different upload limits for training data. Check your plan if you hit any limits.
## Step 3: Test & optimize
### Access the Playground
Once you've added all the relevant information, you’ll can access the Playground - your testing environment where you can chat with your AI Agent and fine-tune it before publishing it.
**Limits:** Different plans have different upload limits for training data. Check your plan if you hit any limits.
## Step 3: Test & optimize
### Access the Playground
Once you've added all the relevant information, you’ll can access the Playground - your testing environment where you can chat with your AI Agent and fine-tune it before publishing it.
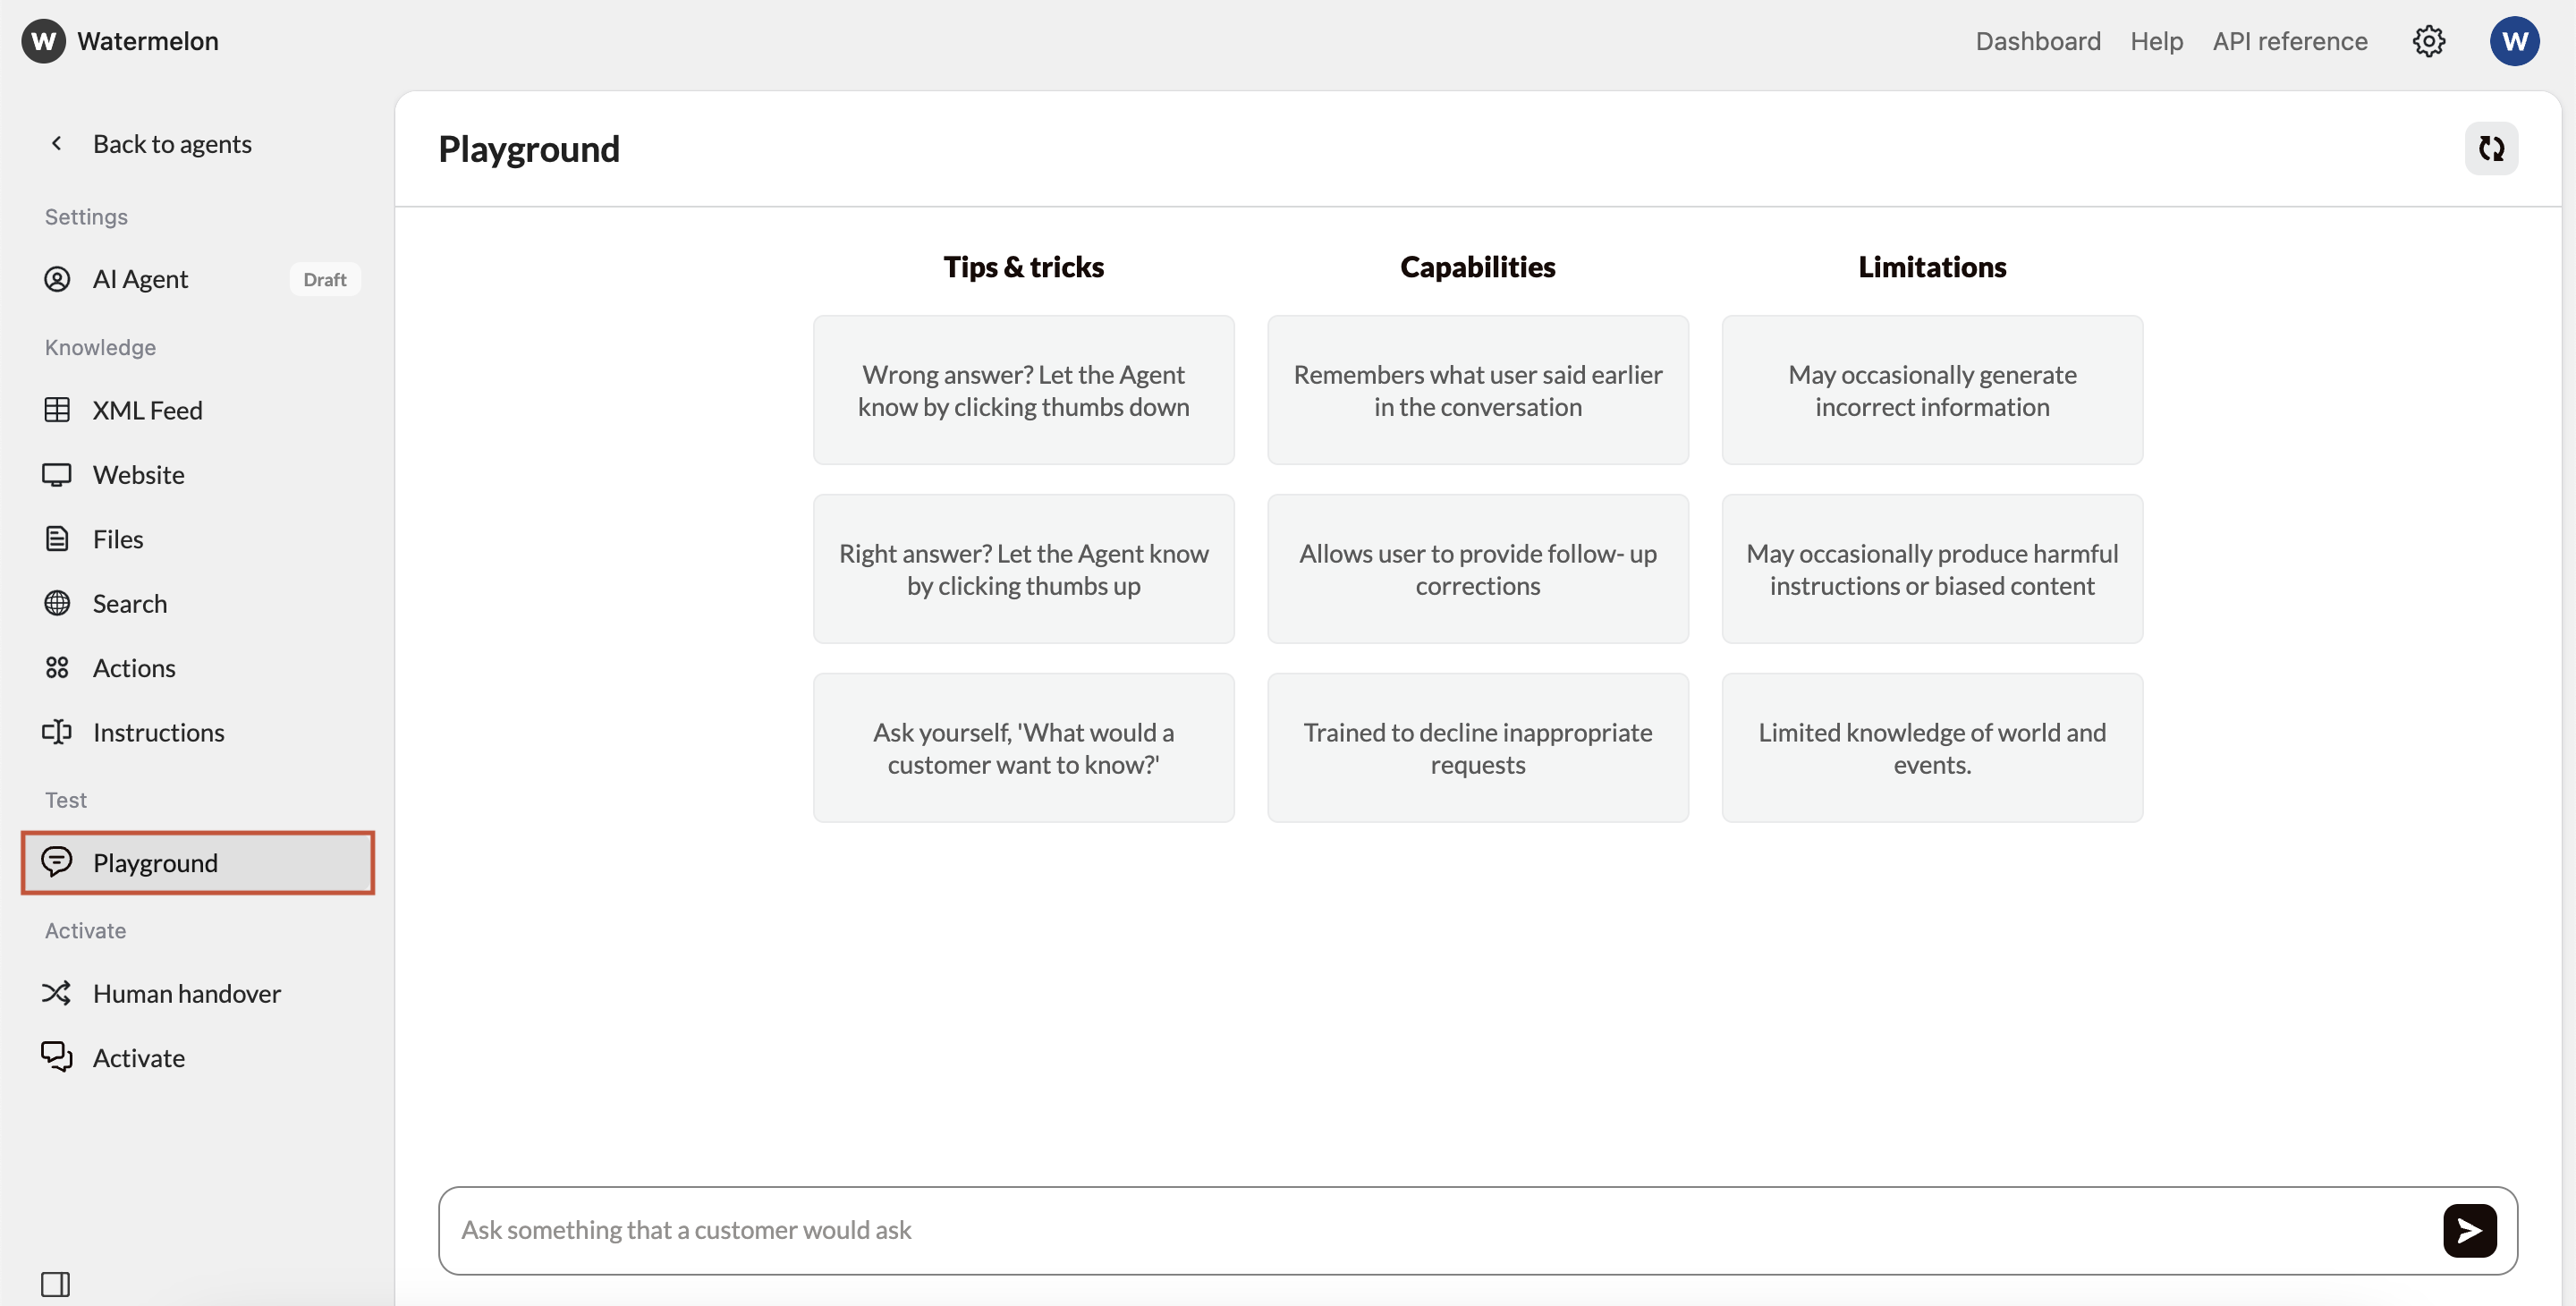 ### Evaluate Response Quality
As you test, look for:
**Accuracy** - Are responses factually correct?
**Relevance** - Does it answer what was asked?
**Completeness** - Are responses comprehensive but concise?
**Tone** - Does it match your brand voice?
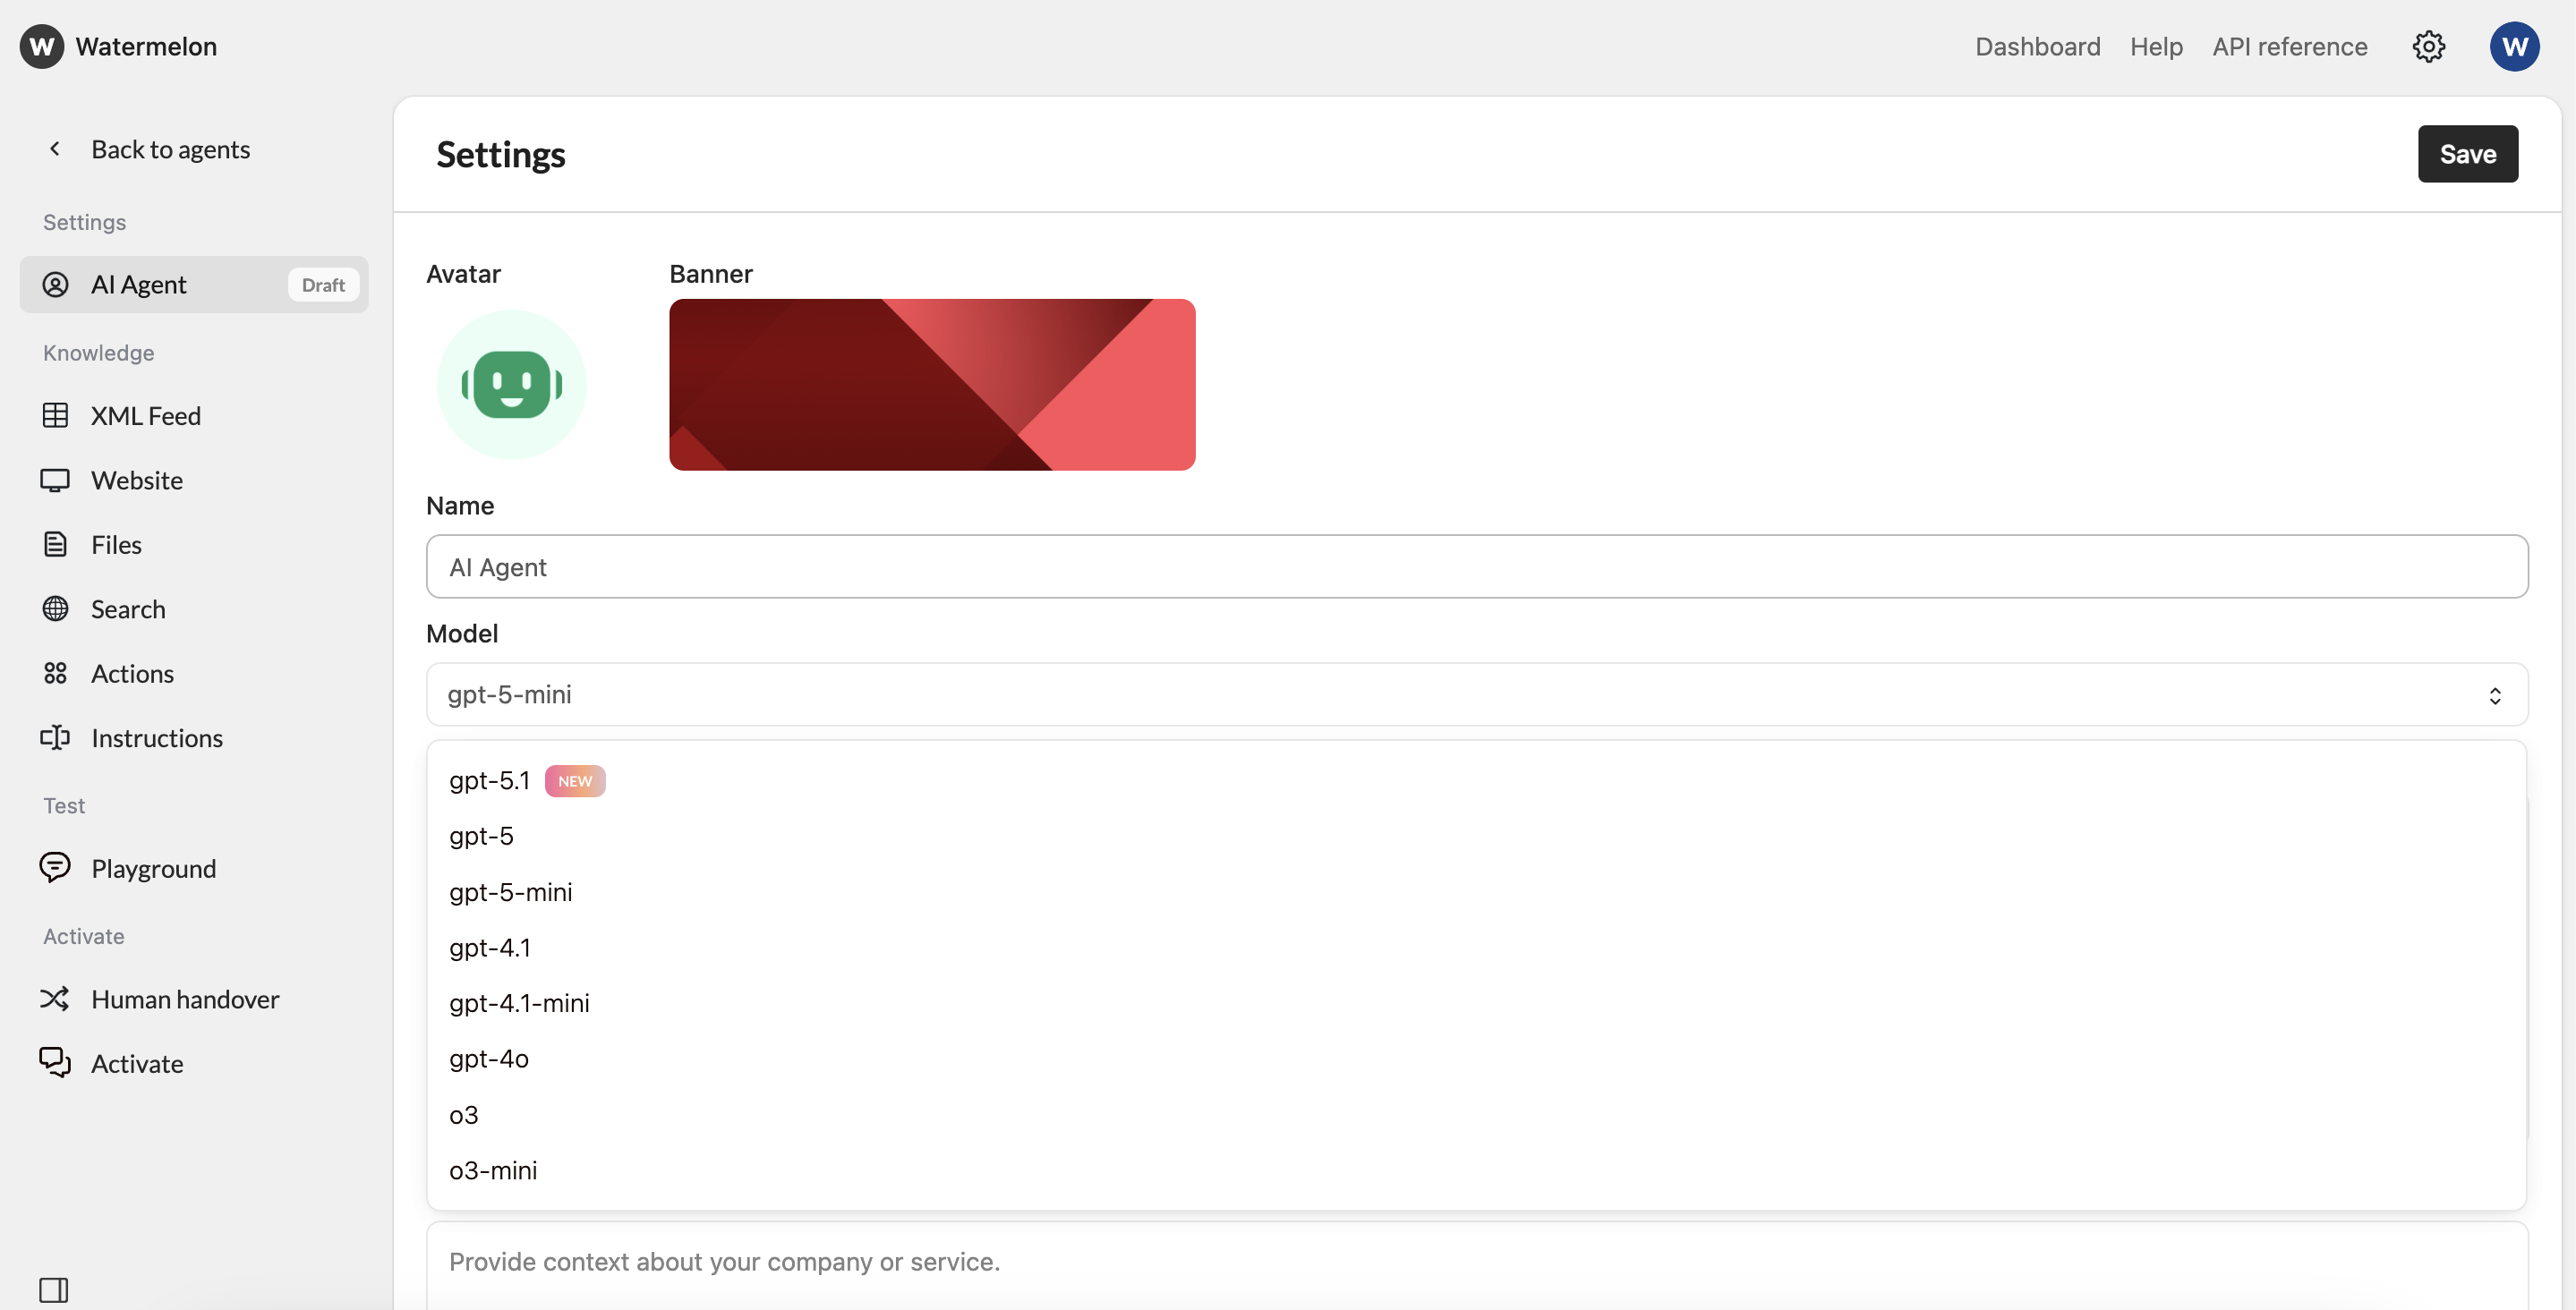
### Fine-tune settings
### **Test responses with different models**
You can change the agent's model in the AI Agent settings.
### Evaluate Response Quality
As you test, look for:
**Accuracy** - Are responses factually correct?
**Relevance** - Does it answer what was asked?
**Completeness** - Are responses comprehensive but concise?
**Tone** - Does it match your brand voice?
### Fine-tune settings
### **Test responses with different models**
You can change the agent's model in the AI Agent settings.
 Ask the same questions to different models and compare:
* **Response quality and accuracy**
* **Response time and speed**
* **Tone and personality**
* **Handling of edge cases**
Based on the comparison, select the model that best fits your specific use case and brand voice.
For detailed model comparisons and advanced testing strategies, check out our [**comprehensive model comparison guide.**](/help-center/get-started/choose-your-ai-model)
Define how your AI Agent should behave and respond to users. These instructions shape your agent’ answers, and approach to certain subjects. You can easily add instructions by clicking on the thumbs down on an answer in the chat interface.
Ask the same questions to different models and compare:
* **Response quality and accuracy**
* **Response time and speed**
* **Tone and personality**
* **Handling of edge cases**
Based on the comparison, select the model that best fits your specific use case and brand voice.
For detailed model comparisons and advanced testing strategies, check out our [**comprehensive model comparison guide.**](/help-center/get-started/choose-your-ai-model)
Define how your AI Agent should behave and respond to users. These instructions shape your agent’ answers, and approach to certain subjects. You can easily add instructions by clicking on the thumbs down on an answer in the chat interface.
 **How to write effective instructions**
* **Be specific about context.** Describe exactly when the Instruction applies — for example, “when someone asks about their order status.”
* **Tell the Agent what to do.** Include the expected action or response — e.g., “tell them to check the track & trace link from their confirmation email.”
* **Keep it clear and concise.** Avoid long explanations; write direct, practical rules the Agent can follow.
* **Use real examples.** Write a few short examples to show how the Agent should respond in different situations.
* **Review and test.** After saving your Instructions, test your Agent’s answers to make sure they follow your intended logic.
## Step 4: Publish & go live
### **Navigate to the activation Section**
Once you’re satisfied with your AI Agent’s responses, it’s time to make it live! Navigate to the **“Activate”** tab in your agent, and click on **“Connect channel”** button to connect your desired channel.
**Perfect for most websites**
Adds a floating chat icon that users can click to start conversations. Non-intrusive and mobile-friendly.
**Pros:**
* Can utilize advanced features like **identity verification**.
* Doesn’t interfere with your site’s design
* Users can minimize/maximize as needed
* Works great on mobile devices
* Familiar UX pattern
**Best for:** Business websites, blogs, e-commerce stores
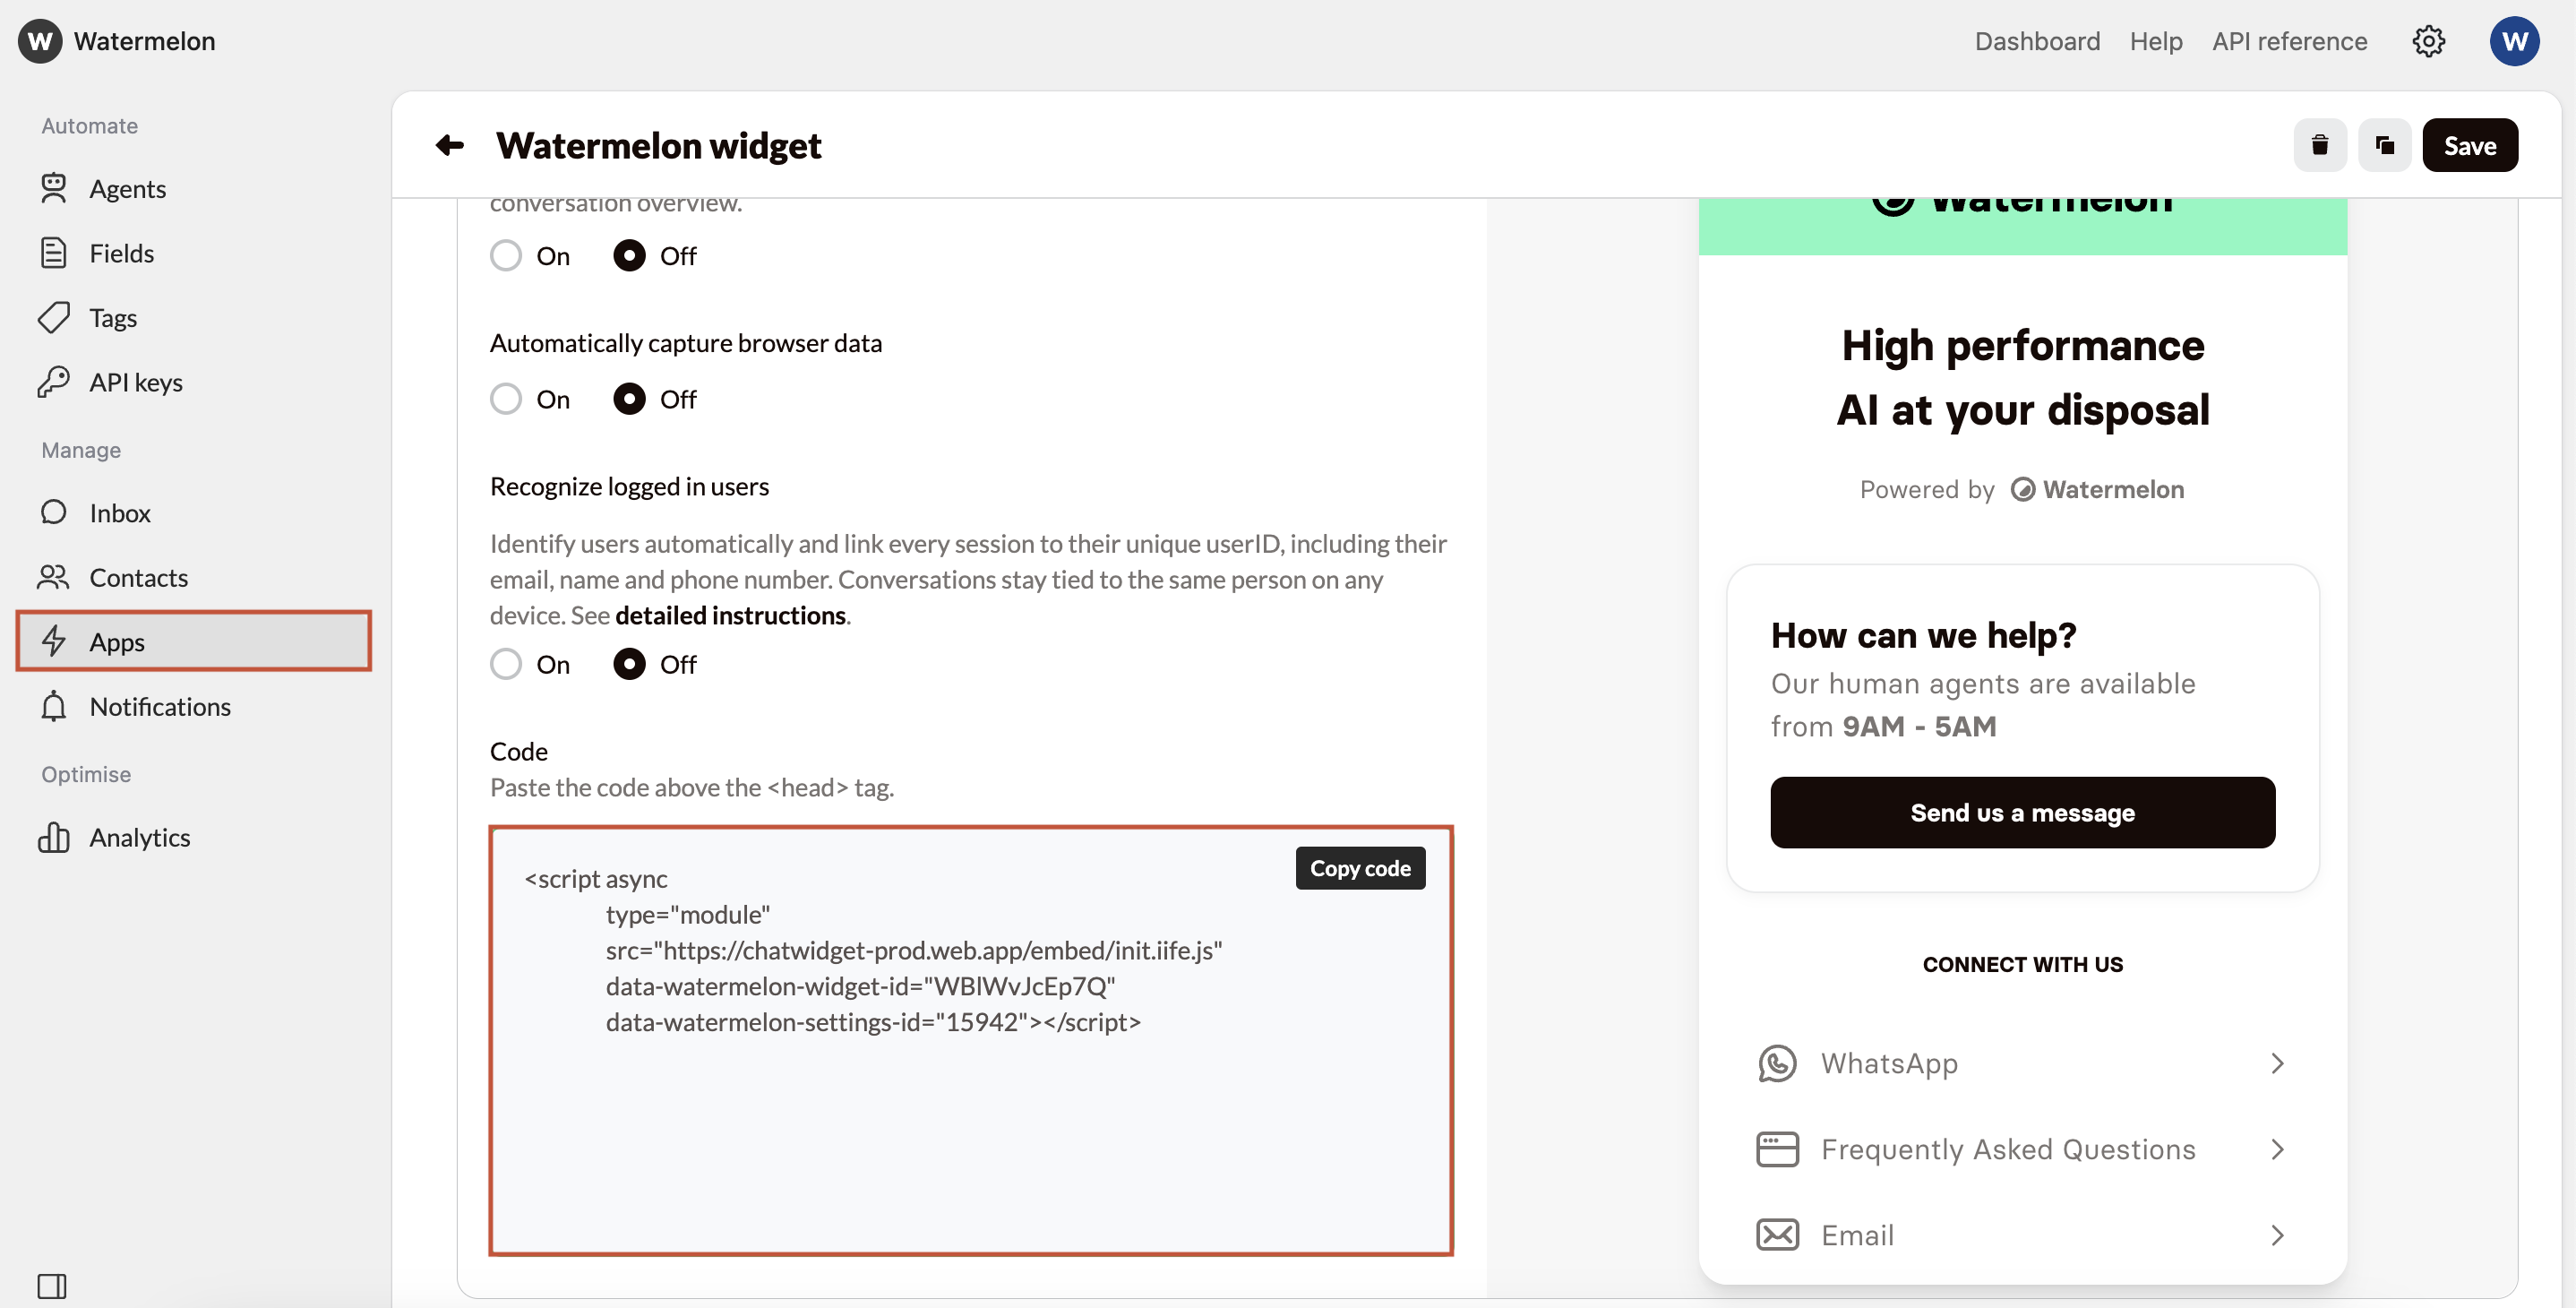
### **Get Your Embed Code**
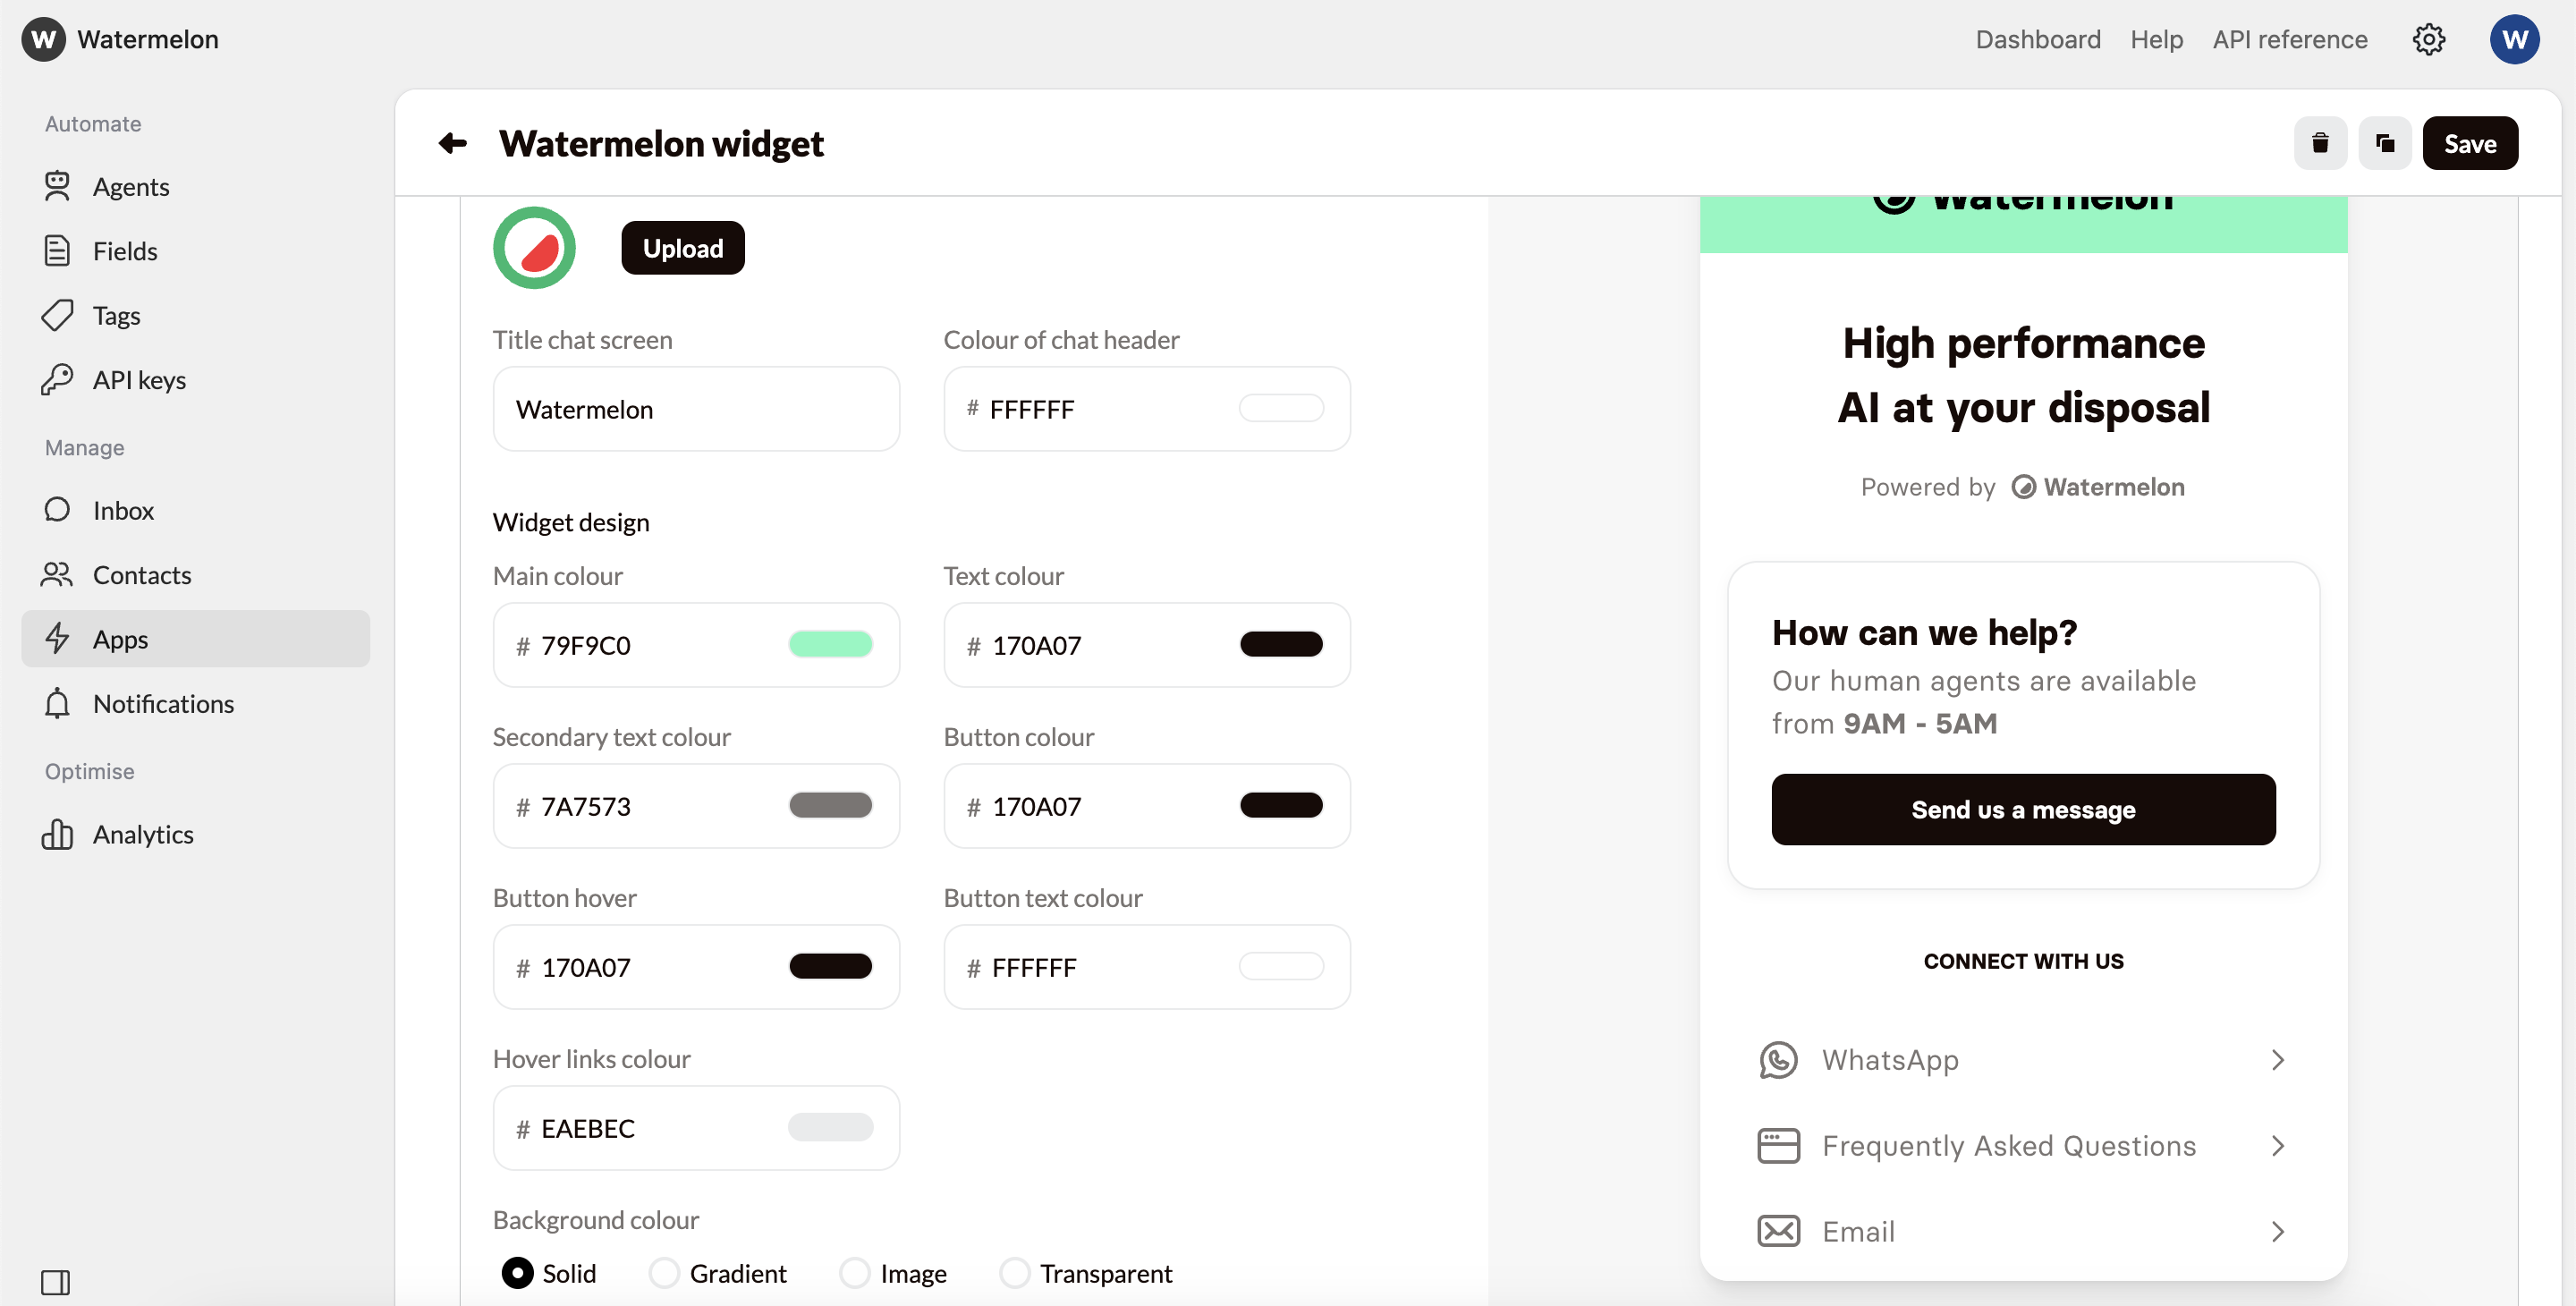
In this guide we’ll use the Chat widget option, go to **apps** -> **My first widget** -> **Placement** -> **scroll down** to find the javascript code snippet.
Copy the provided JavaScript code snippet:
**How to write effective instructions**
* **Be specific about context.** Describe exactly when the Instruction applies — for example, “when someone asks about their order status.”
* **Tell the Agent what to do.** Include the expected action or response — e.g., “tell them to check the track & trace link from their confirmation email.”
* **Keep it clear and concise.** Avoid long explanations; write direct, practical rules the Agent can follow.
* **Use real examples.** Write a few short examples to show how the Agent should respond in different situations.
* **Review and test.** After saving your Instructions, test your Agent’s answers to make sure they follow your intended logic.
## Step 4: Publish & go live
### **Navigate to the activation Section**
Once you’re satisfied with your AI Agent’s responses, it’s time to make it live! Navigate to the **“Activate”** tab in your agent, and click on **“Connect channel”** button to connect your desired channel.
**Perfect for most websites**
Adds a floating chat icon that users can click to start conversations. Non-intrusive and mobile-friendly.
**Pros:**
* Can utilize advanced features like **identity verification**.
* Doesn’t interfere with your site’s design
* Users can minimize/maximize as needed
* Works great on mobile devices
* Familiar UX pattern
**Best for:** Business websites, blogs, e-commerce stores
### **Get Your Embed Code**
In this guide we’ll use the Chat widget option, go to **apps** -> **My first widget** -> **Placement** -> **scroll down** to find the javascript code snippet.
Copy the provided JavaScript code snippet:
 ### **Add Code to Your Website**
Find where you can add JavaScript code to your website. This is usually in the `` section or before the closing `` tag.
**For fast loading:** Place the script just before the closing `
### **Add Code to Your Website**
Find where you can add JavaScript code to your website. This is usually in the `` section or before the closing `` tag.
**For fast loading:** Place the script just before the closing `
` tag to ensure your page content loads first, then the chat widget appears.
**For immediate availability:** Place the script in the `