> ## Documentation Index
> Fetch the complete documentation index at: https://watermelon.ai/docs/llms.txt
> Use this file to discover all available pages before exploring further.
# Set up Human handover with Zapier
> Forward your Watermelon chats to another tool via Zapier
By using the Watermelon Human handover, you can automatically forward messages to other software when a handover occurs from the AI Agent to a user.
### **What is the Human Handover?**
The Handover refers to the moment when the AI Agent is transferred (handover) to an agent or a team, and the Zap is initiated. In other words, there is a trigger when a handover takes place.
## 1. Set up Human handover
Start by setting up Human Handover in Watermelon. The Handover is needed so the Agent knows in which cases the Agent needs to forward conversations. The handover triggers the automation in Zapier which forwards the conversation to your email.
How does handover work?
Agent collects details → customer types trigger → Human Handover fires → Zapier sends email.
Go to Situations and go to Human Handover.
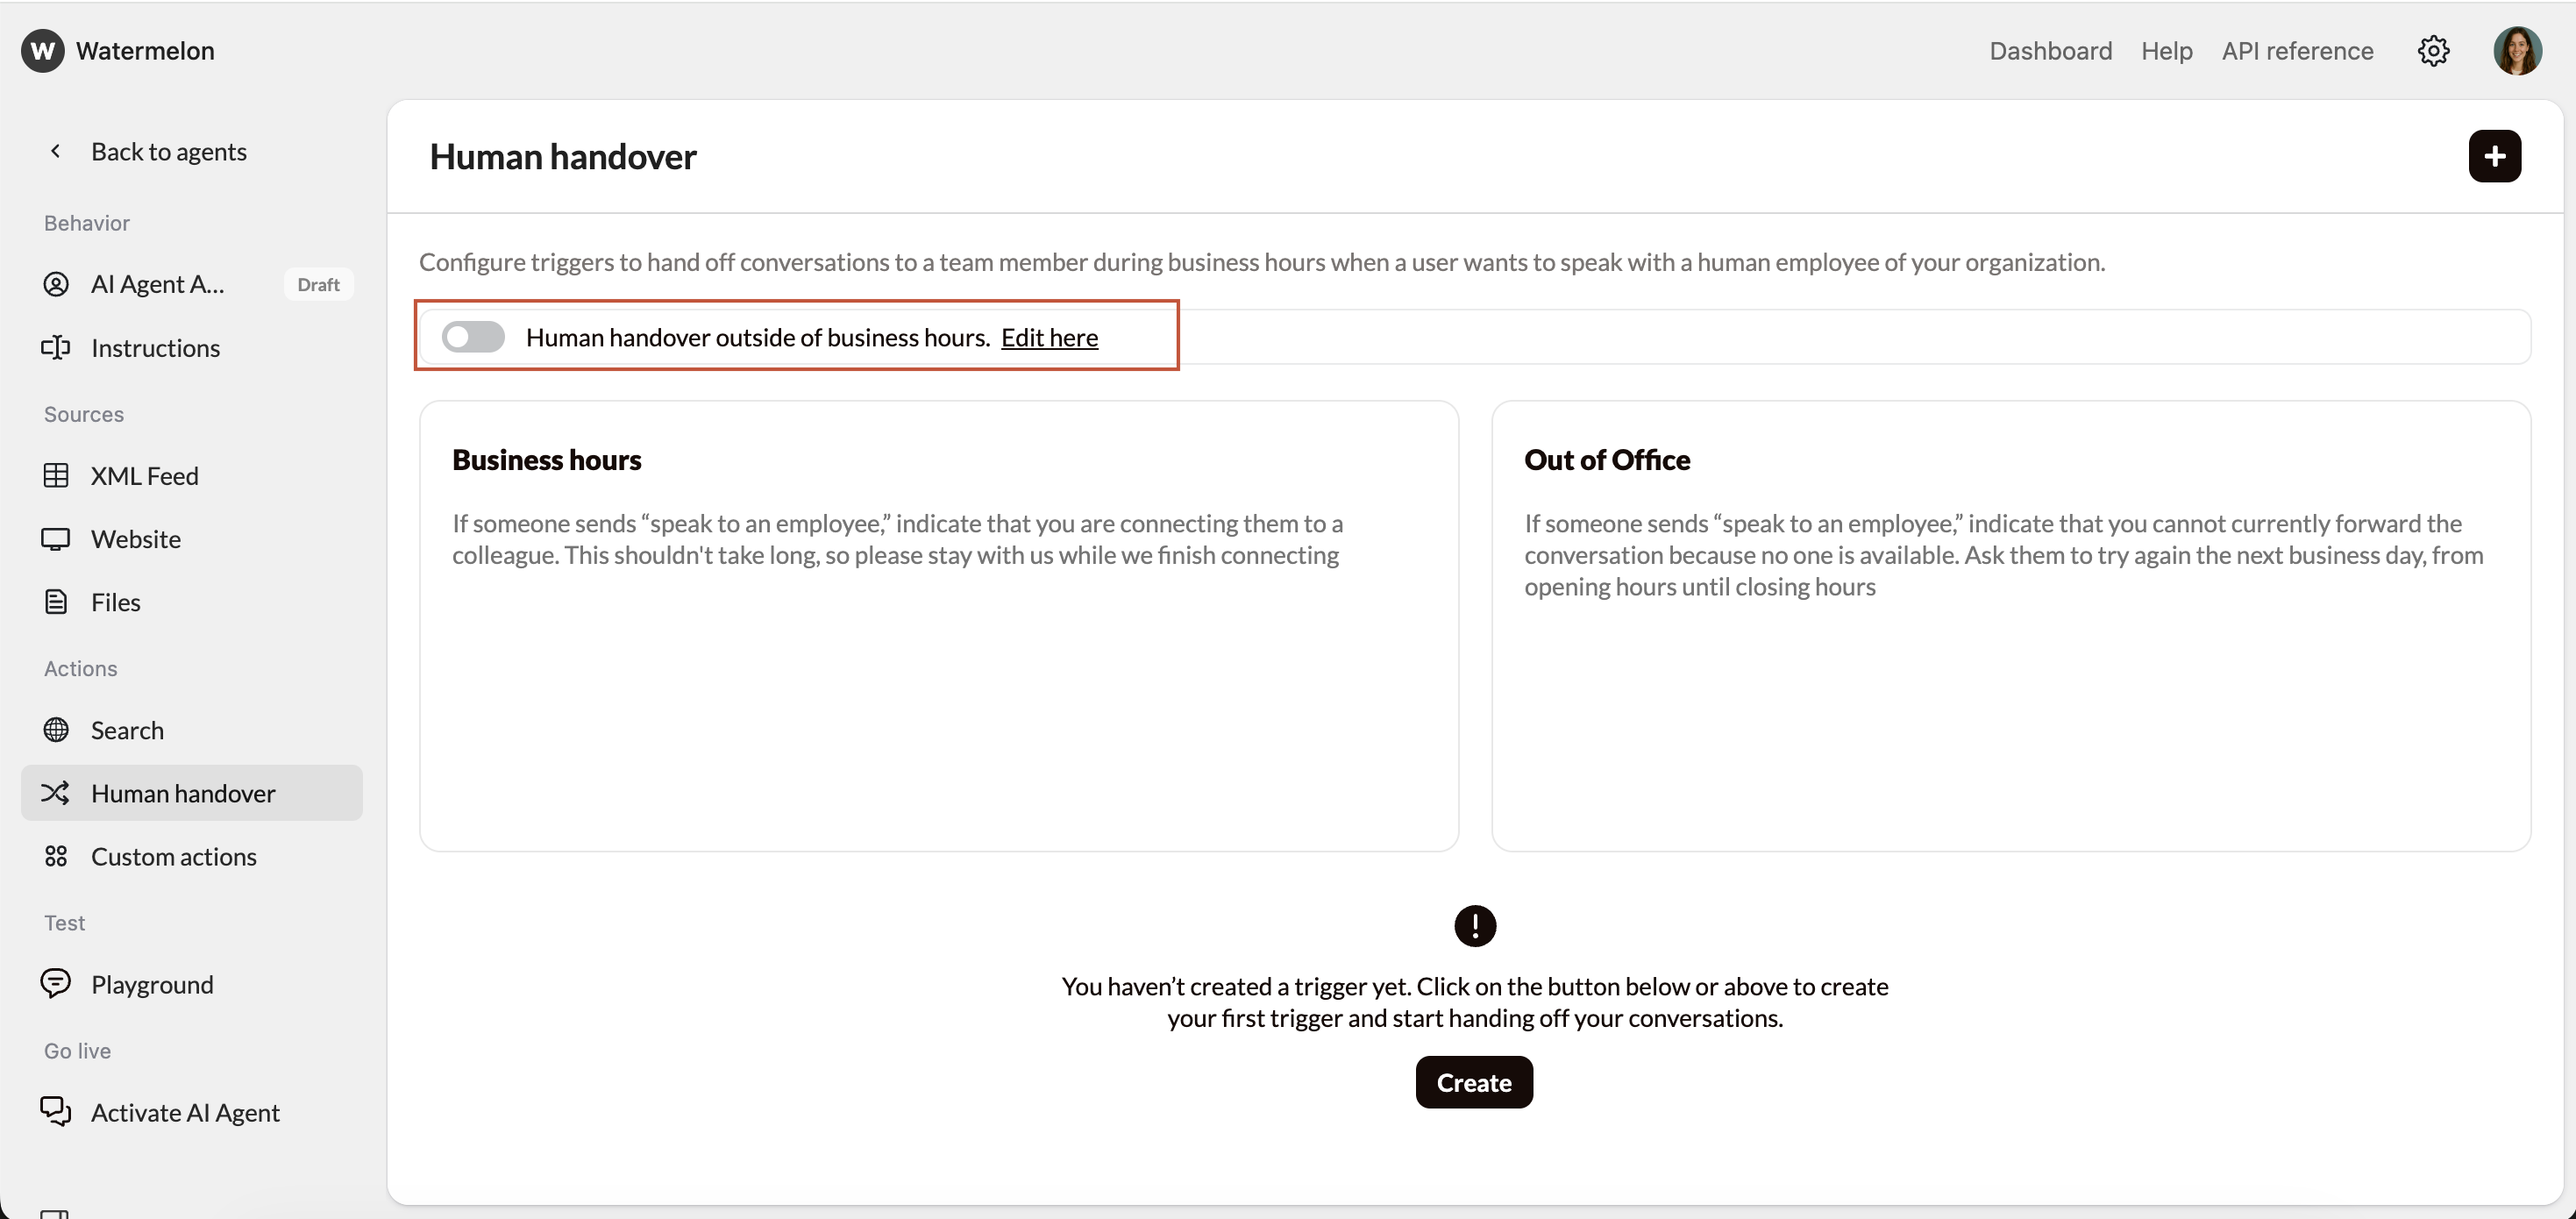
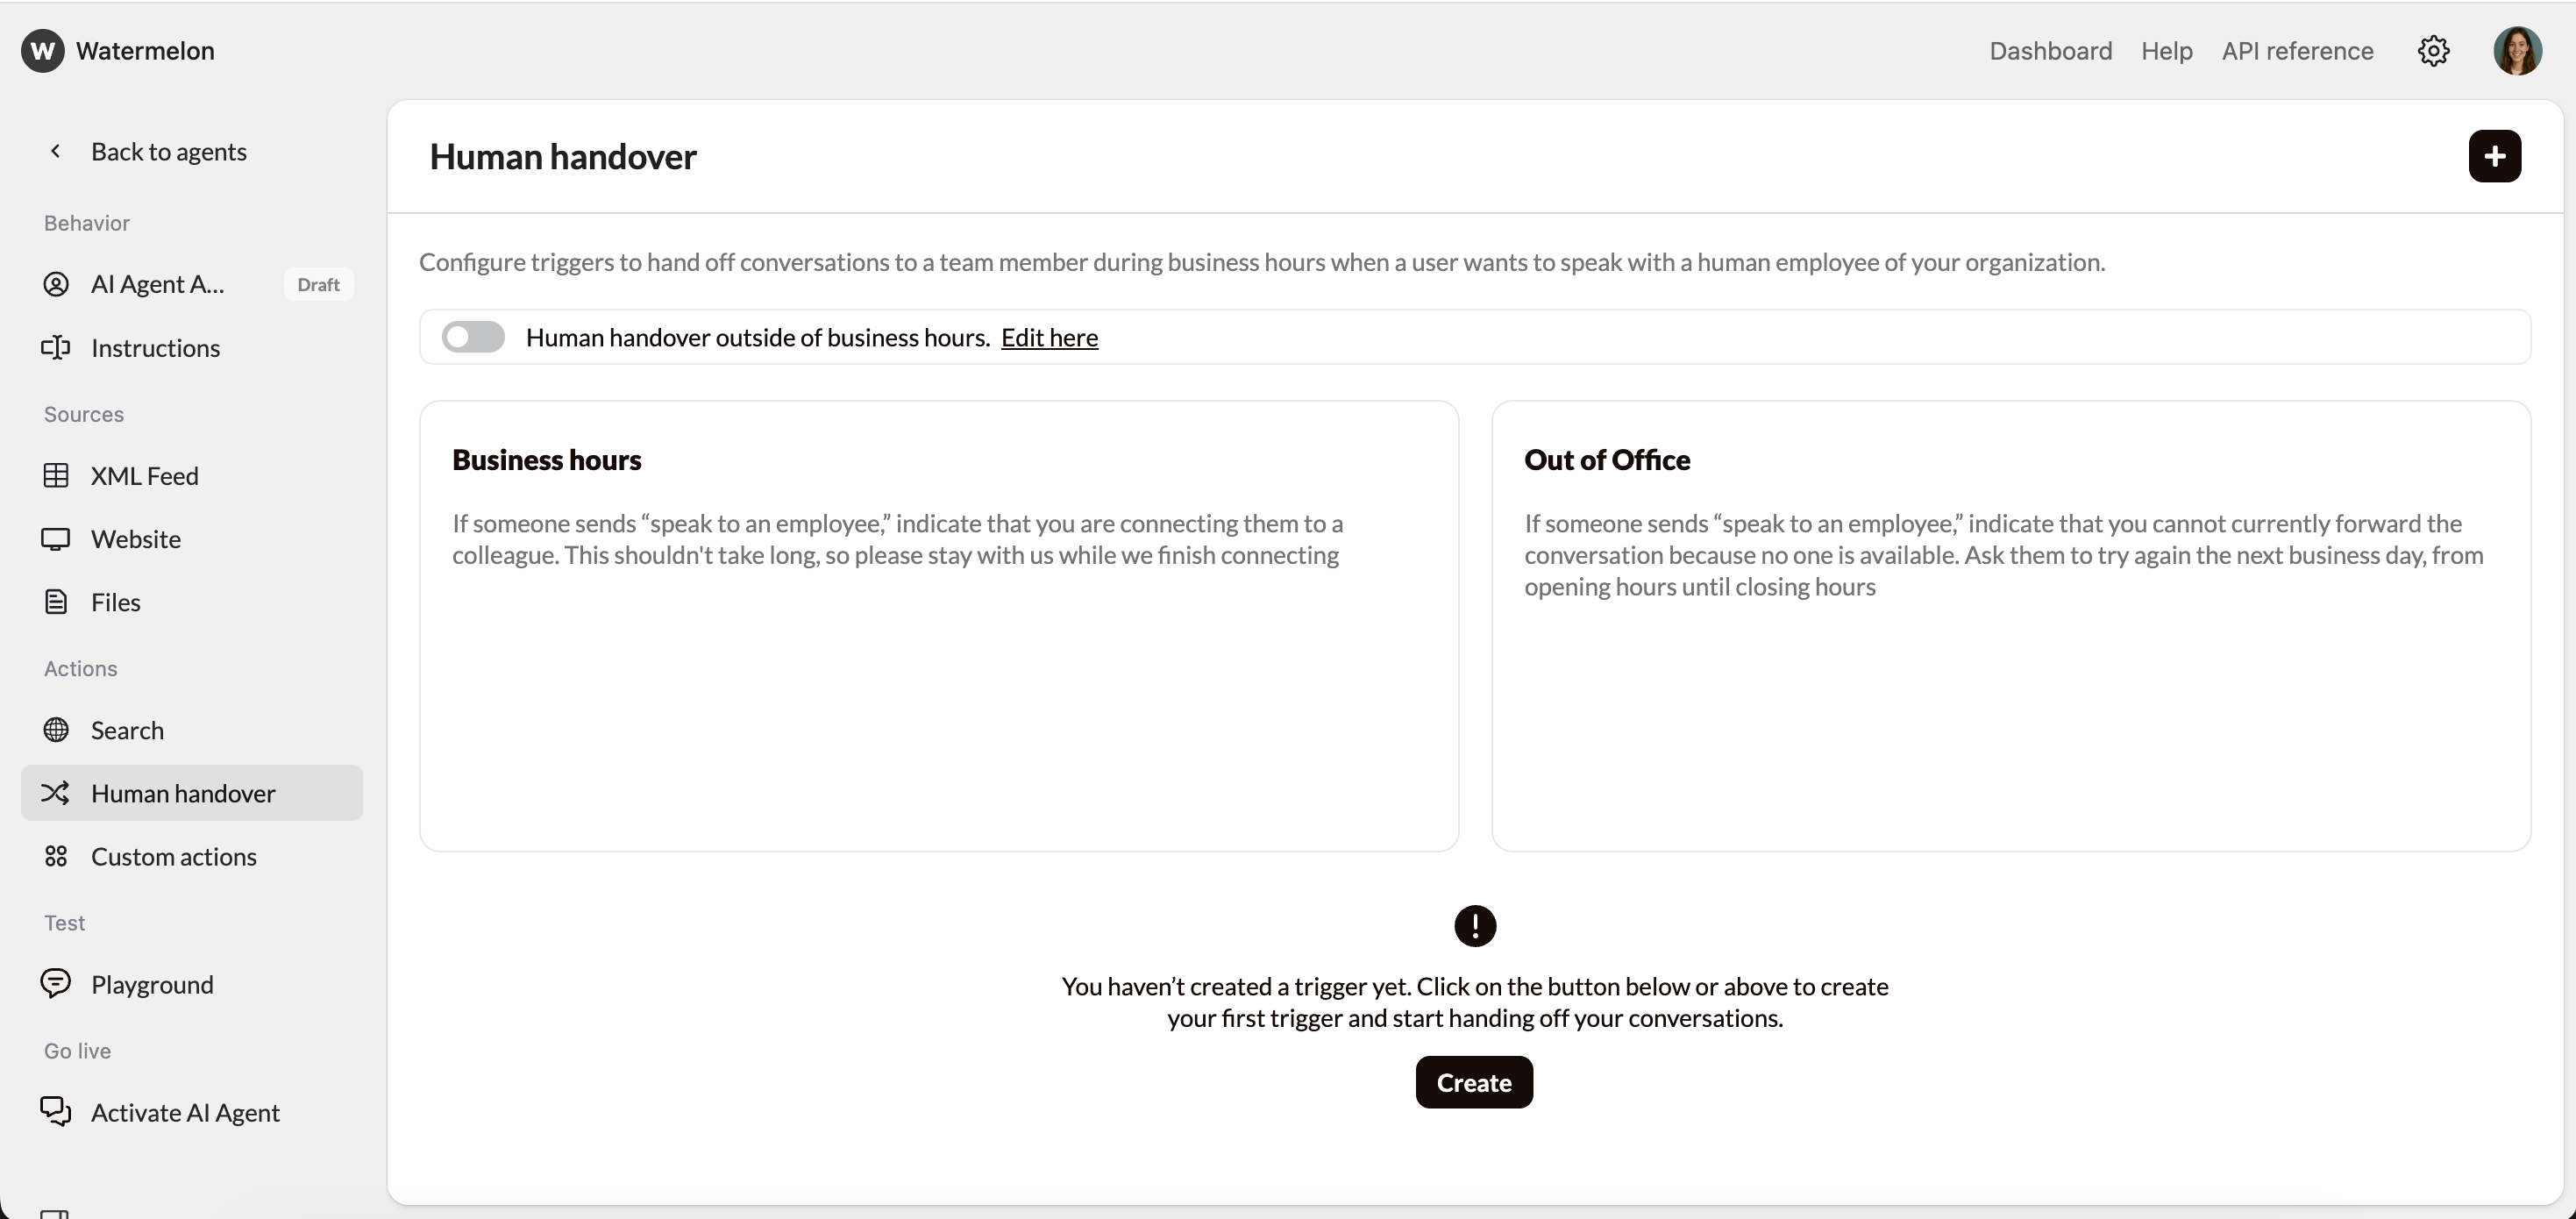 Decide if you want to forward conversations outside office hours. If you turn on the toggle, conversations outside business hours will also be forwarded to your email.
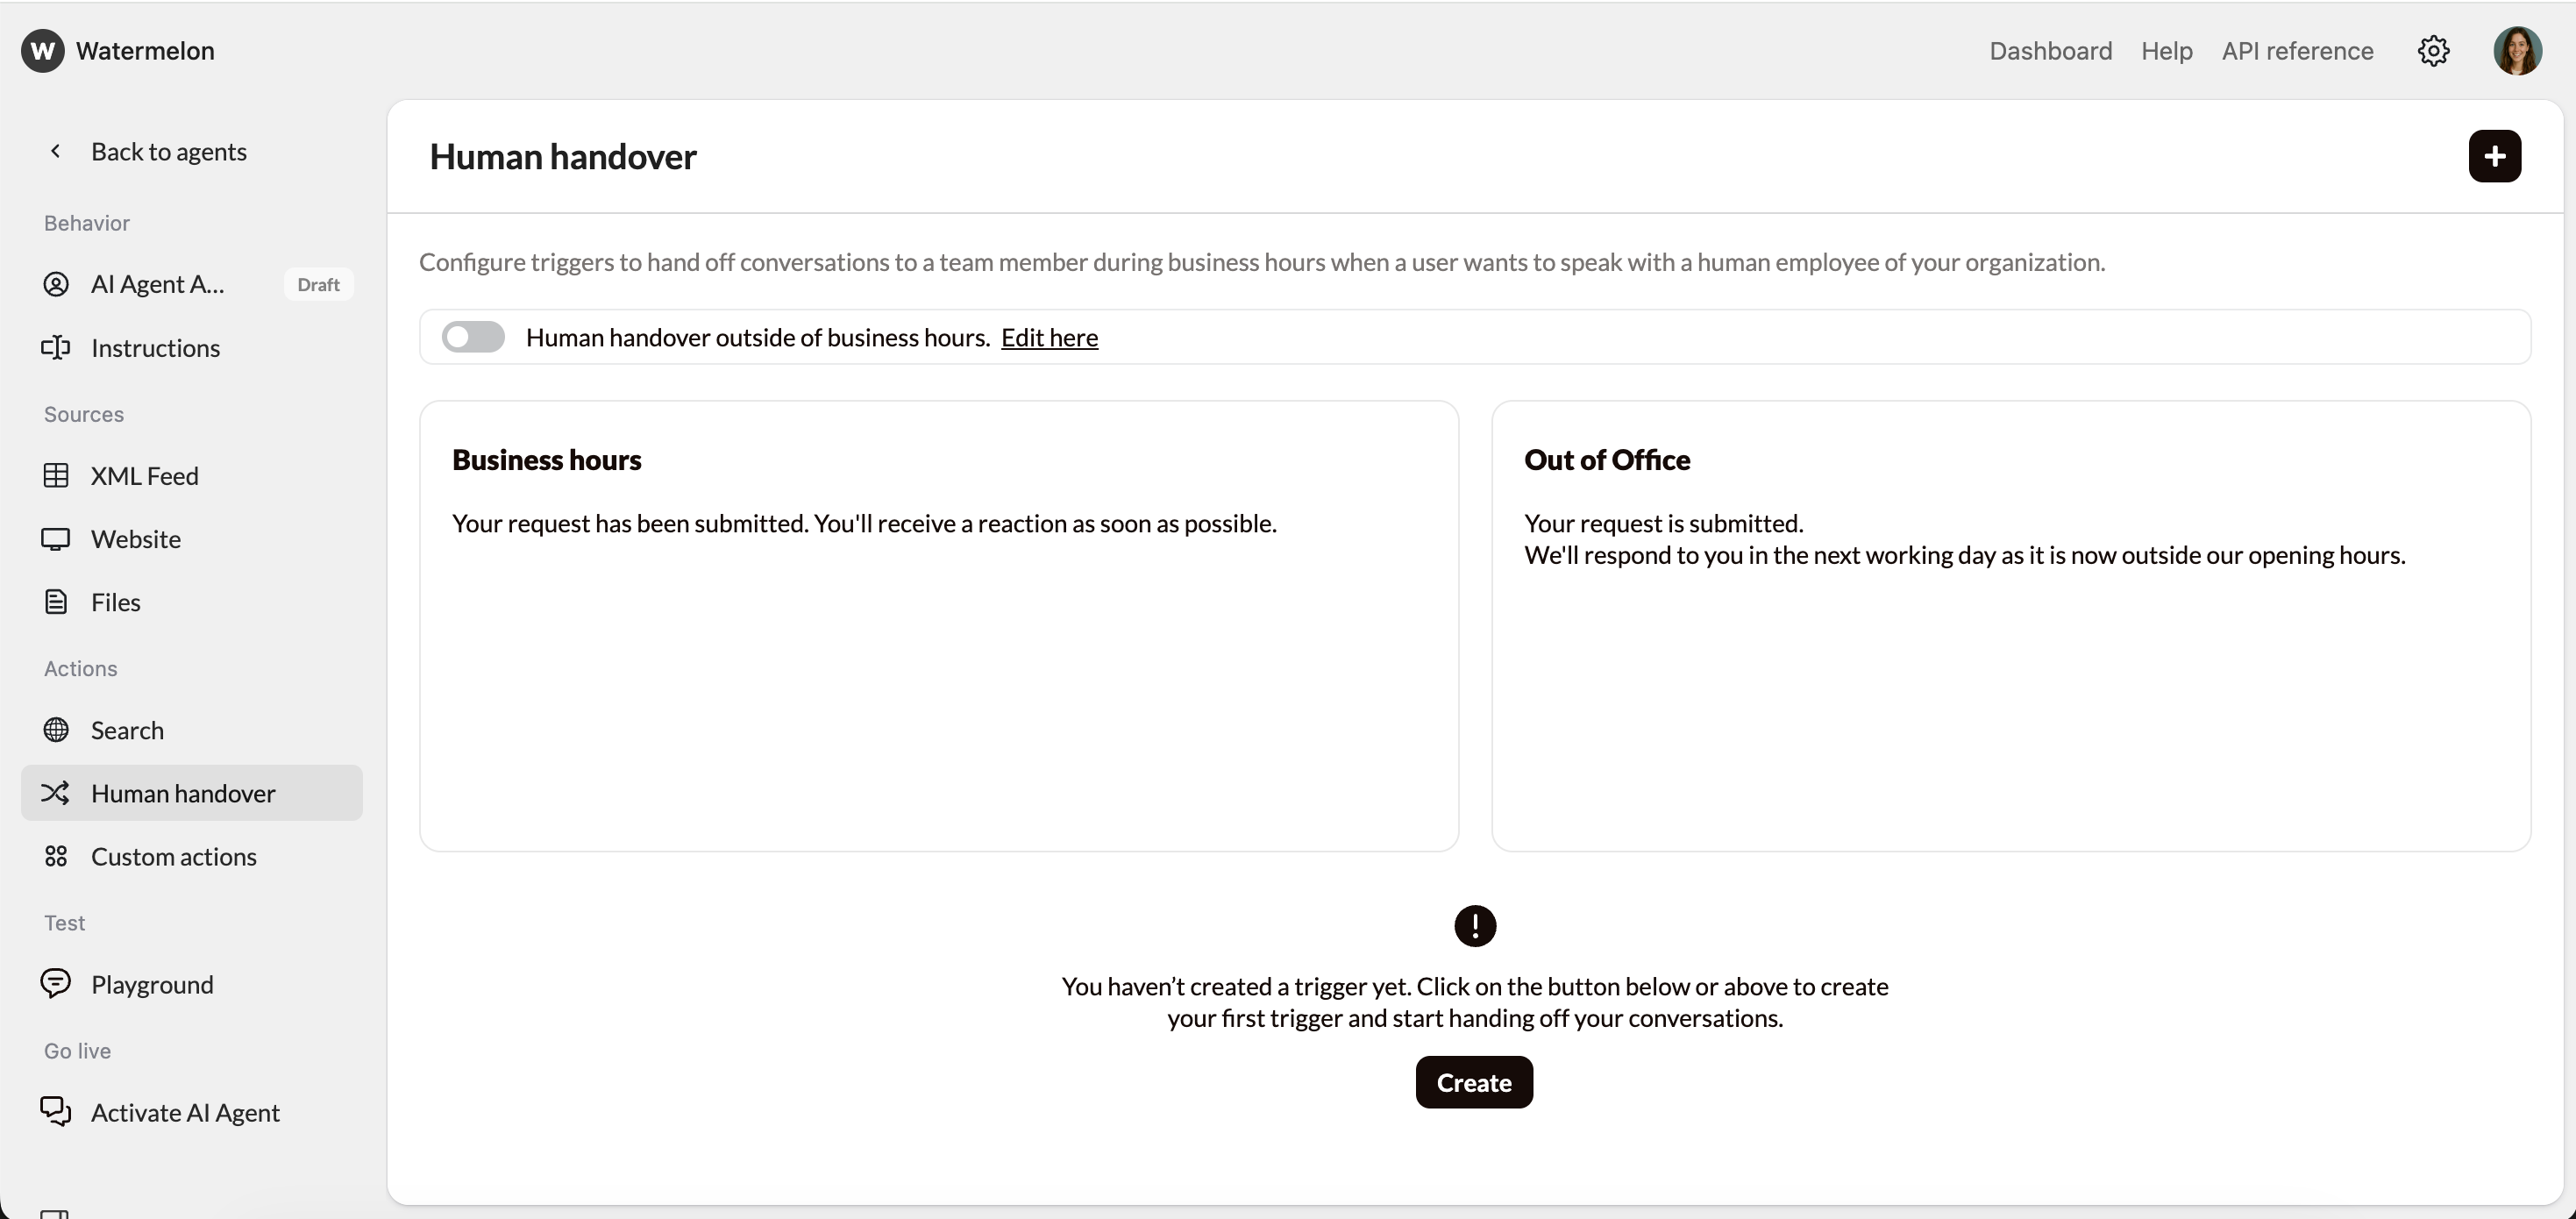
 To manage expectations for the end-user, you can add instructions for the Agent what it needs to say during/outside office hours. Example:
> Your request has been submitted. Our team will reach out as soon as possible.
To manage expectations for the end-user, you can add instructions for the Agent what it needs to say during/outside office hours. Example:
> Your request has been submitted. Our team will reach out as soon as possible.
 Be aware that after the Handover your Agent has left the Chat. You can include this information in the instructions above.
To technically trigger the handover, we need a code word. We call this code word a trigger. When a customer types this trigger, the message is automatically forwarded.
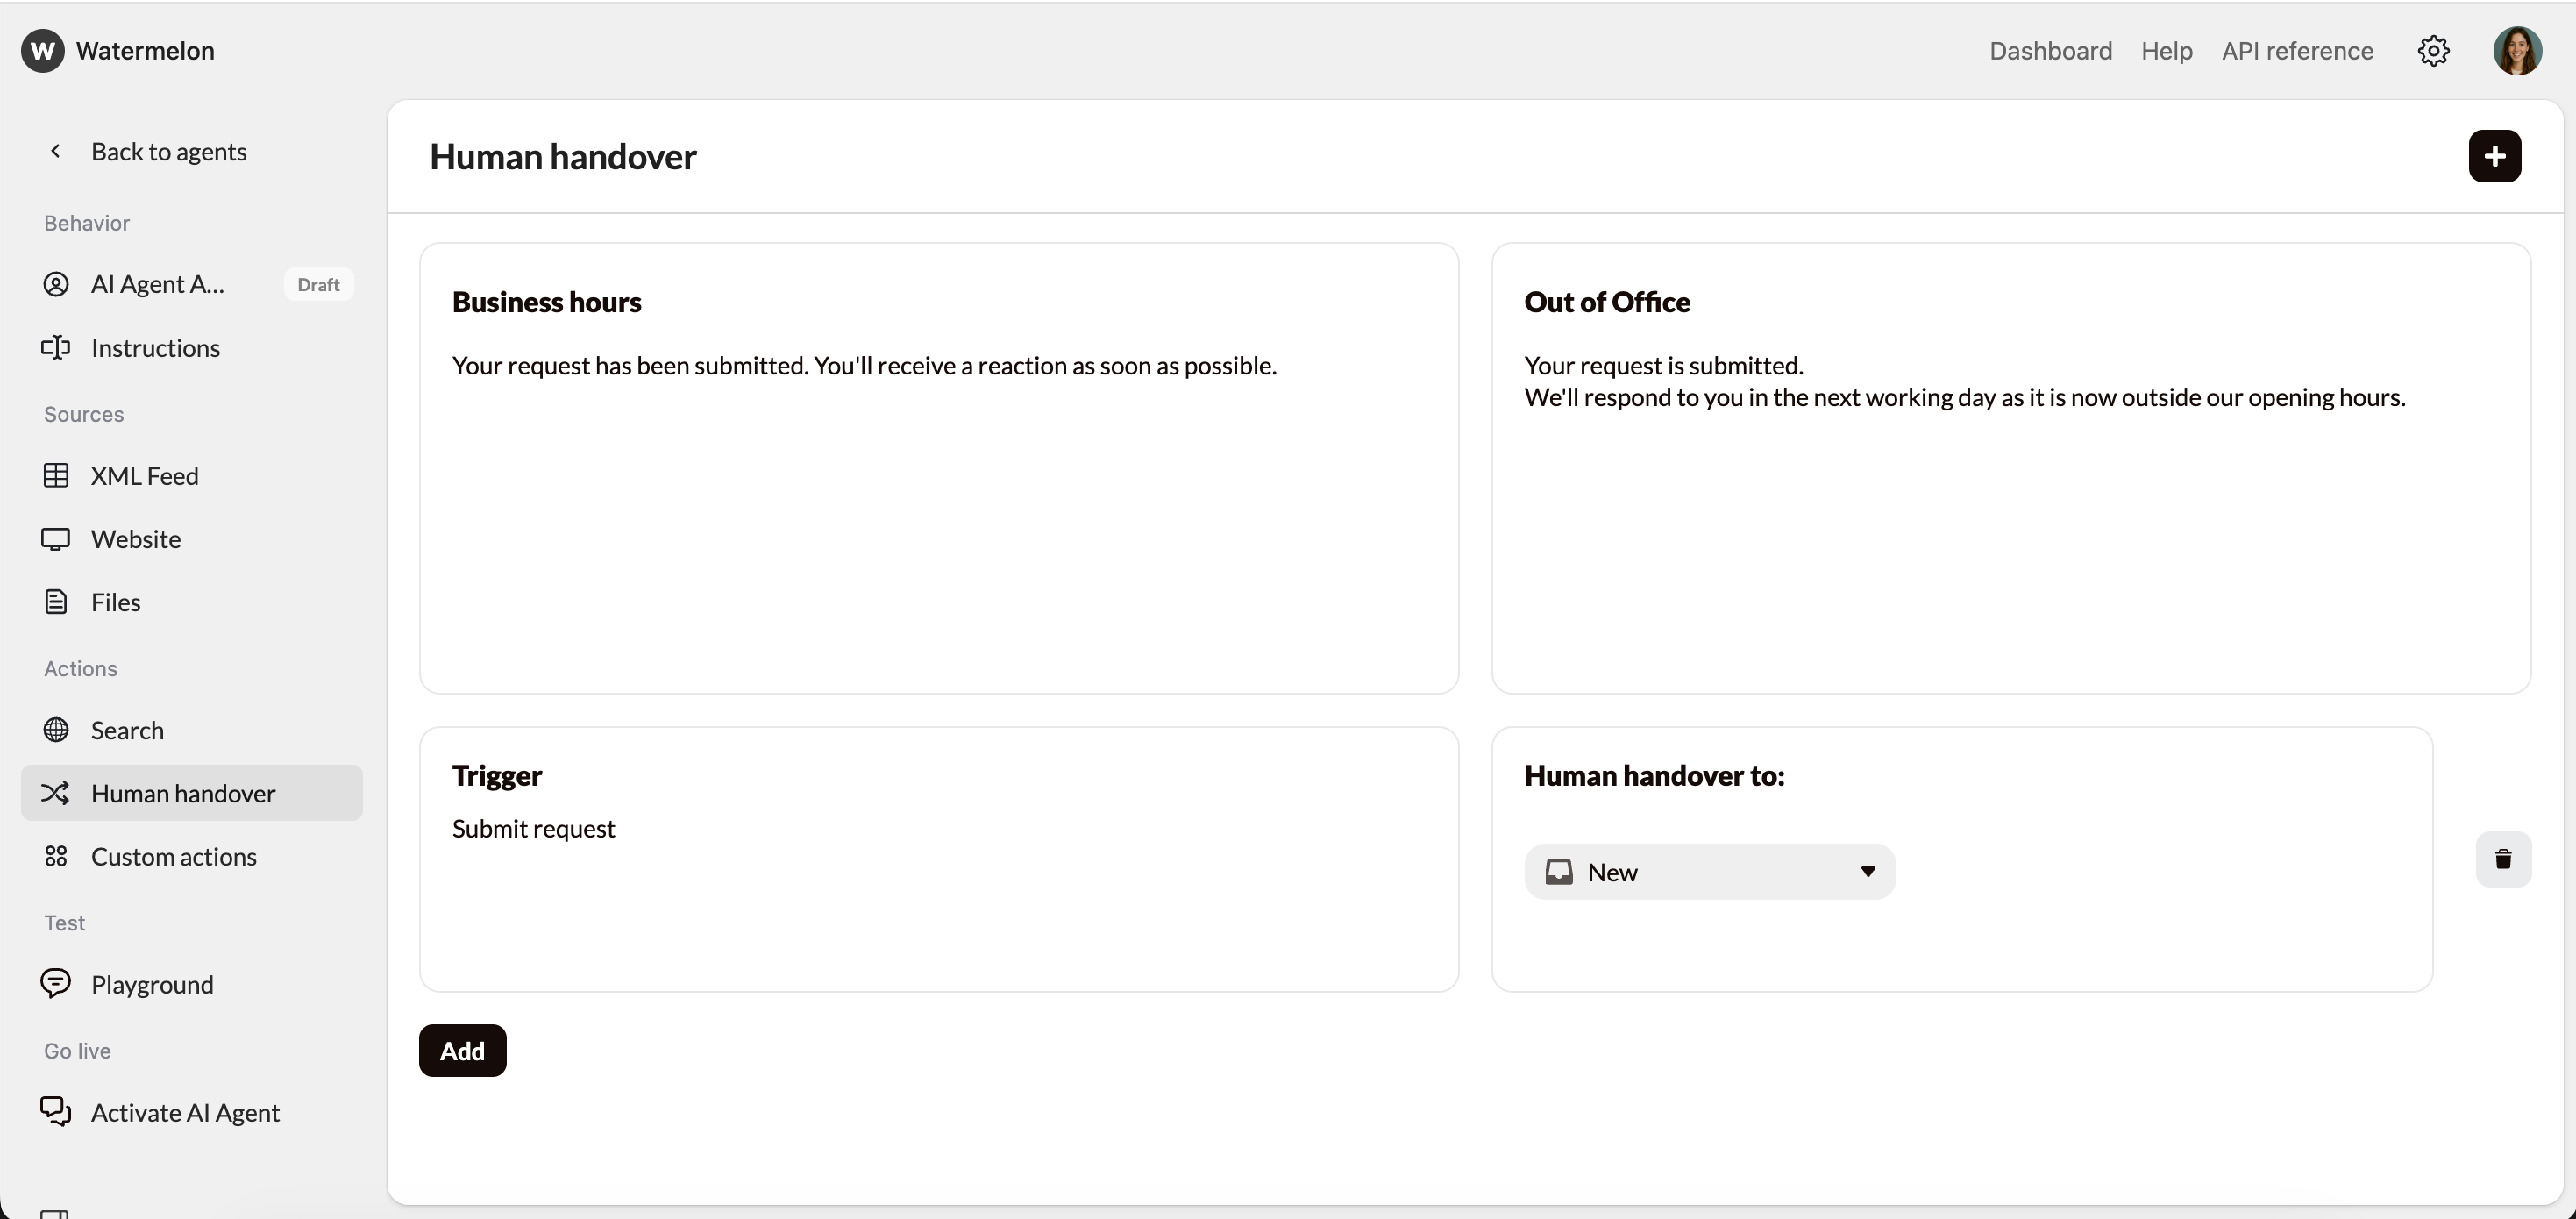
Click **Create** to create a new Trigger and select **new** in the dropdown menu.
Suggested trigger: **Submit request.**
Be aware that after the Handover your Agent has left the Chat. You can include this information in the instructions above.
To technically trigger the handover, we need a code word. We call this code word a trigger. When a customer types this trigger, the message is automatically forwarded.
Click **Create** to create a new Trigger and select **new** in the dropdown menu.
Suggested trigger: **Submit request.**
 It's important to choose a trigger sentence which is not used in conversations often. Otherwise the automation might be triggered without all necessary data.
## 2. Create automation
Now everything is set up in Watermelon, we can create the automation in Zapier. This automation will make sure your chats will actually be forwared to your email.
In Watermelon, go to **Apps** and open **Zapier**.
It's important to choose a trigger sentence which is not used in conversations often. Otherwise the automation might be triggered without all necessary data.
## 2. Create automation
Now everything is set up in Watermelon, we can create the automation in Zapier. This automation will make sure your chats will actually be forwared to your email.
In Watermelon, go to **Apps** and open **Zapier**.
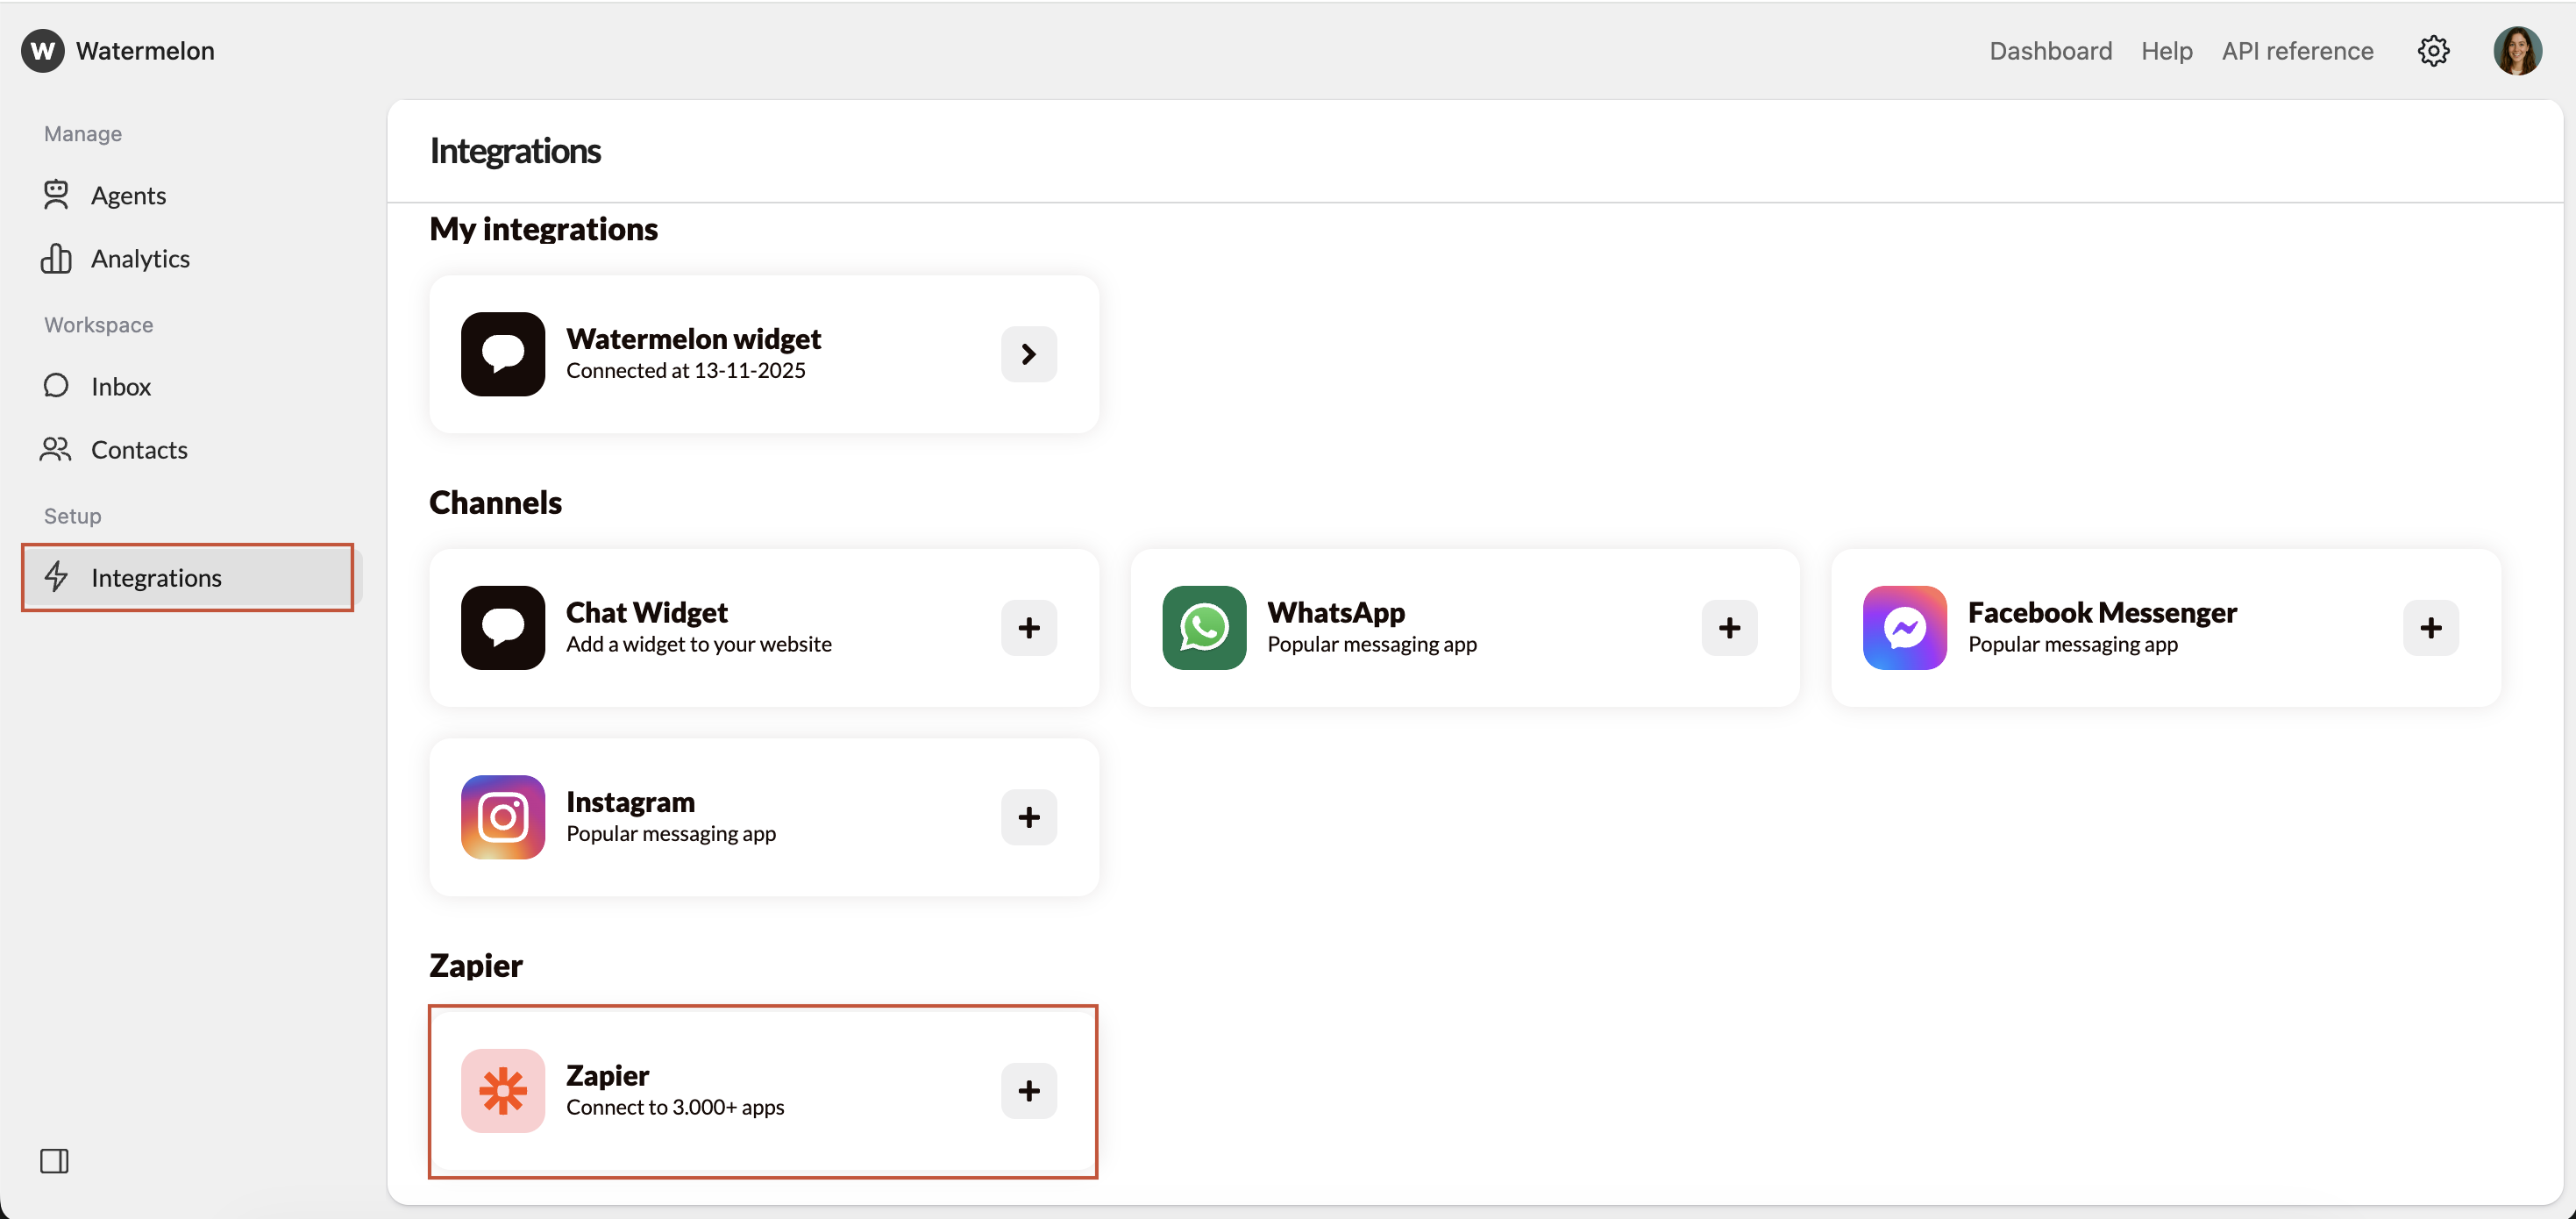 In the next screen select **Create from scratch** at the bottom of the page.
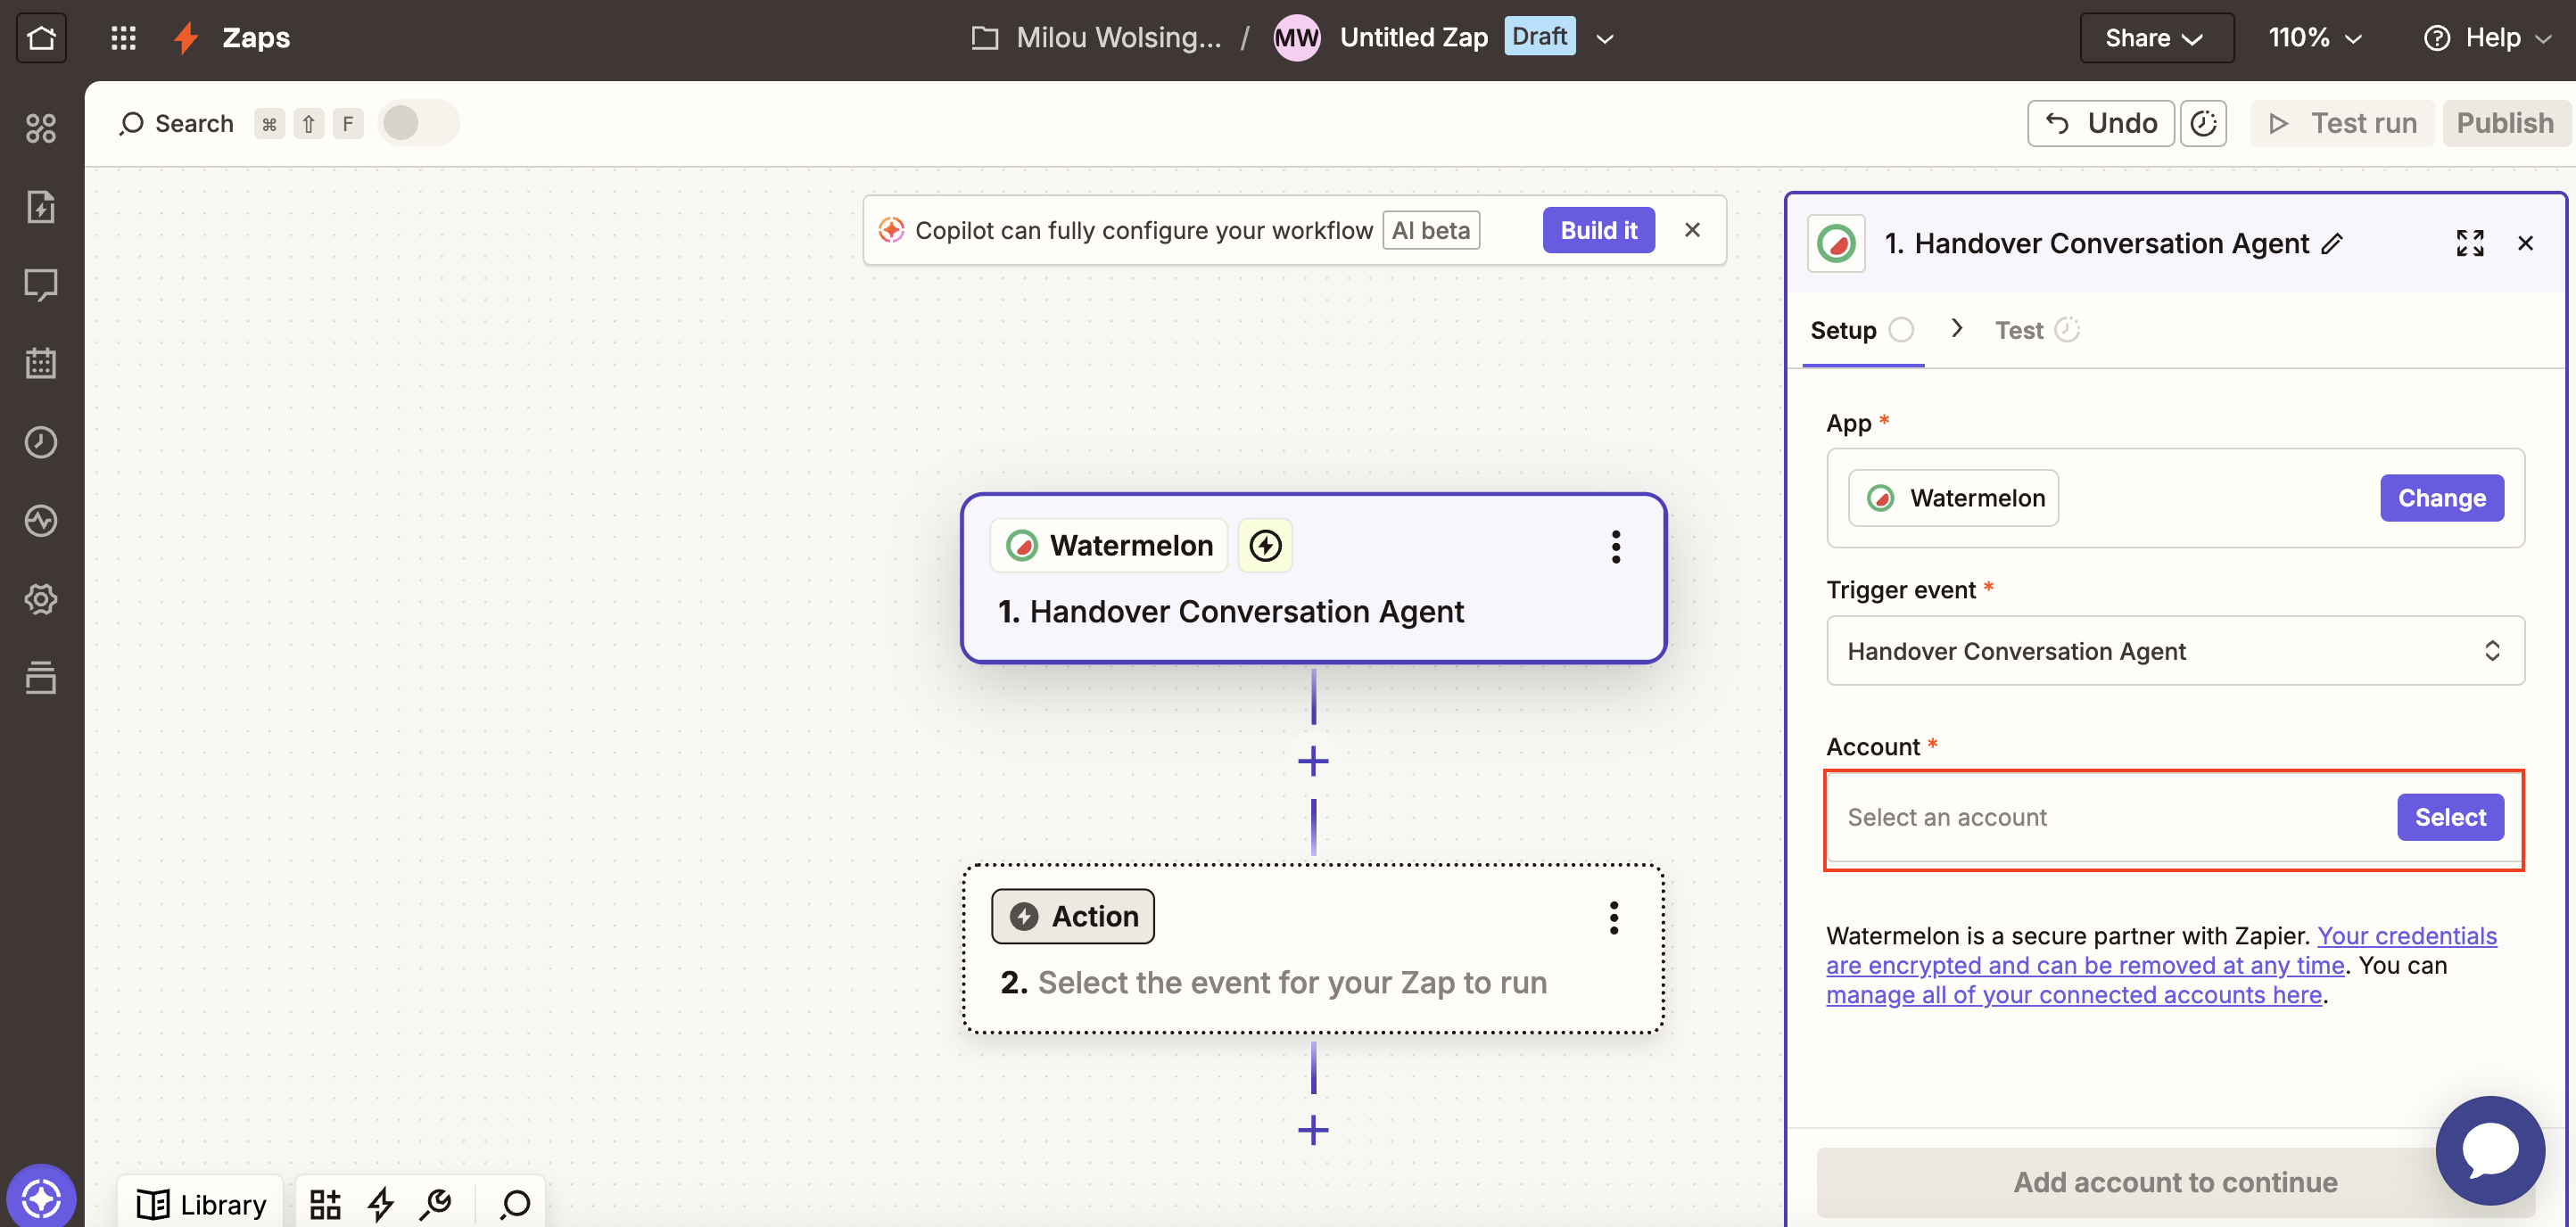
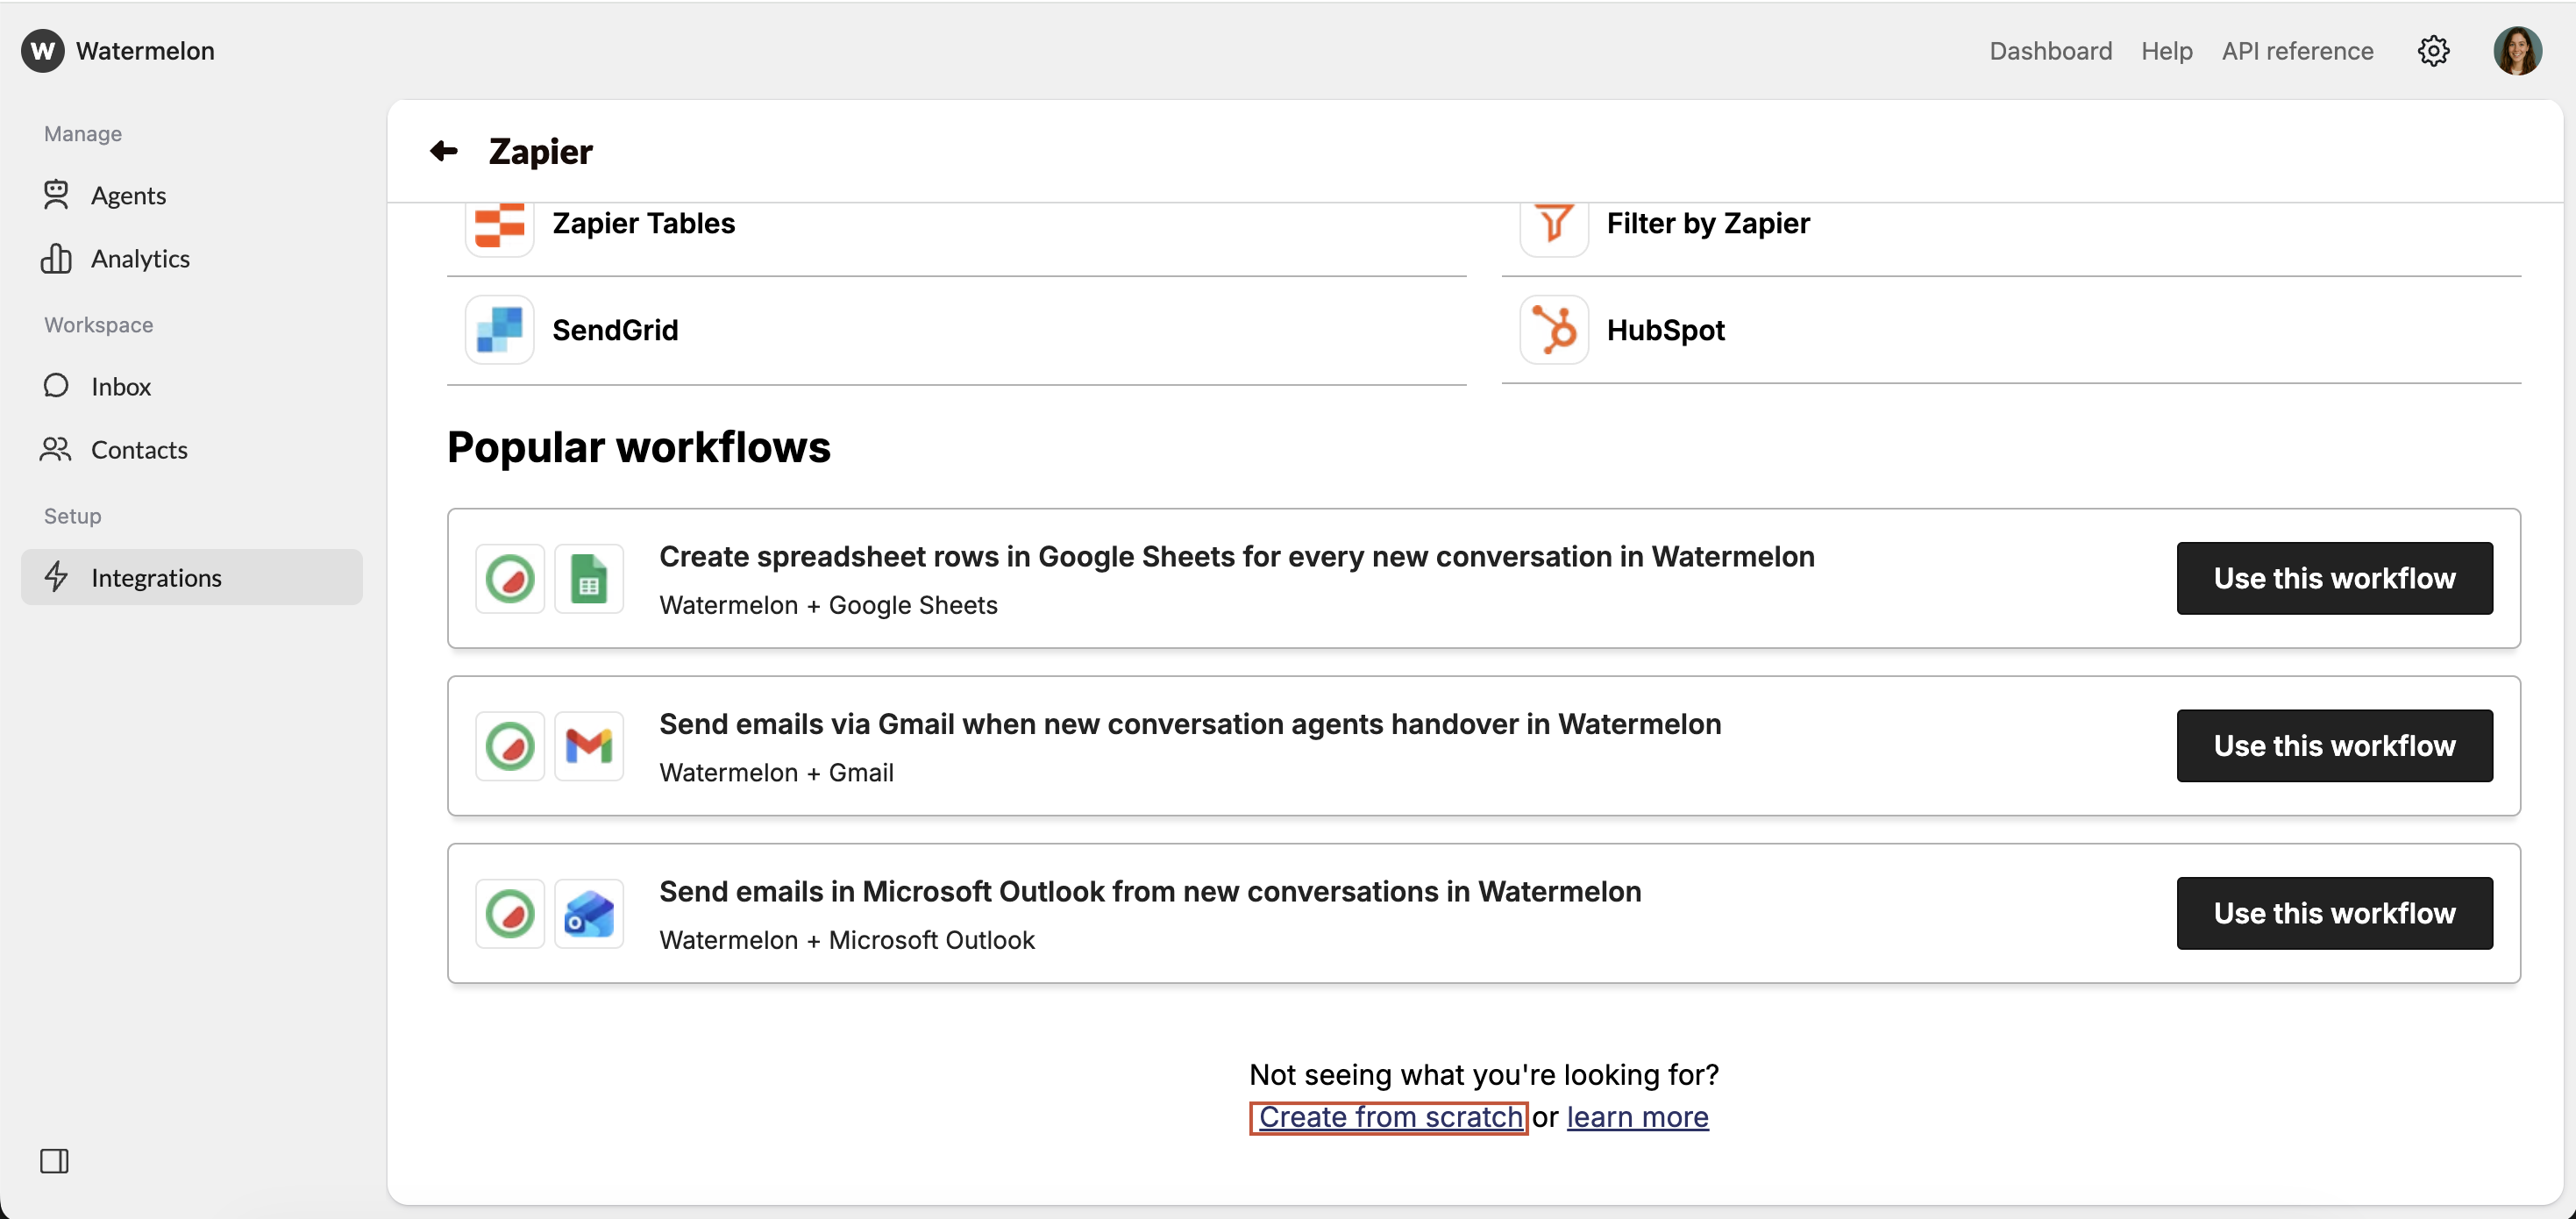 Zapier will open in a new screen, it should show as the image below. \
Click **Select** to connect Watermelon to Zapier.
Zapier will open in a new screen, it should show as the image below. \
Click **Select** to connect Watermelon to Zapier.
 A new screen will open where you need to add API keys.
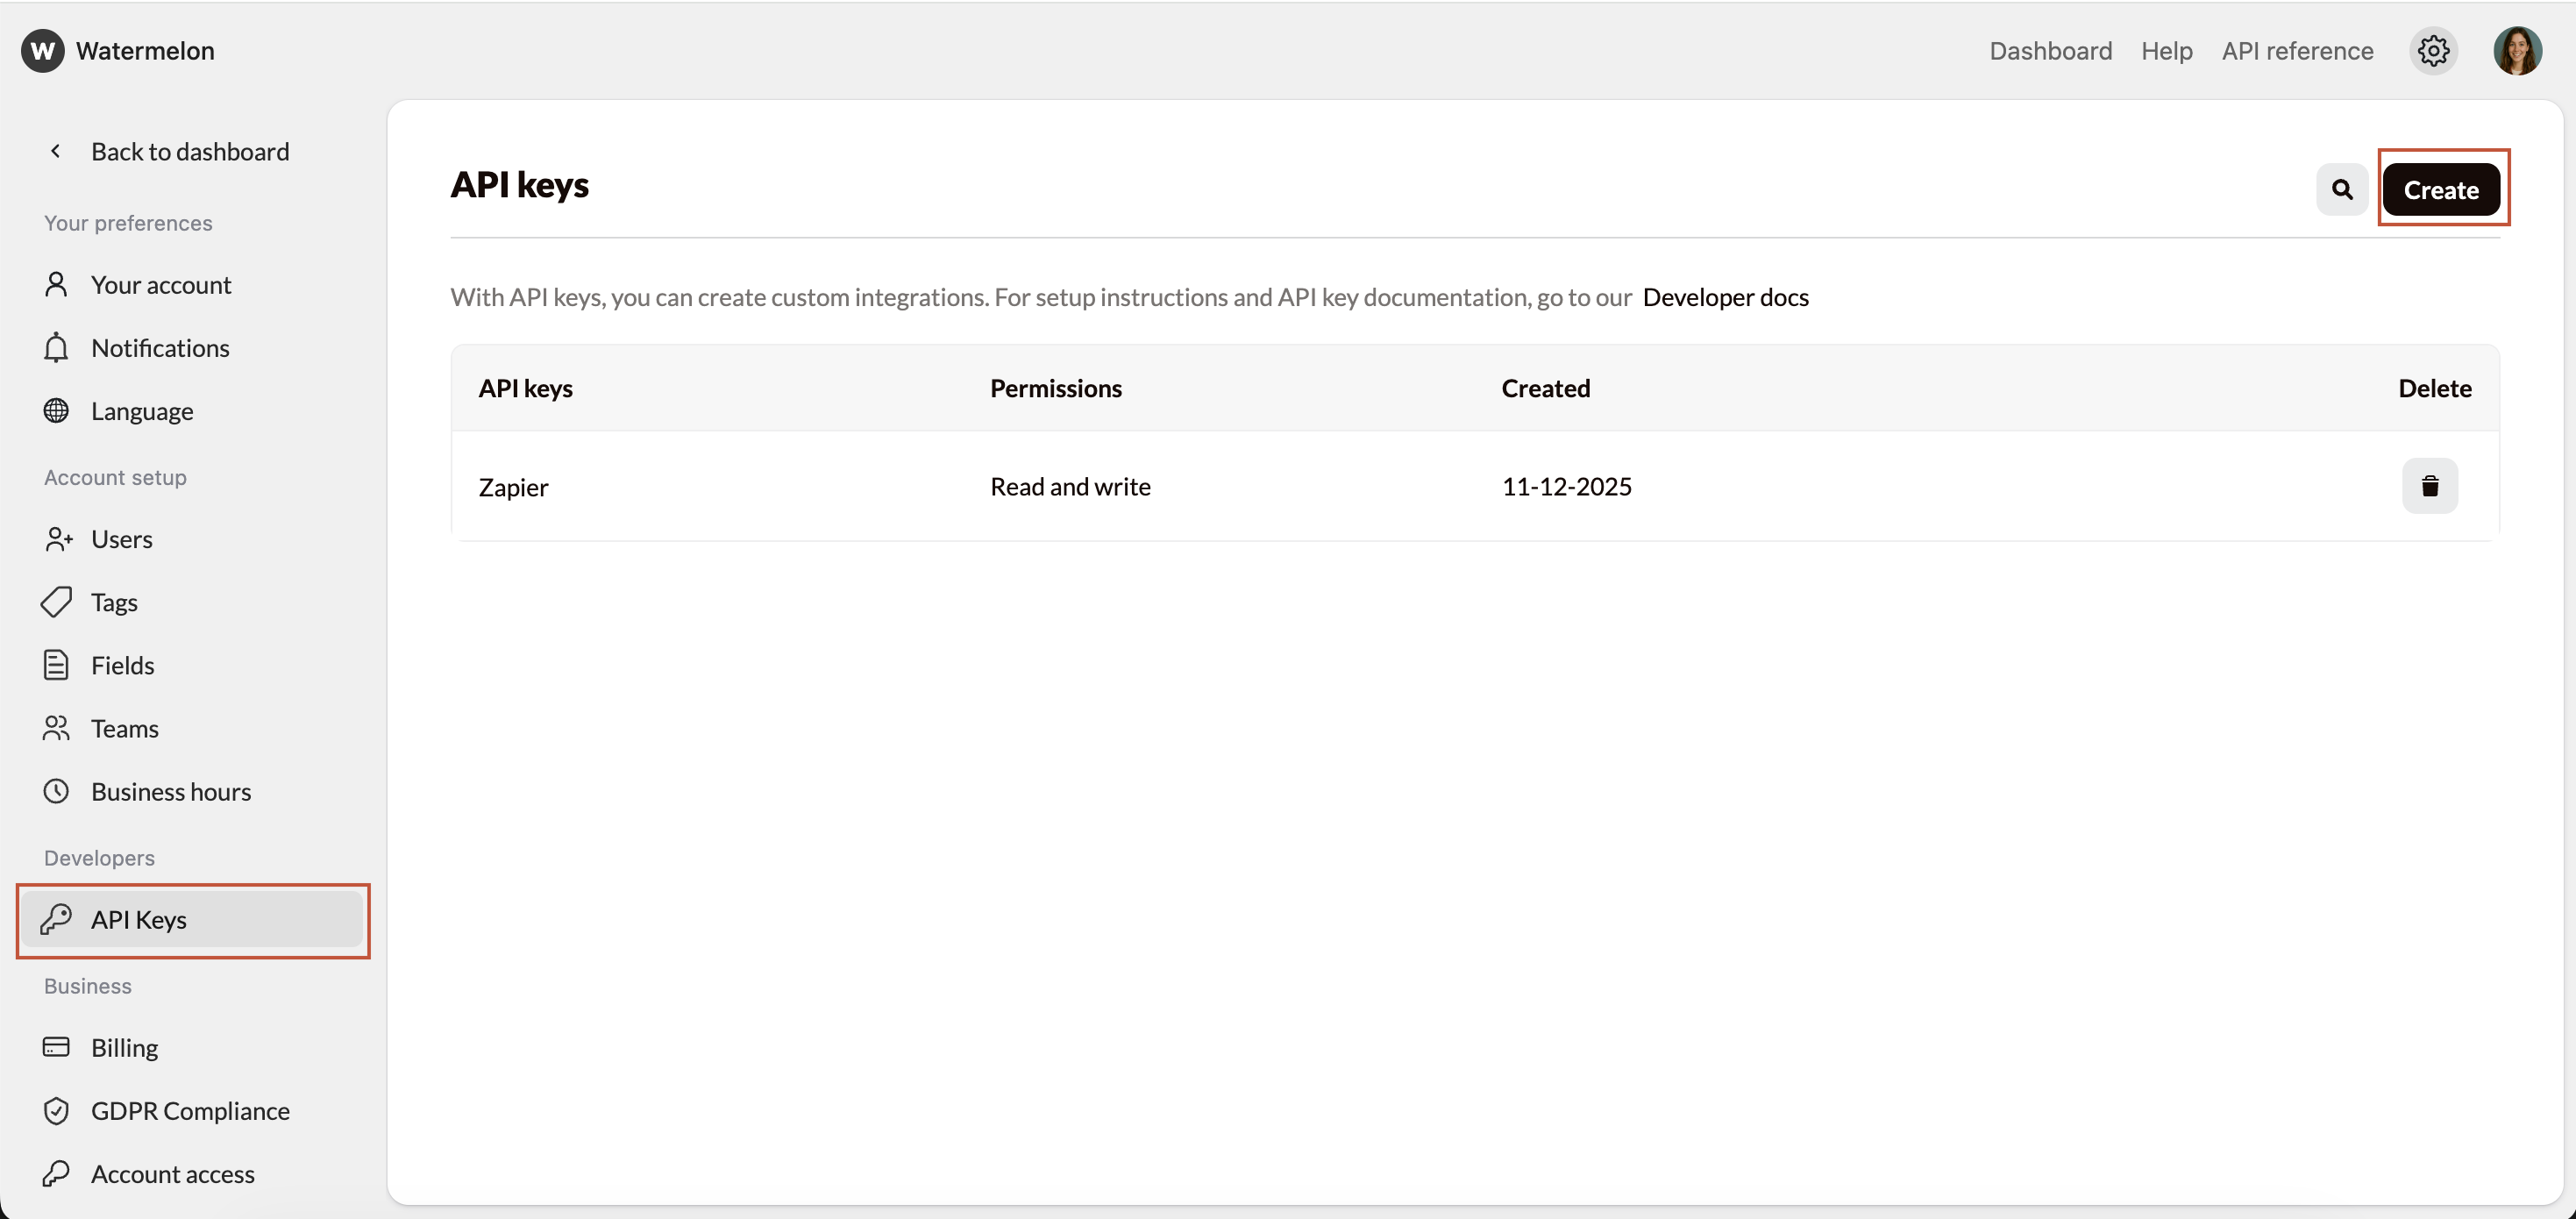
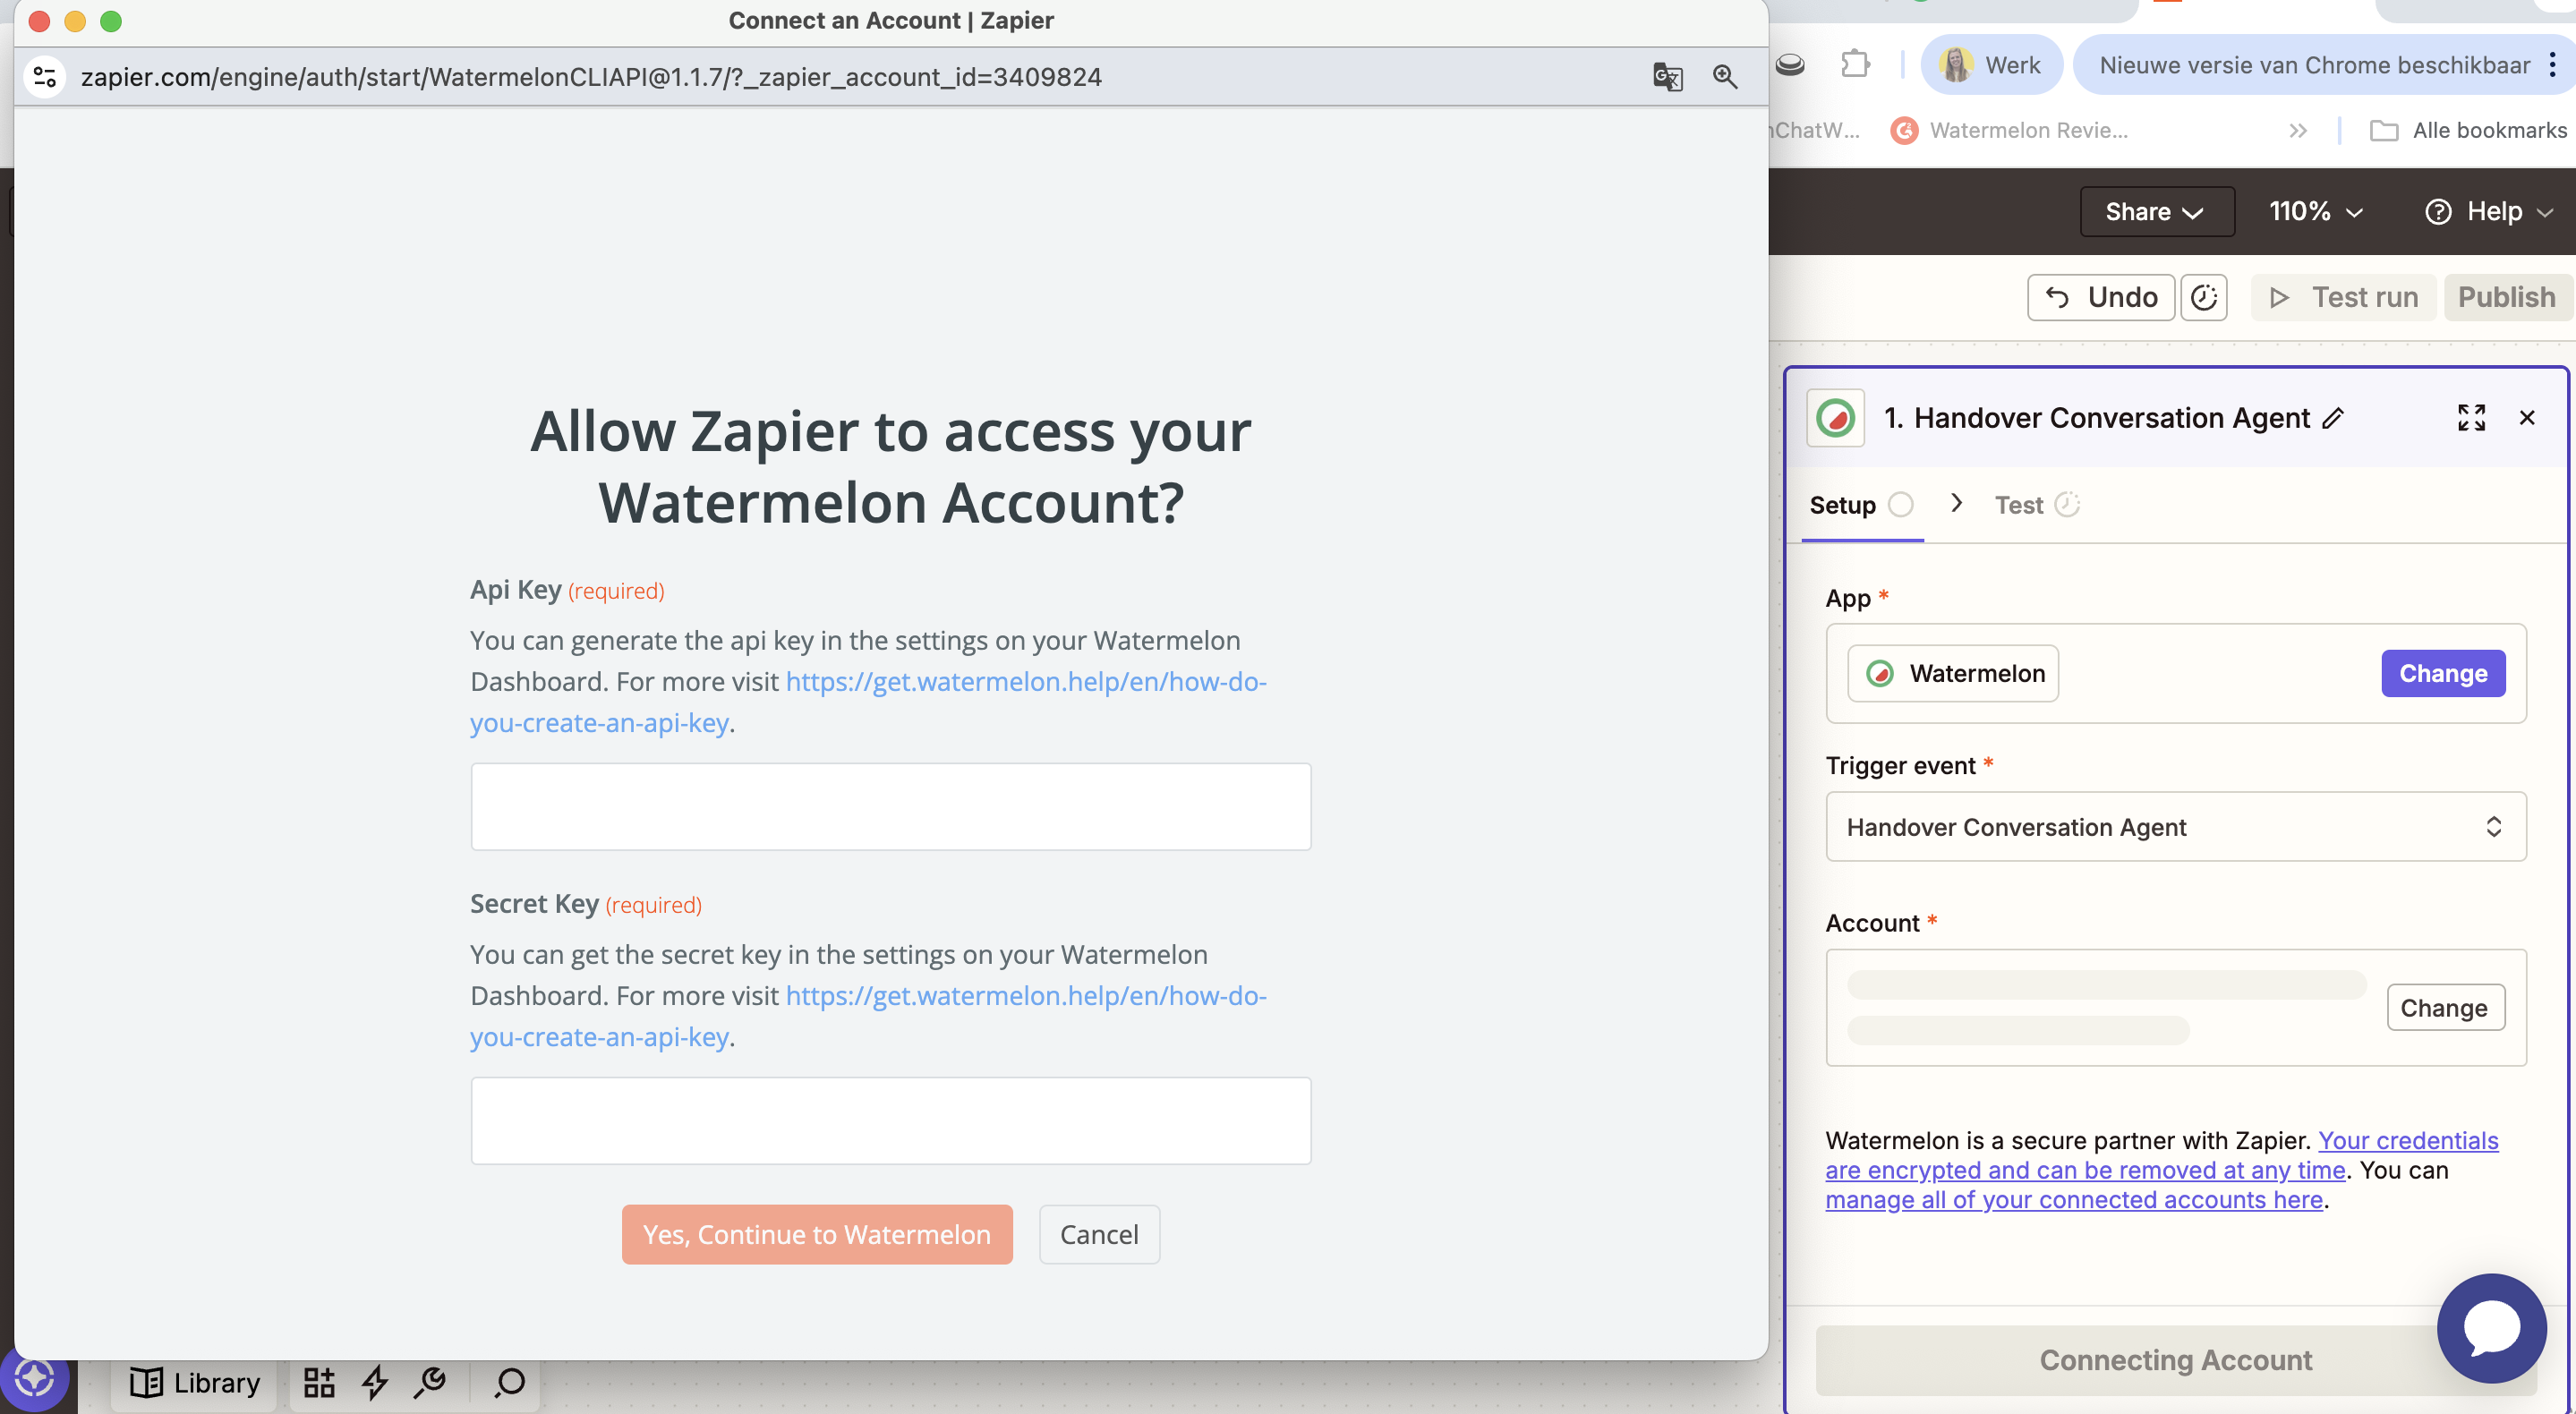 In Watermelon, go to API keys and click **Create** to create a new API key.
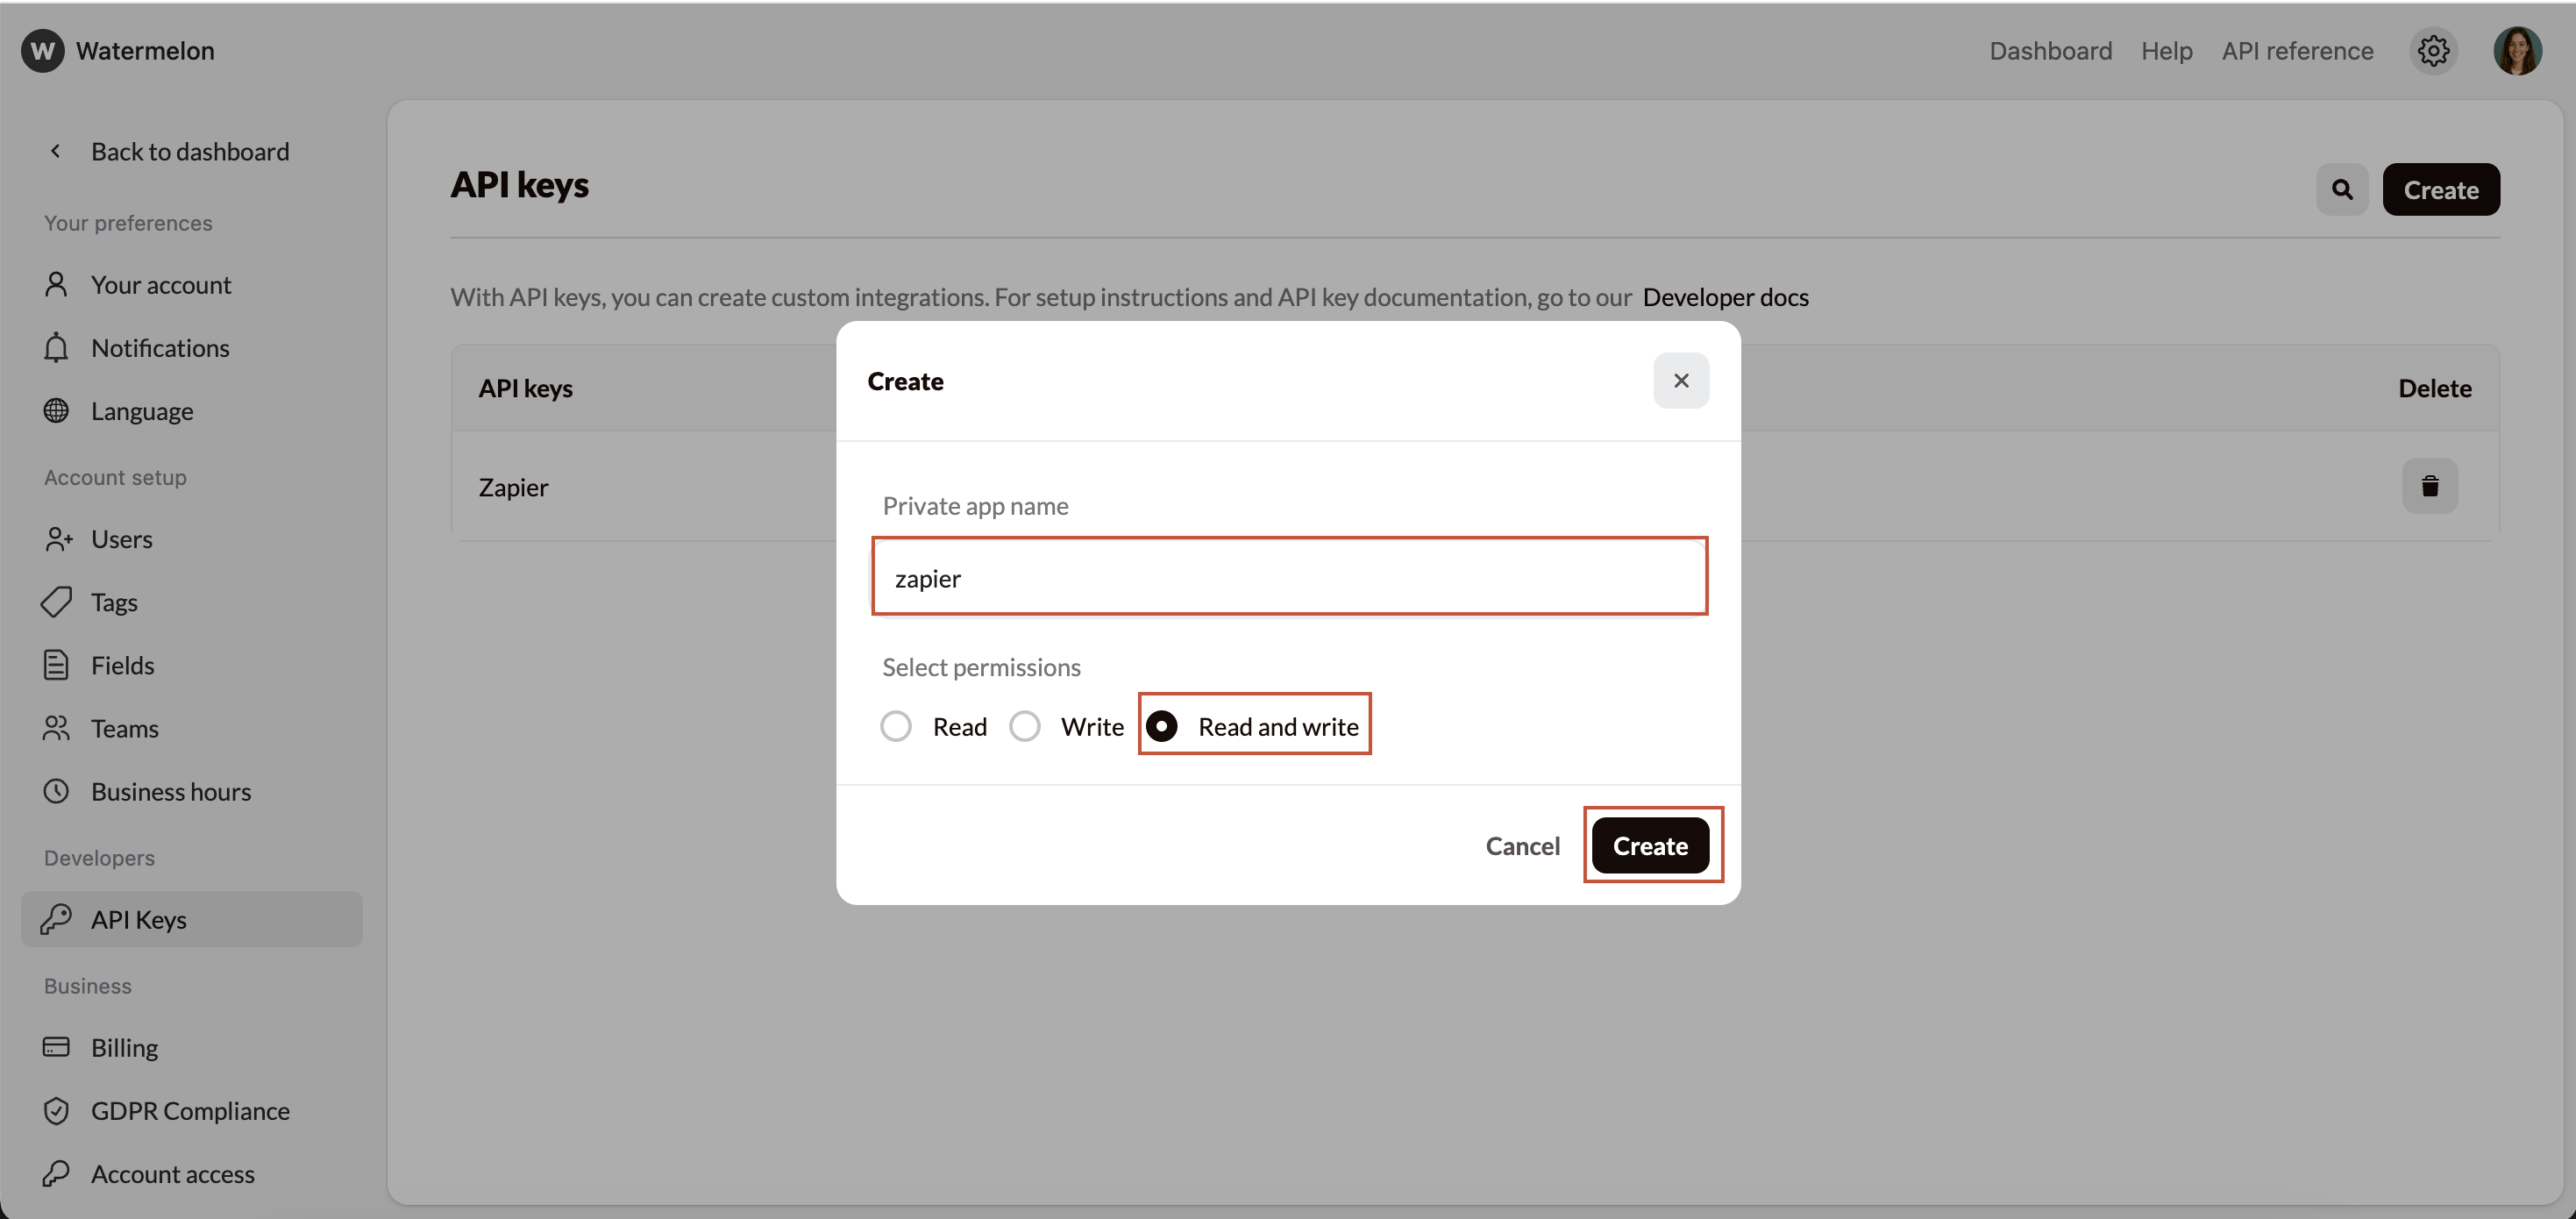
Give the API Key a name and make sure to select **Read and write**. Read and write permissions are needed so the API can collect and use the correct details.
Add the keys to the Zapier fields.
In Watermelon, go to API keys and click **Create** to create a new API key.
Give the API Key a name and make sure to select **Read and write**. Read and write permissions are needed so the API can collect and use the correct details.
Add the keys to the Zapier fields.
 In Zapier, click on continue to test the connection with Watermelon.
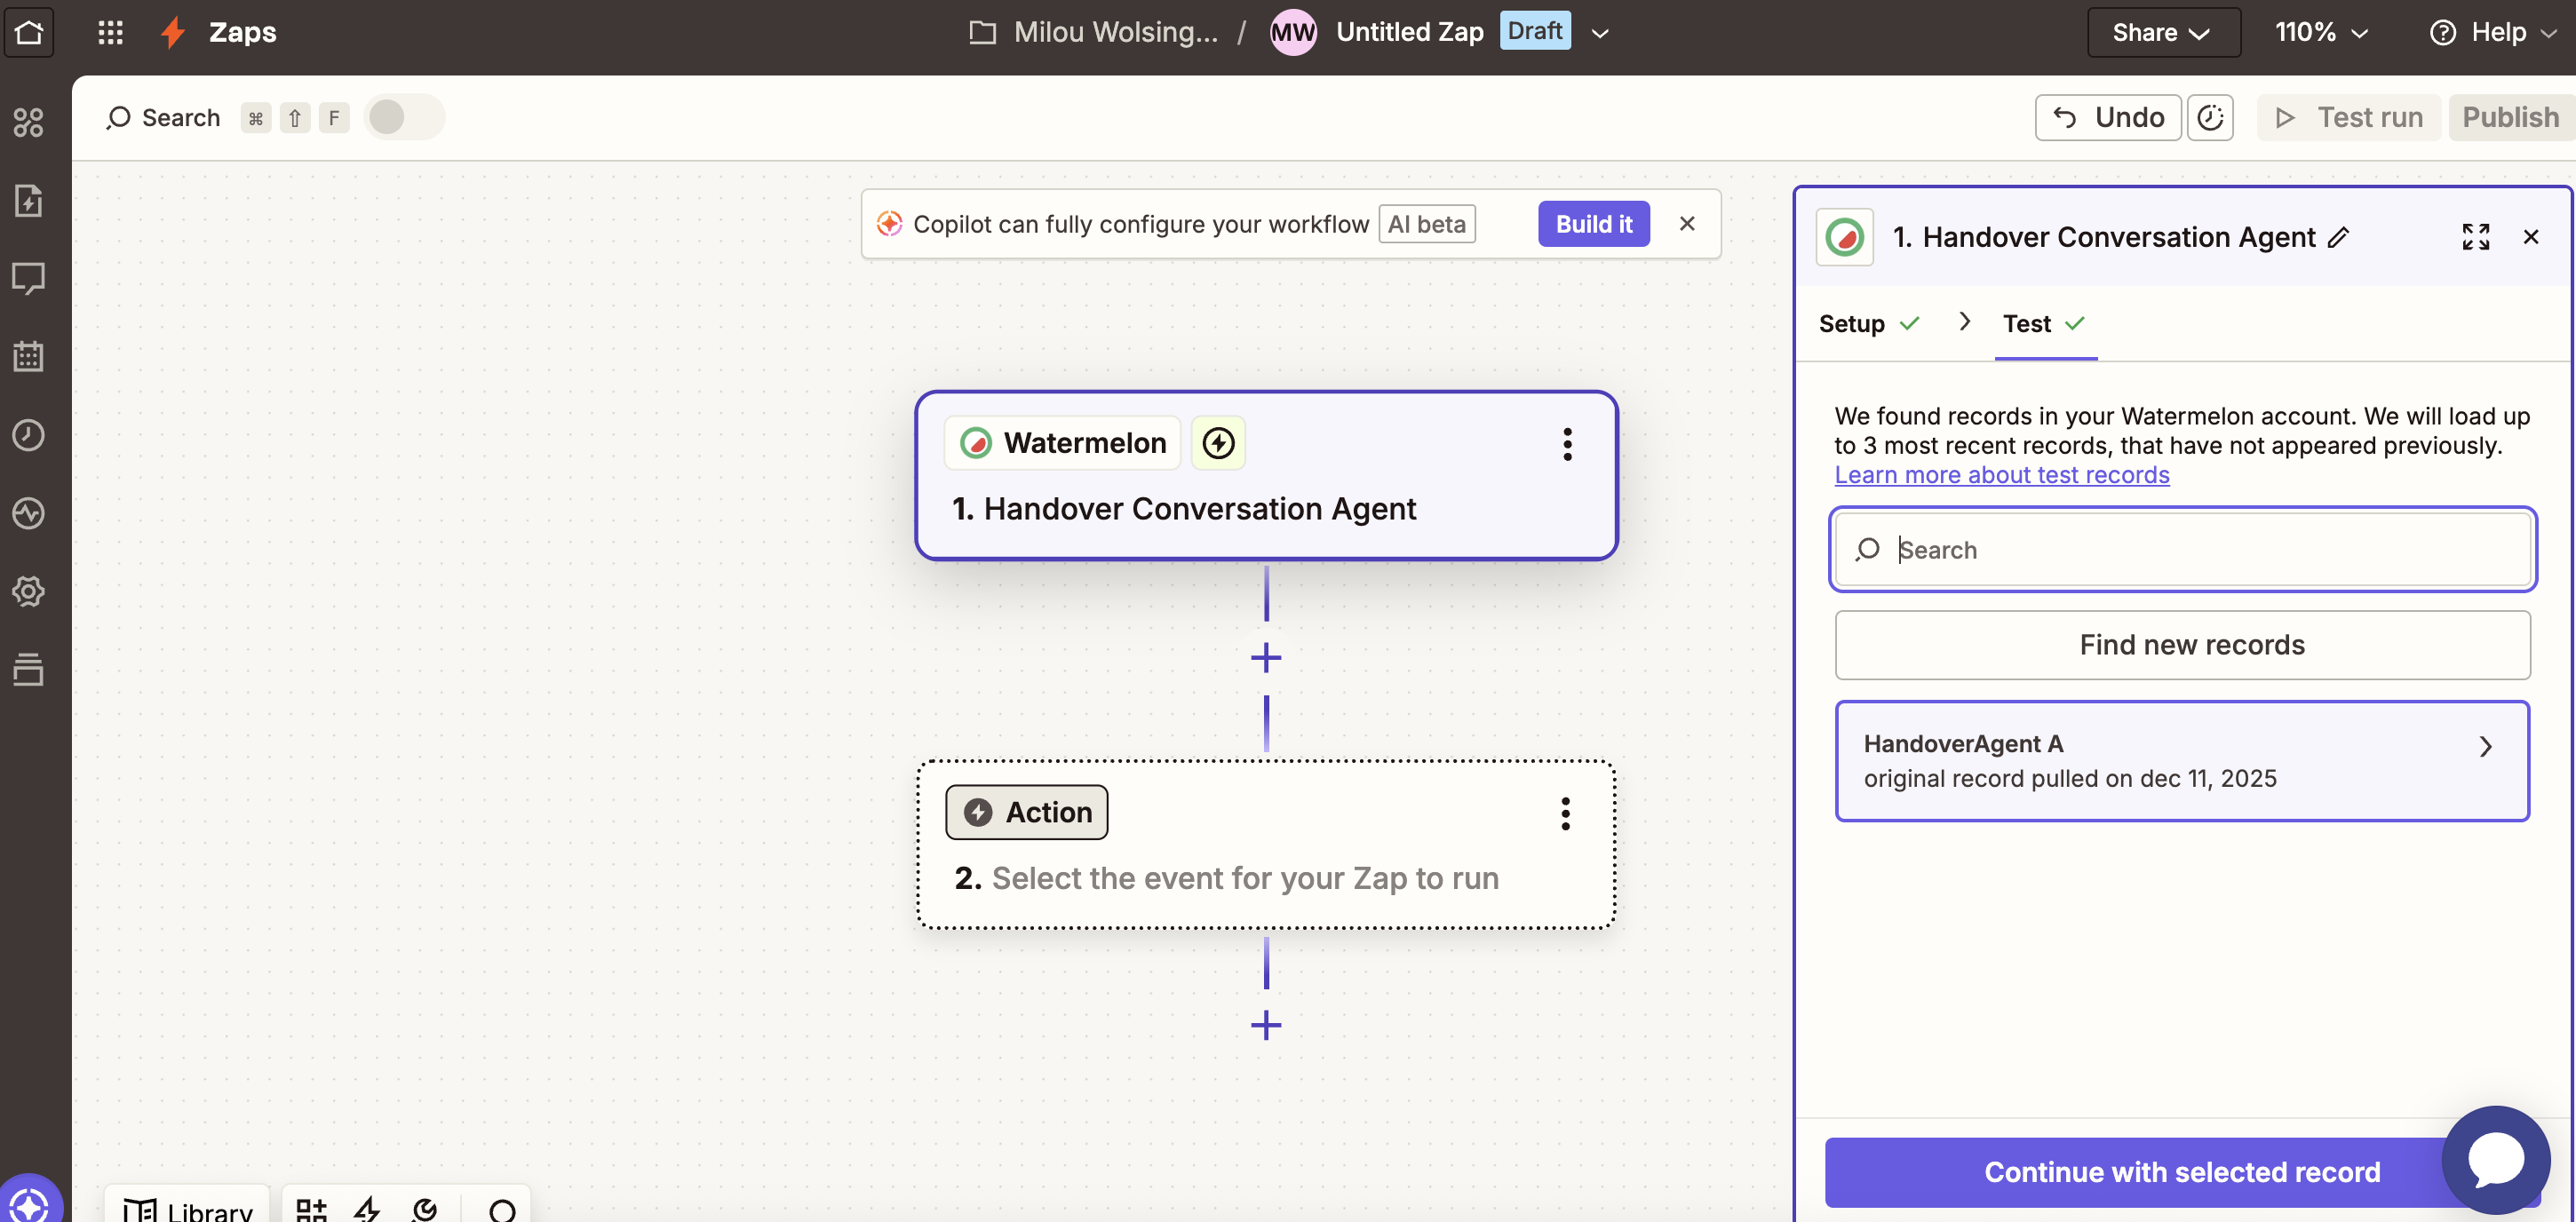 You need a conversation in your inbox to test this step. Follow these steps if no conversations are handed off:
1. Open your Chat Widget
2. Start a conversation
3. Use the Trigger word you set up in step 1 of this article.
4. After the conversation is handed off in Watermelon, click **Find new records** in Zapier.
Your new conversation should show up.
AI by Zapier is a paid service, you can also skip this step and load the full message payload into the email.
Click on the plus button to add an extra step and select **AI by Zapier**.
You need a conversation in your inbox to test this step. Follow these steps if no conversations are handed off:
1. Open your Chat Widget
2. Start a conversation
3. Use the Trigger word you set up in step 1 of this article.
4. After the conversation is handed off in Watermelon, click **Find new records** in Zapier.
Your new conversation should show up.
AI by Zapier is a paid service, you can also skip this step and load the full message payload into the email.
Click on the plus button to add an extra step and select **AI by Zapier**.
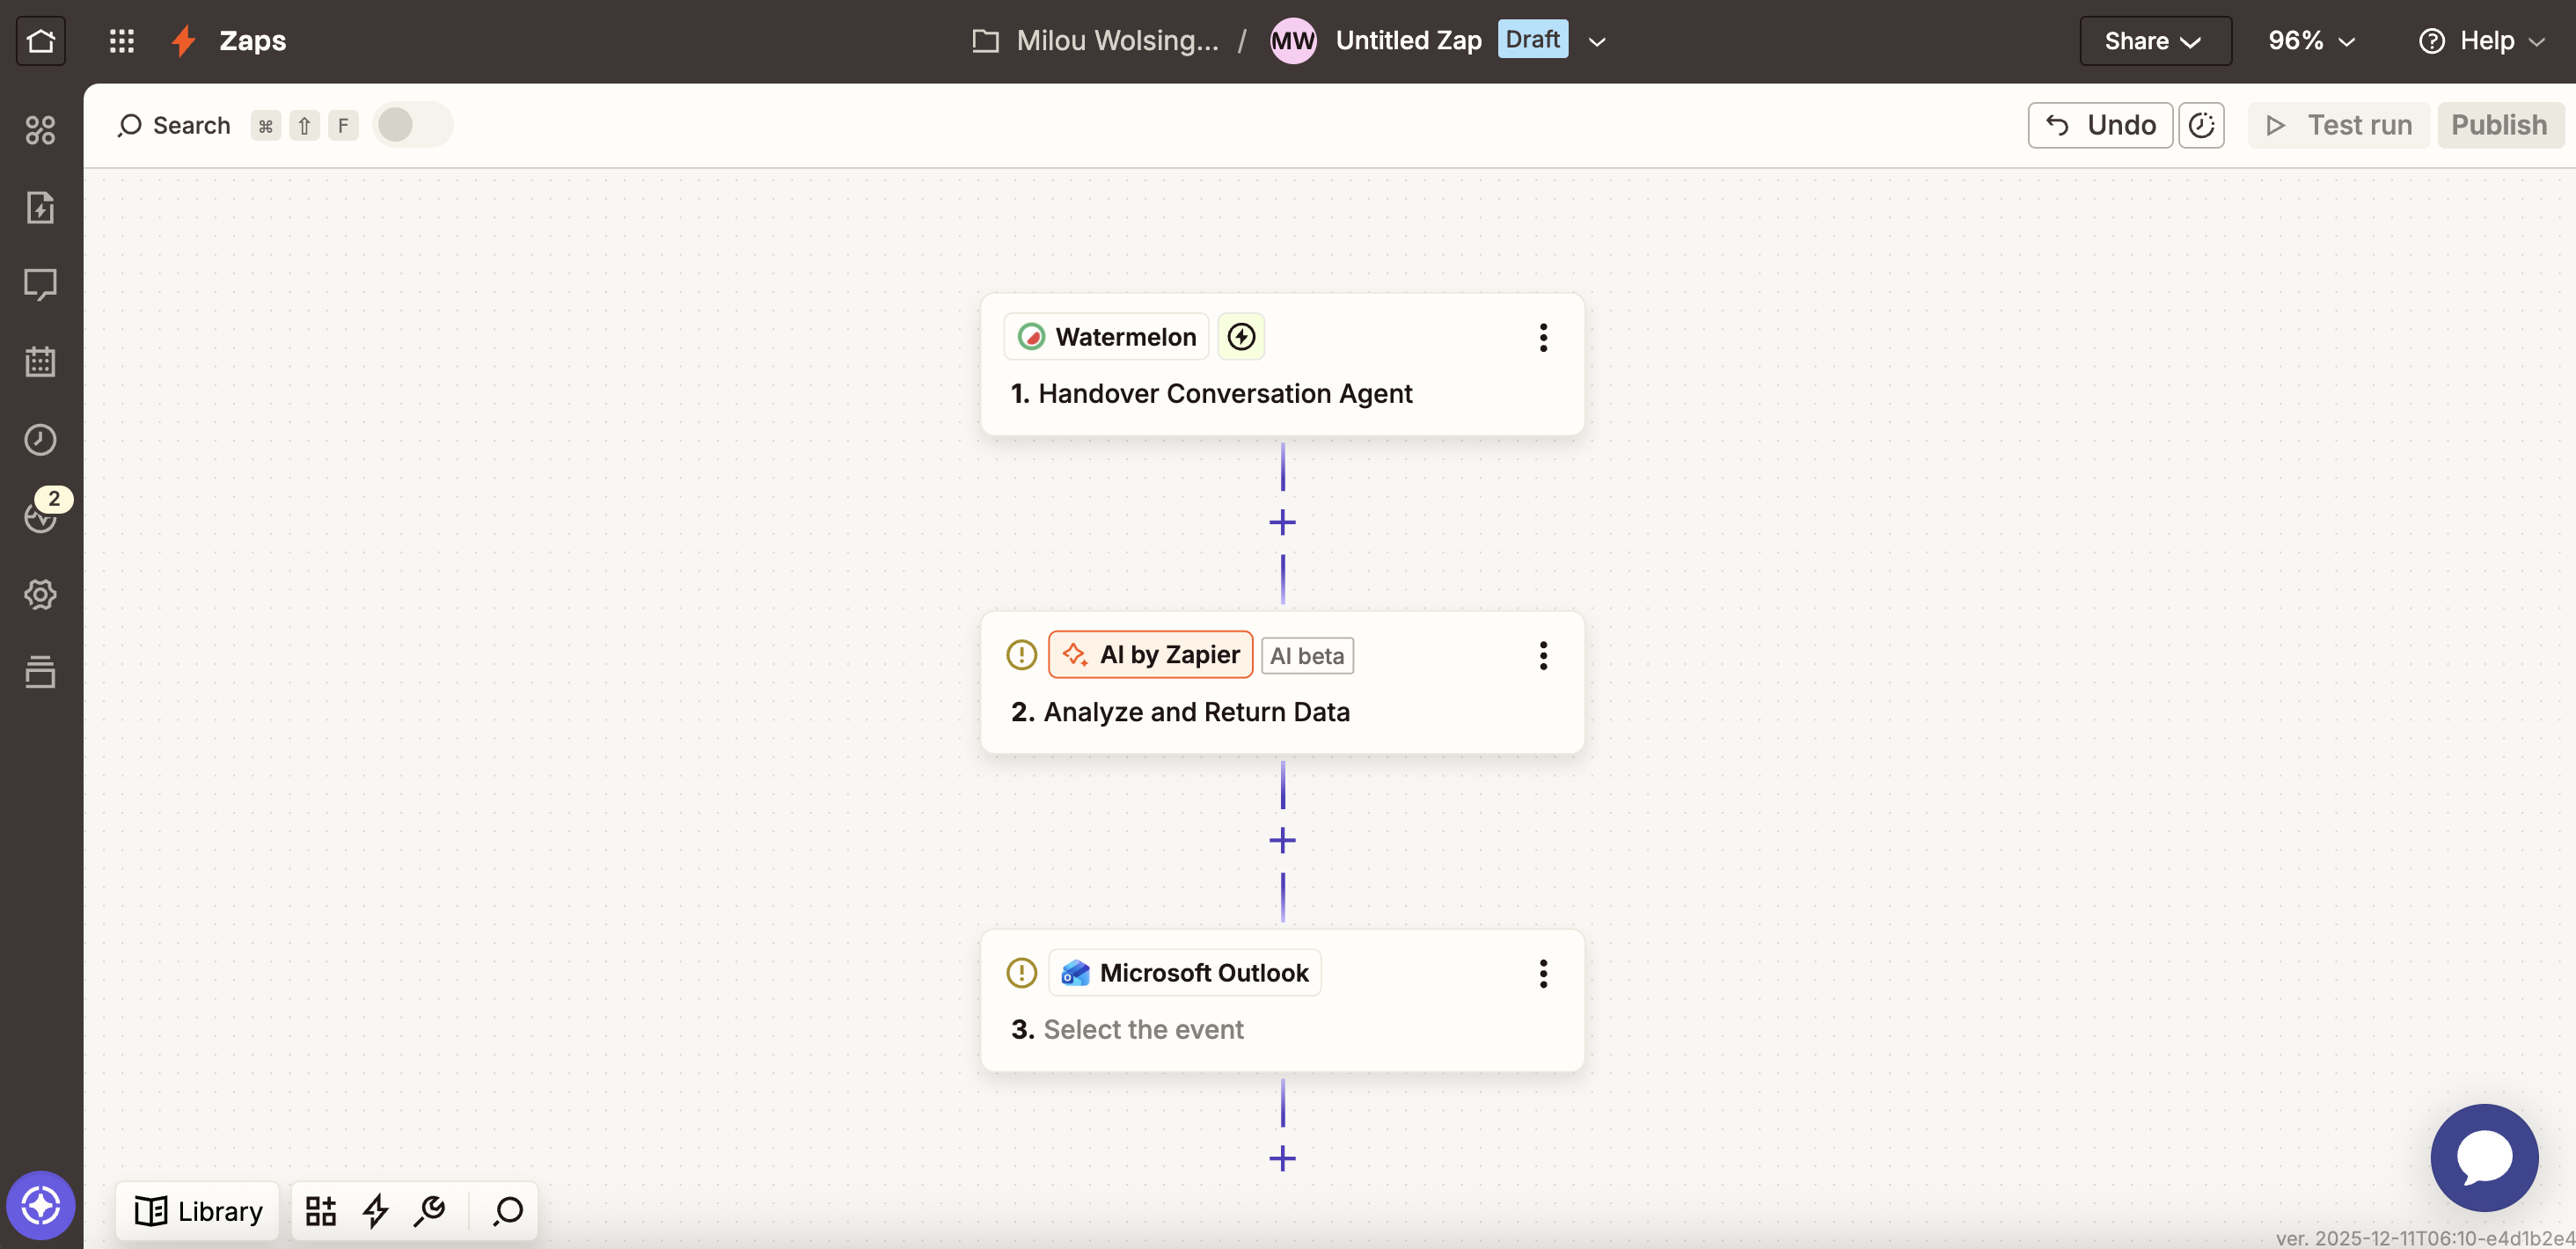 1. In the **input field**, click on the Plus button and select **Message payload**.
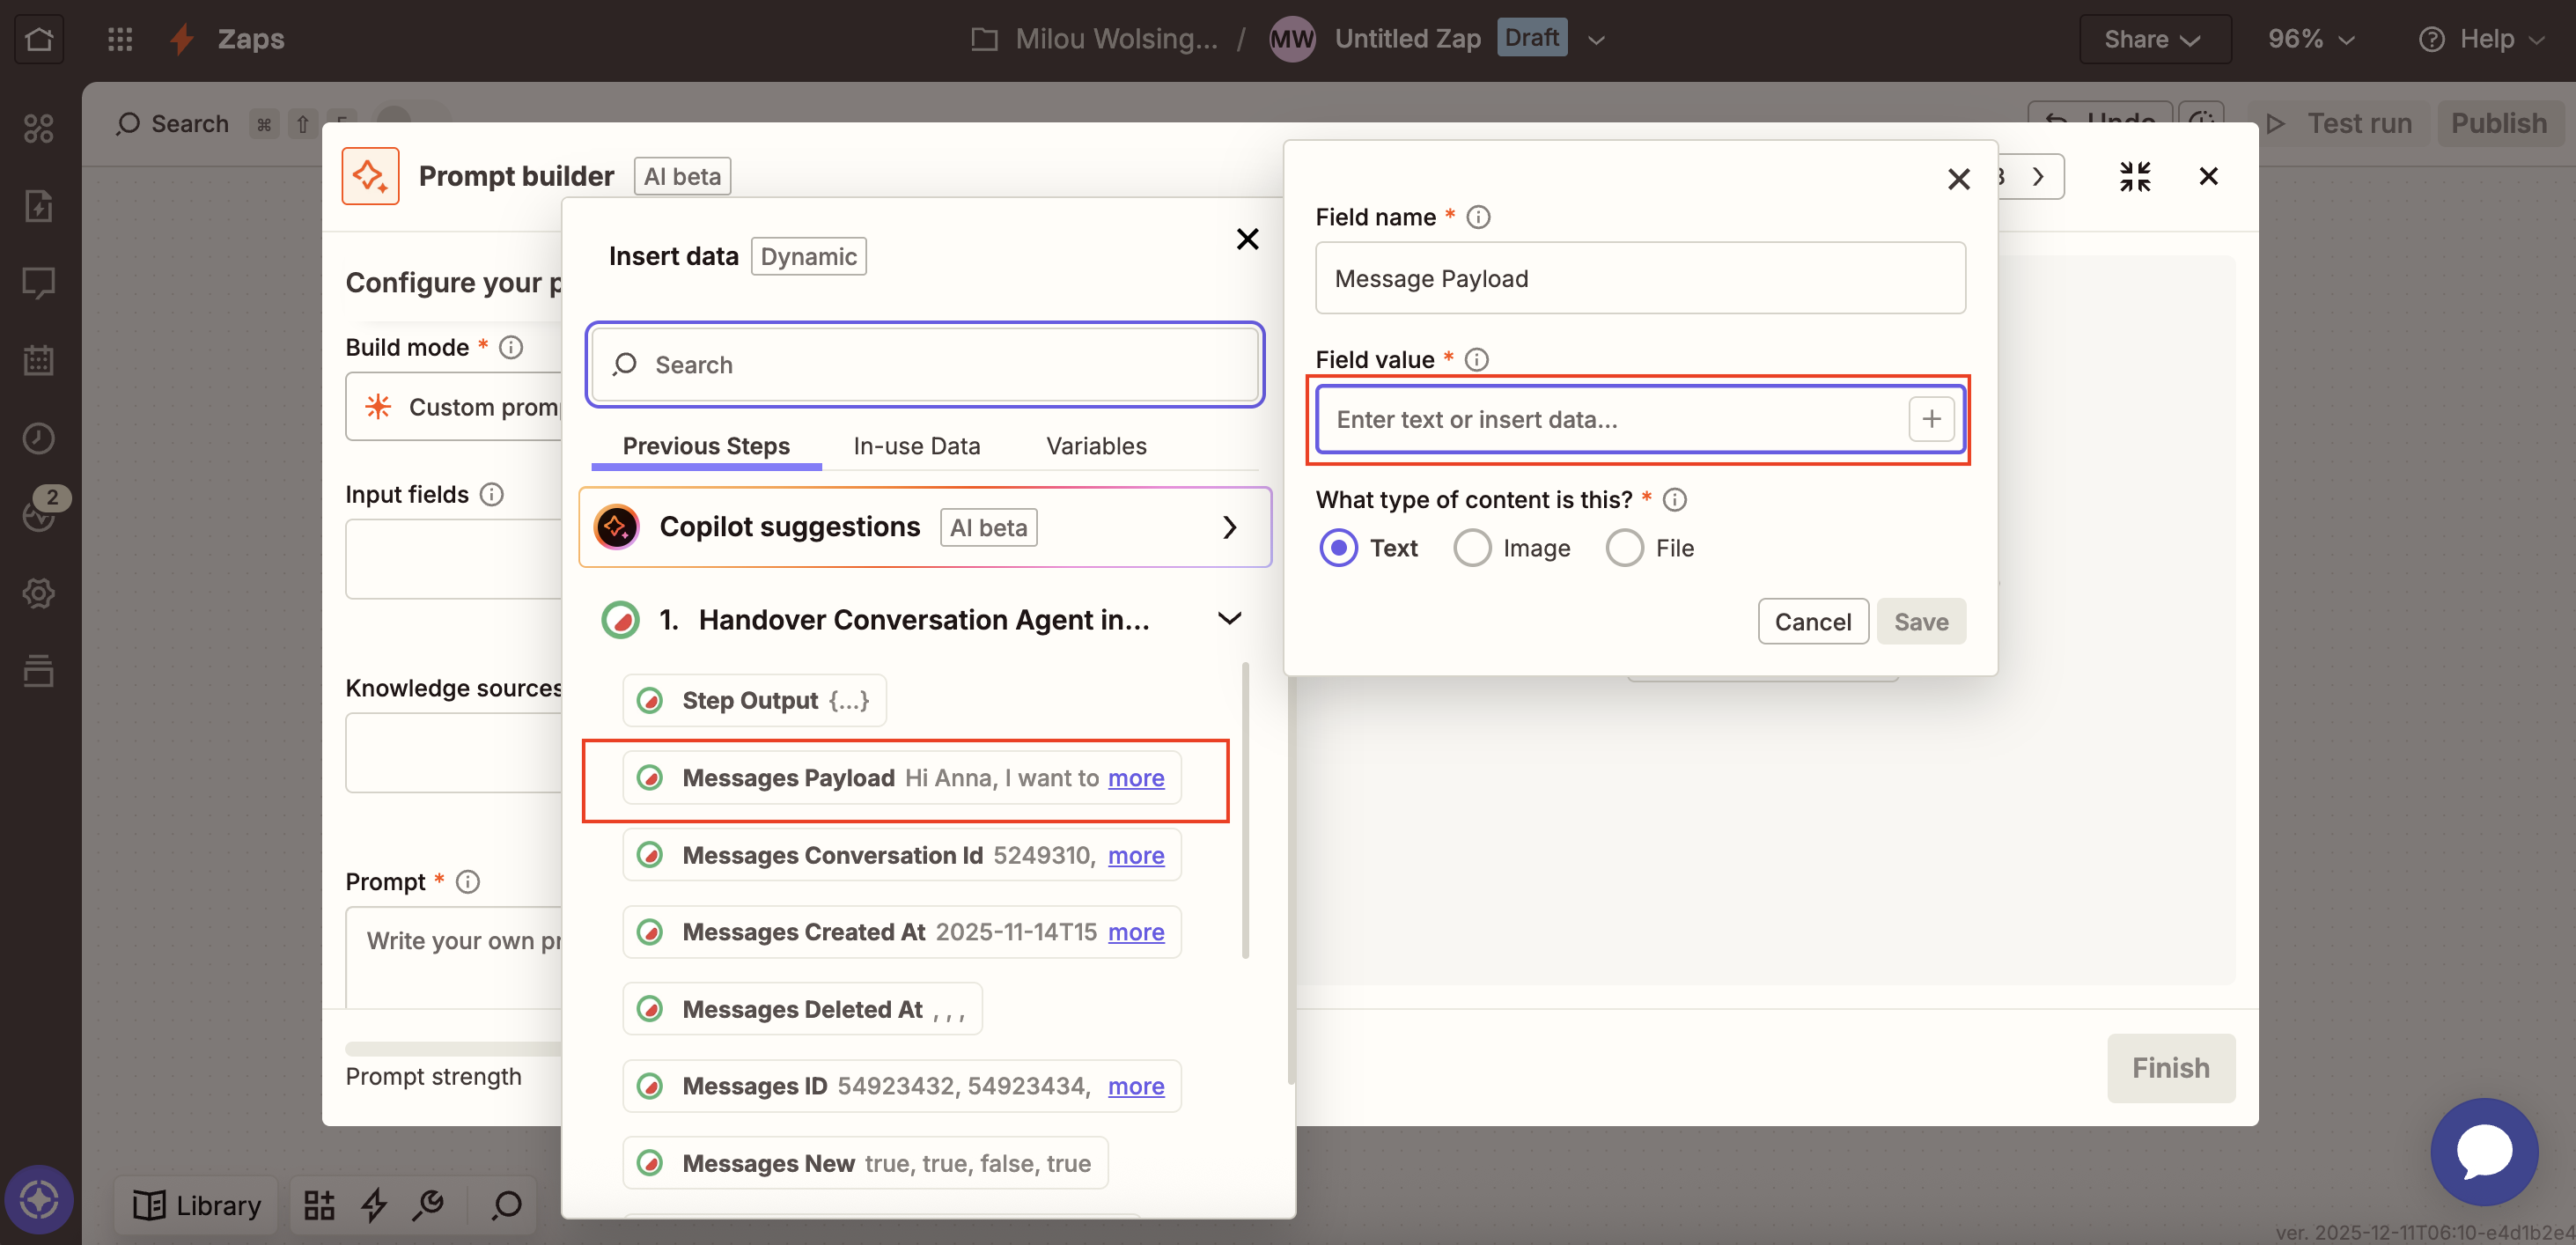 2. Add the following prompt:
> Get the details from the Message payload
2. Add the following prompt:
> Get the details from the Message payload
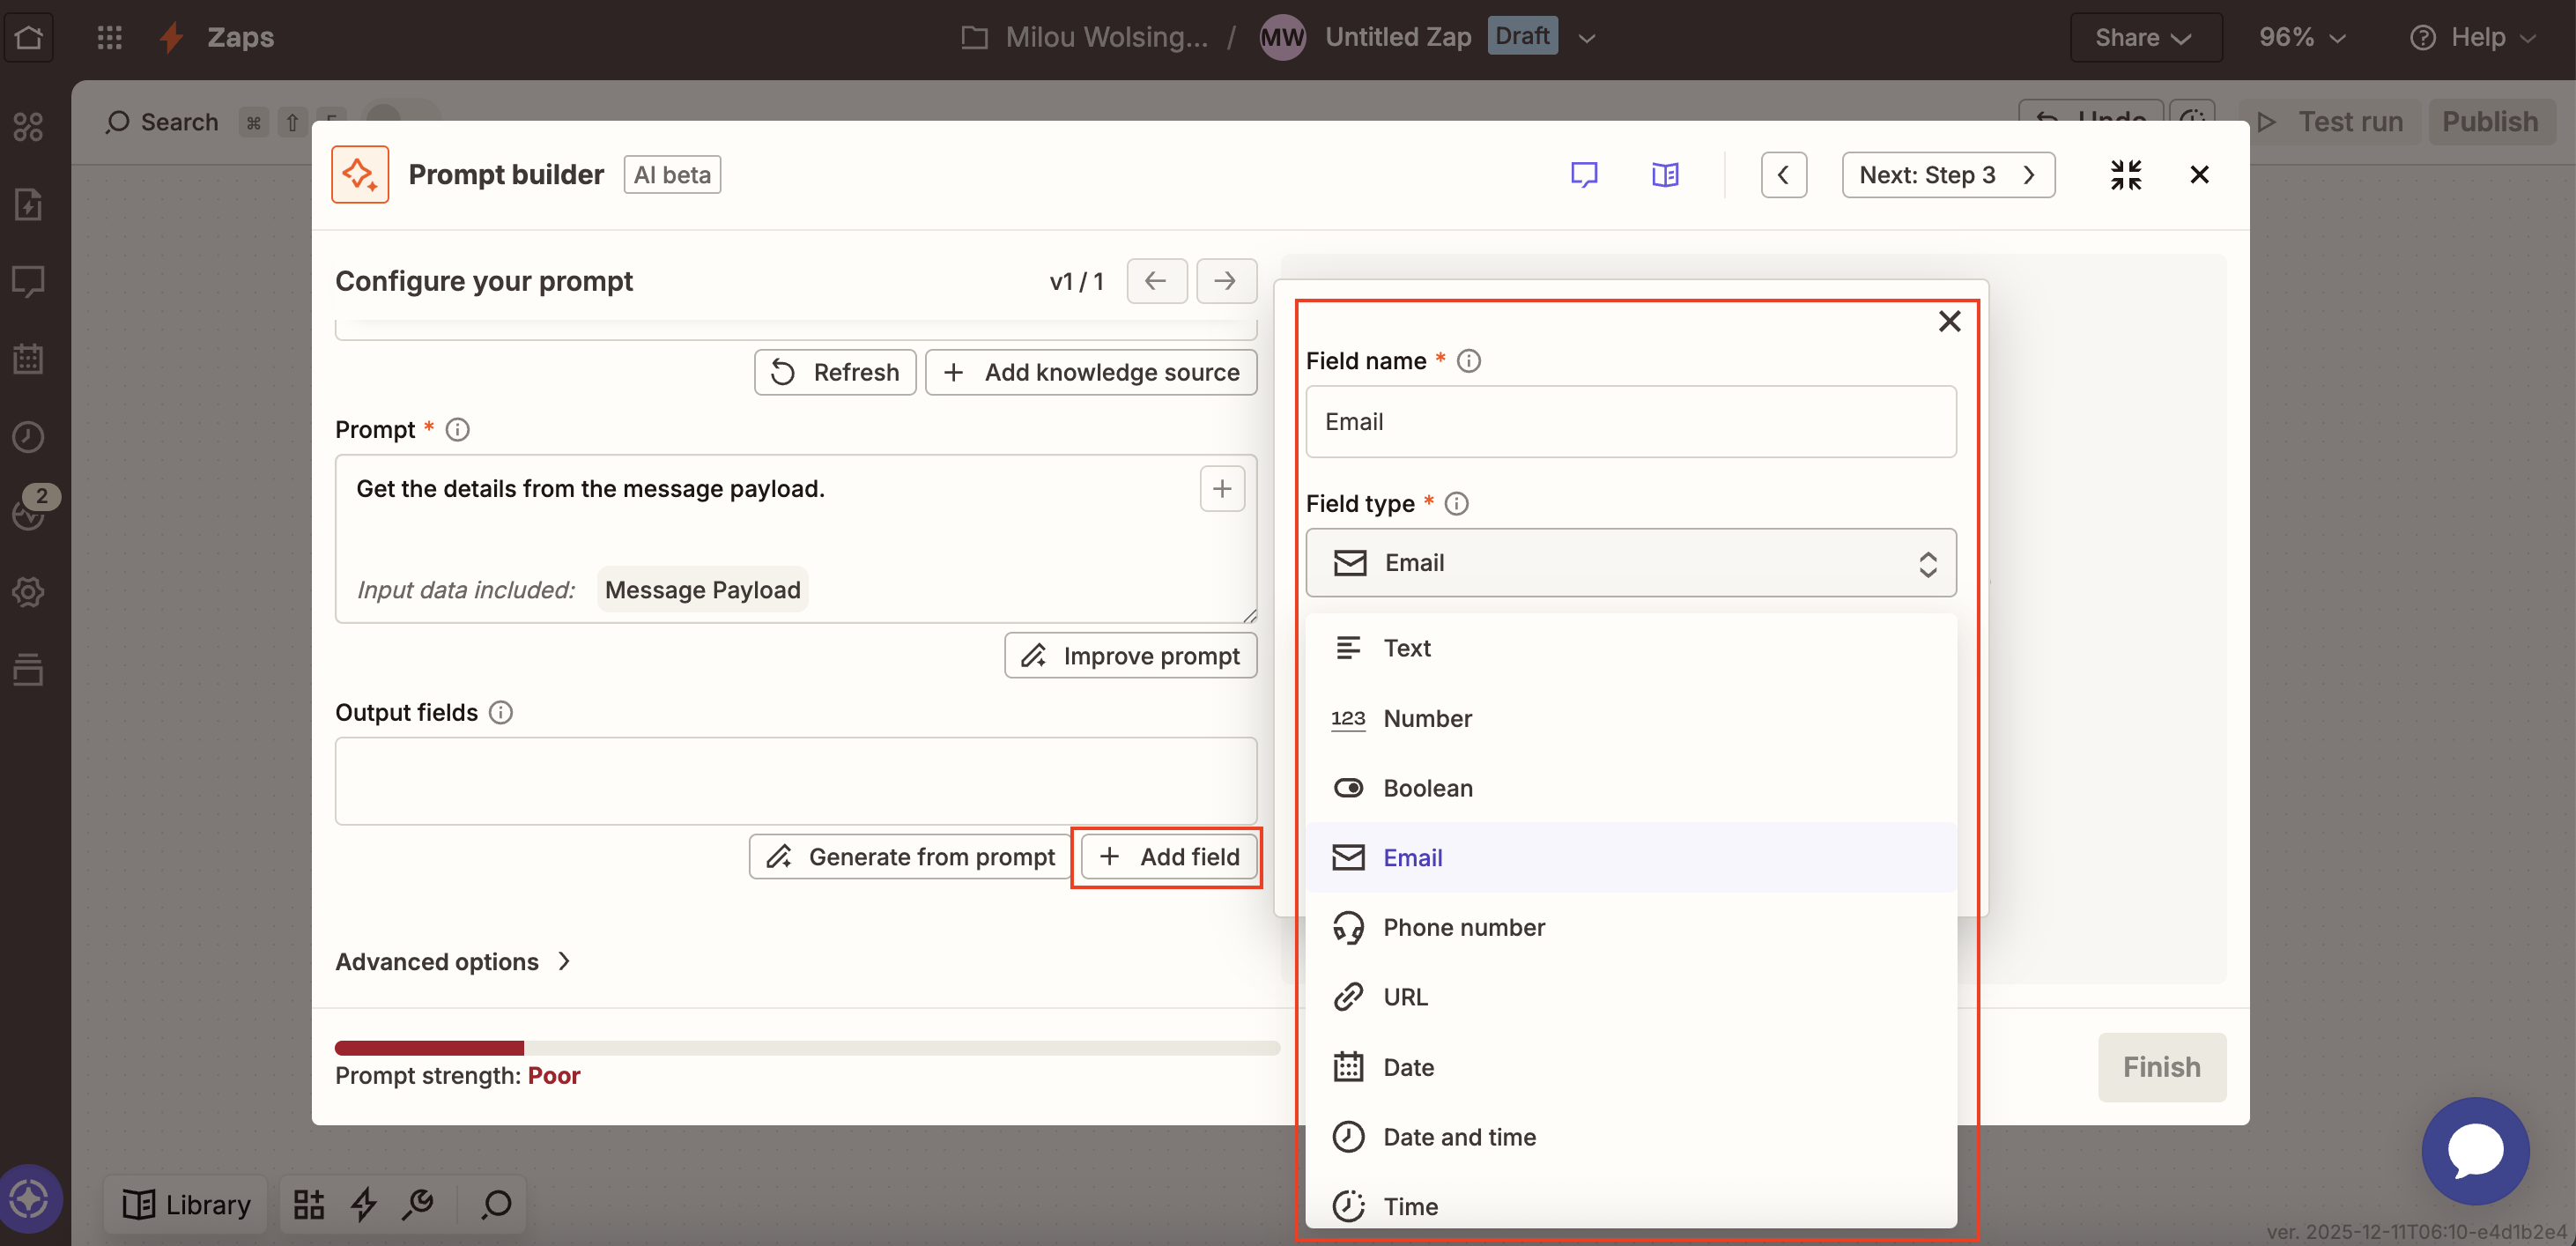
 3. At **Output fields**, click **add field**. Give the fields a name and select the field type. Repeat this for all desired data.
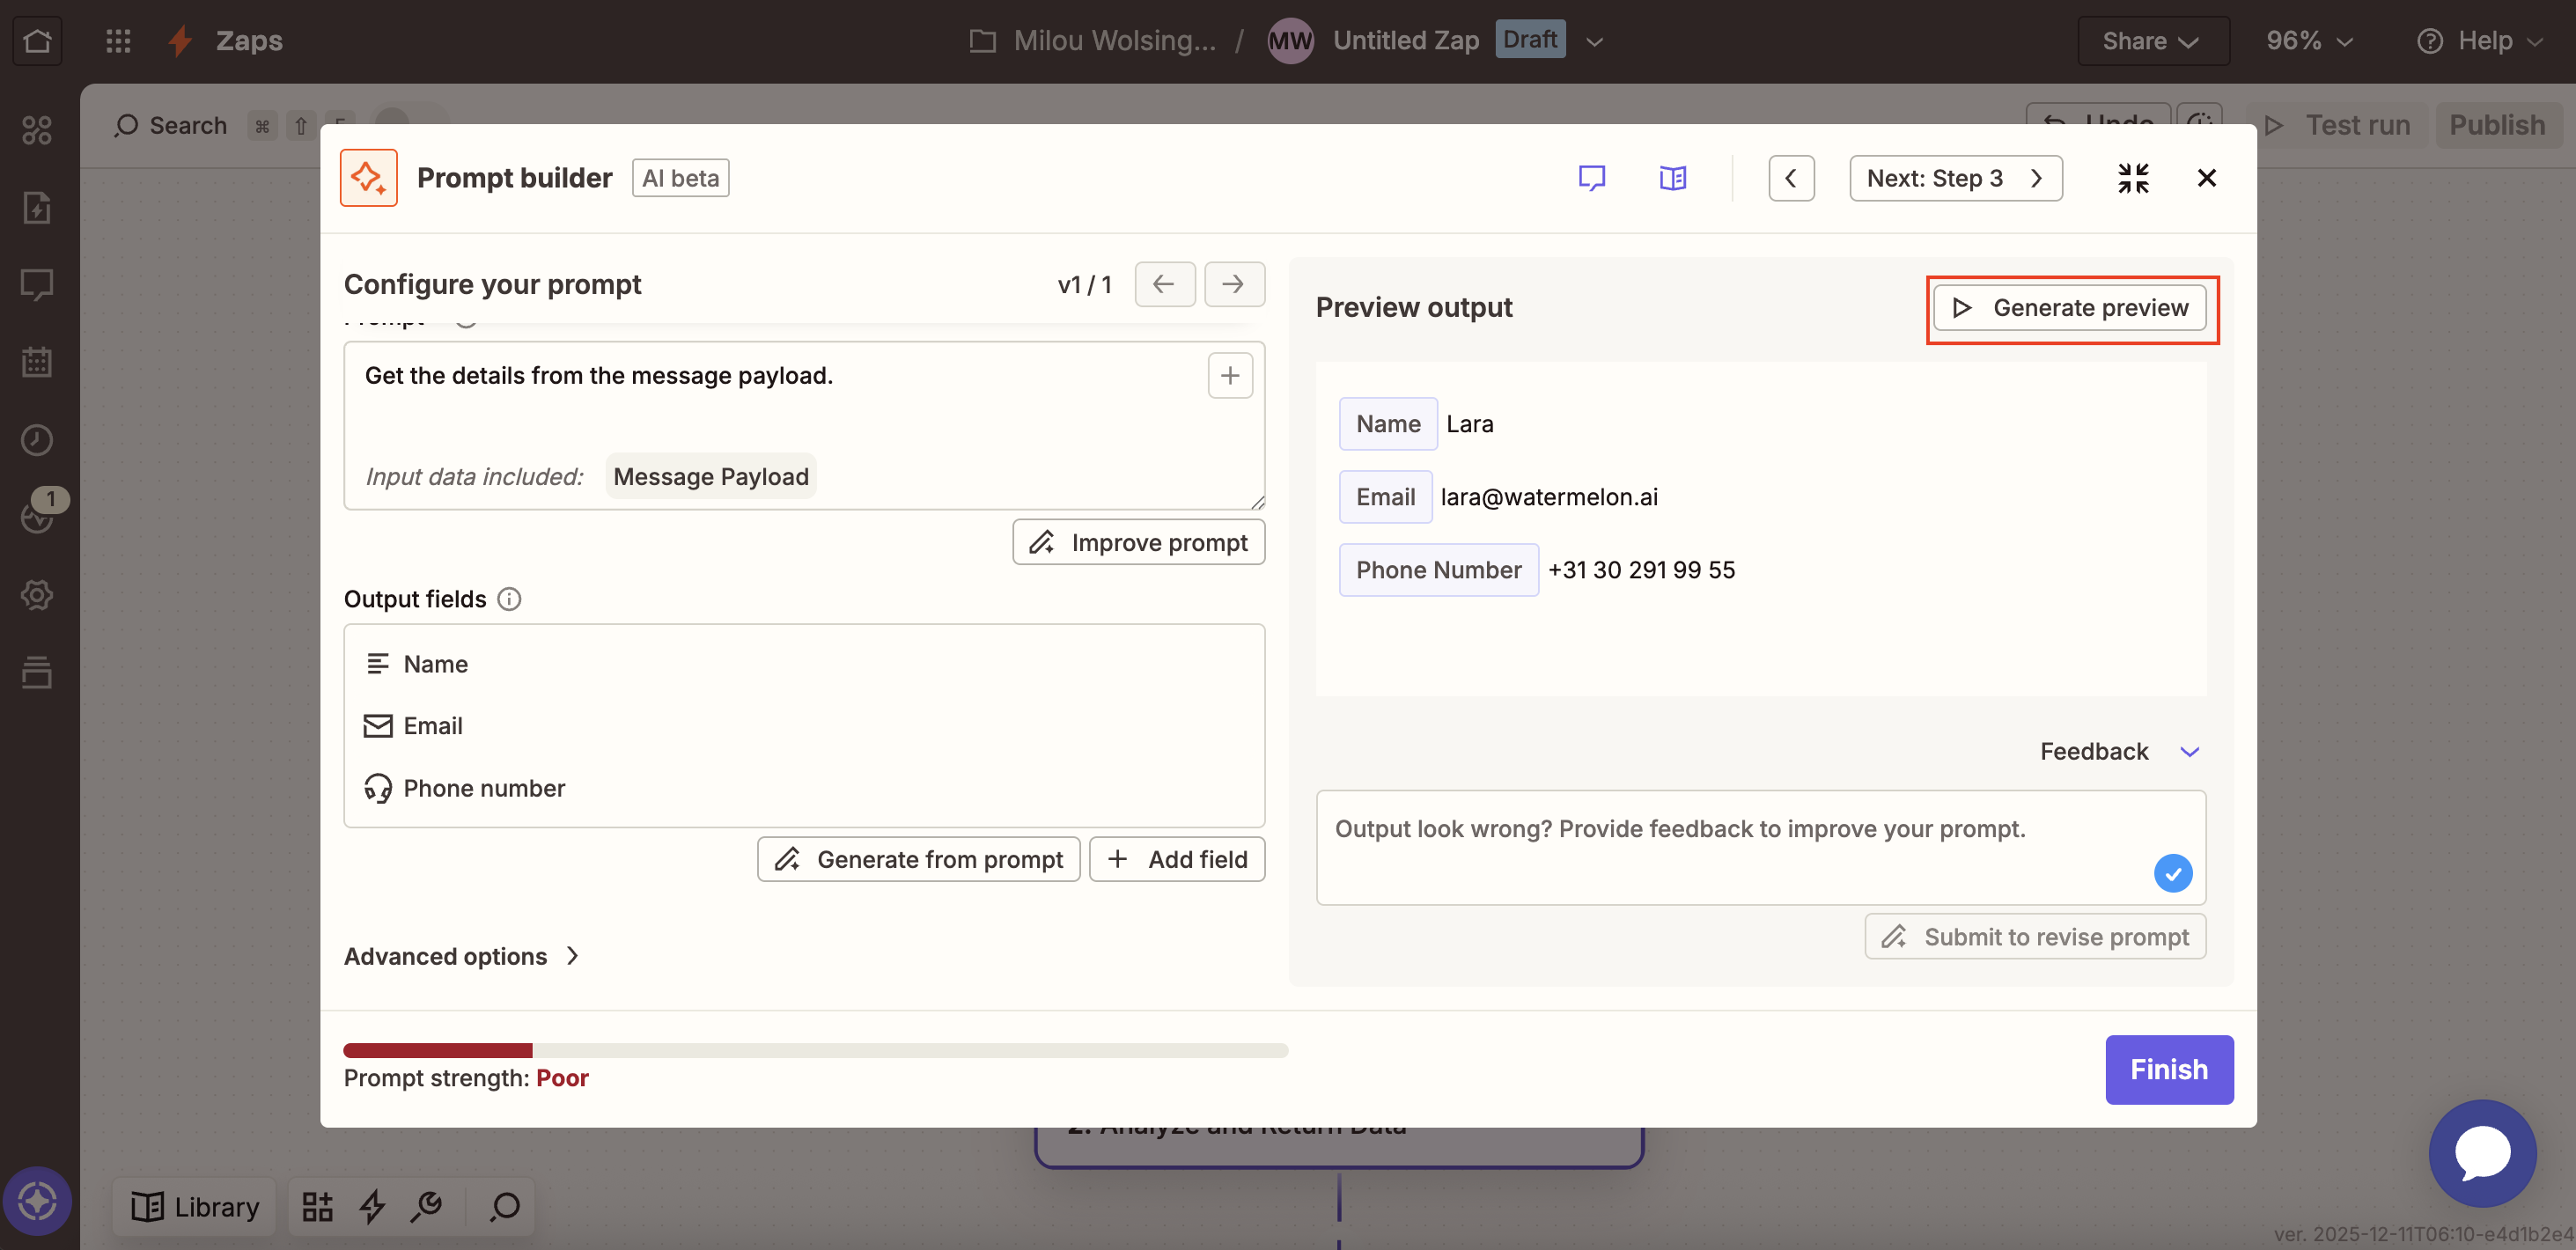
 4. Click **Generate preview** to see the outcome of your prompt and click **Finish.**
 Select your app of choice to connect, choose the Action you'd like to execute e.g. Create ticket, send email or create contact.
Which action you choose depends on how you want to follow up the chat.
Click on **Continue** and test the email step.
When the email is received correctly, you can **Publish** our workflow by clicking **Publish**.
### **Testing**
Open your AI Agent in a Chat Widget and send the Handover trigger which you set up in Watermelon. If all goes well, the desired data should now appear in the selected tool.
Congratulations! Your handover trigger is complete!
It is not possible to test the Handover in the Playground.
Select your app of choice to connect, choose the Action you'd like to execute e.g. Create ticket, send email or create contact.
Which action you choose depends on how you want to follow up the chat.
Click on **Continue** and test the email step.
When the email is received correctly, you can **Publish** our workflow by clicking **Publish**.
### **Testing**
Open your AI Agent in a Chat Widget and send the Handover trigger which you set up in Watermelon. If all goes well, the desired data should now appear in the selected tool.
Congratulations! Your handover trigger is complete!
It is not possible to test the Handover in the Playground.