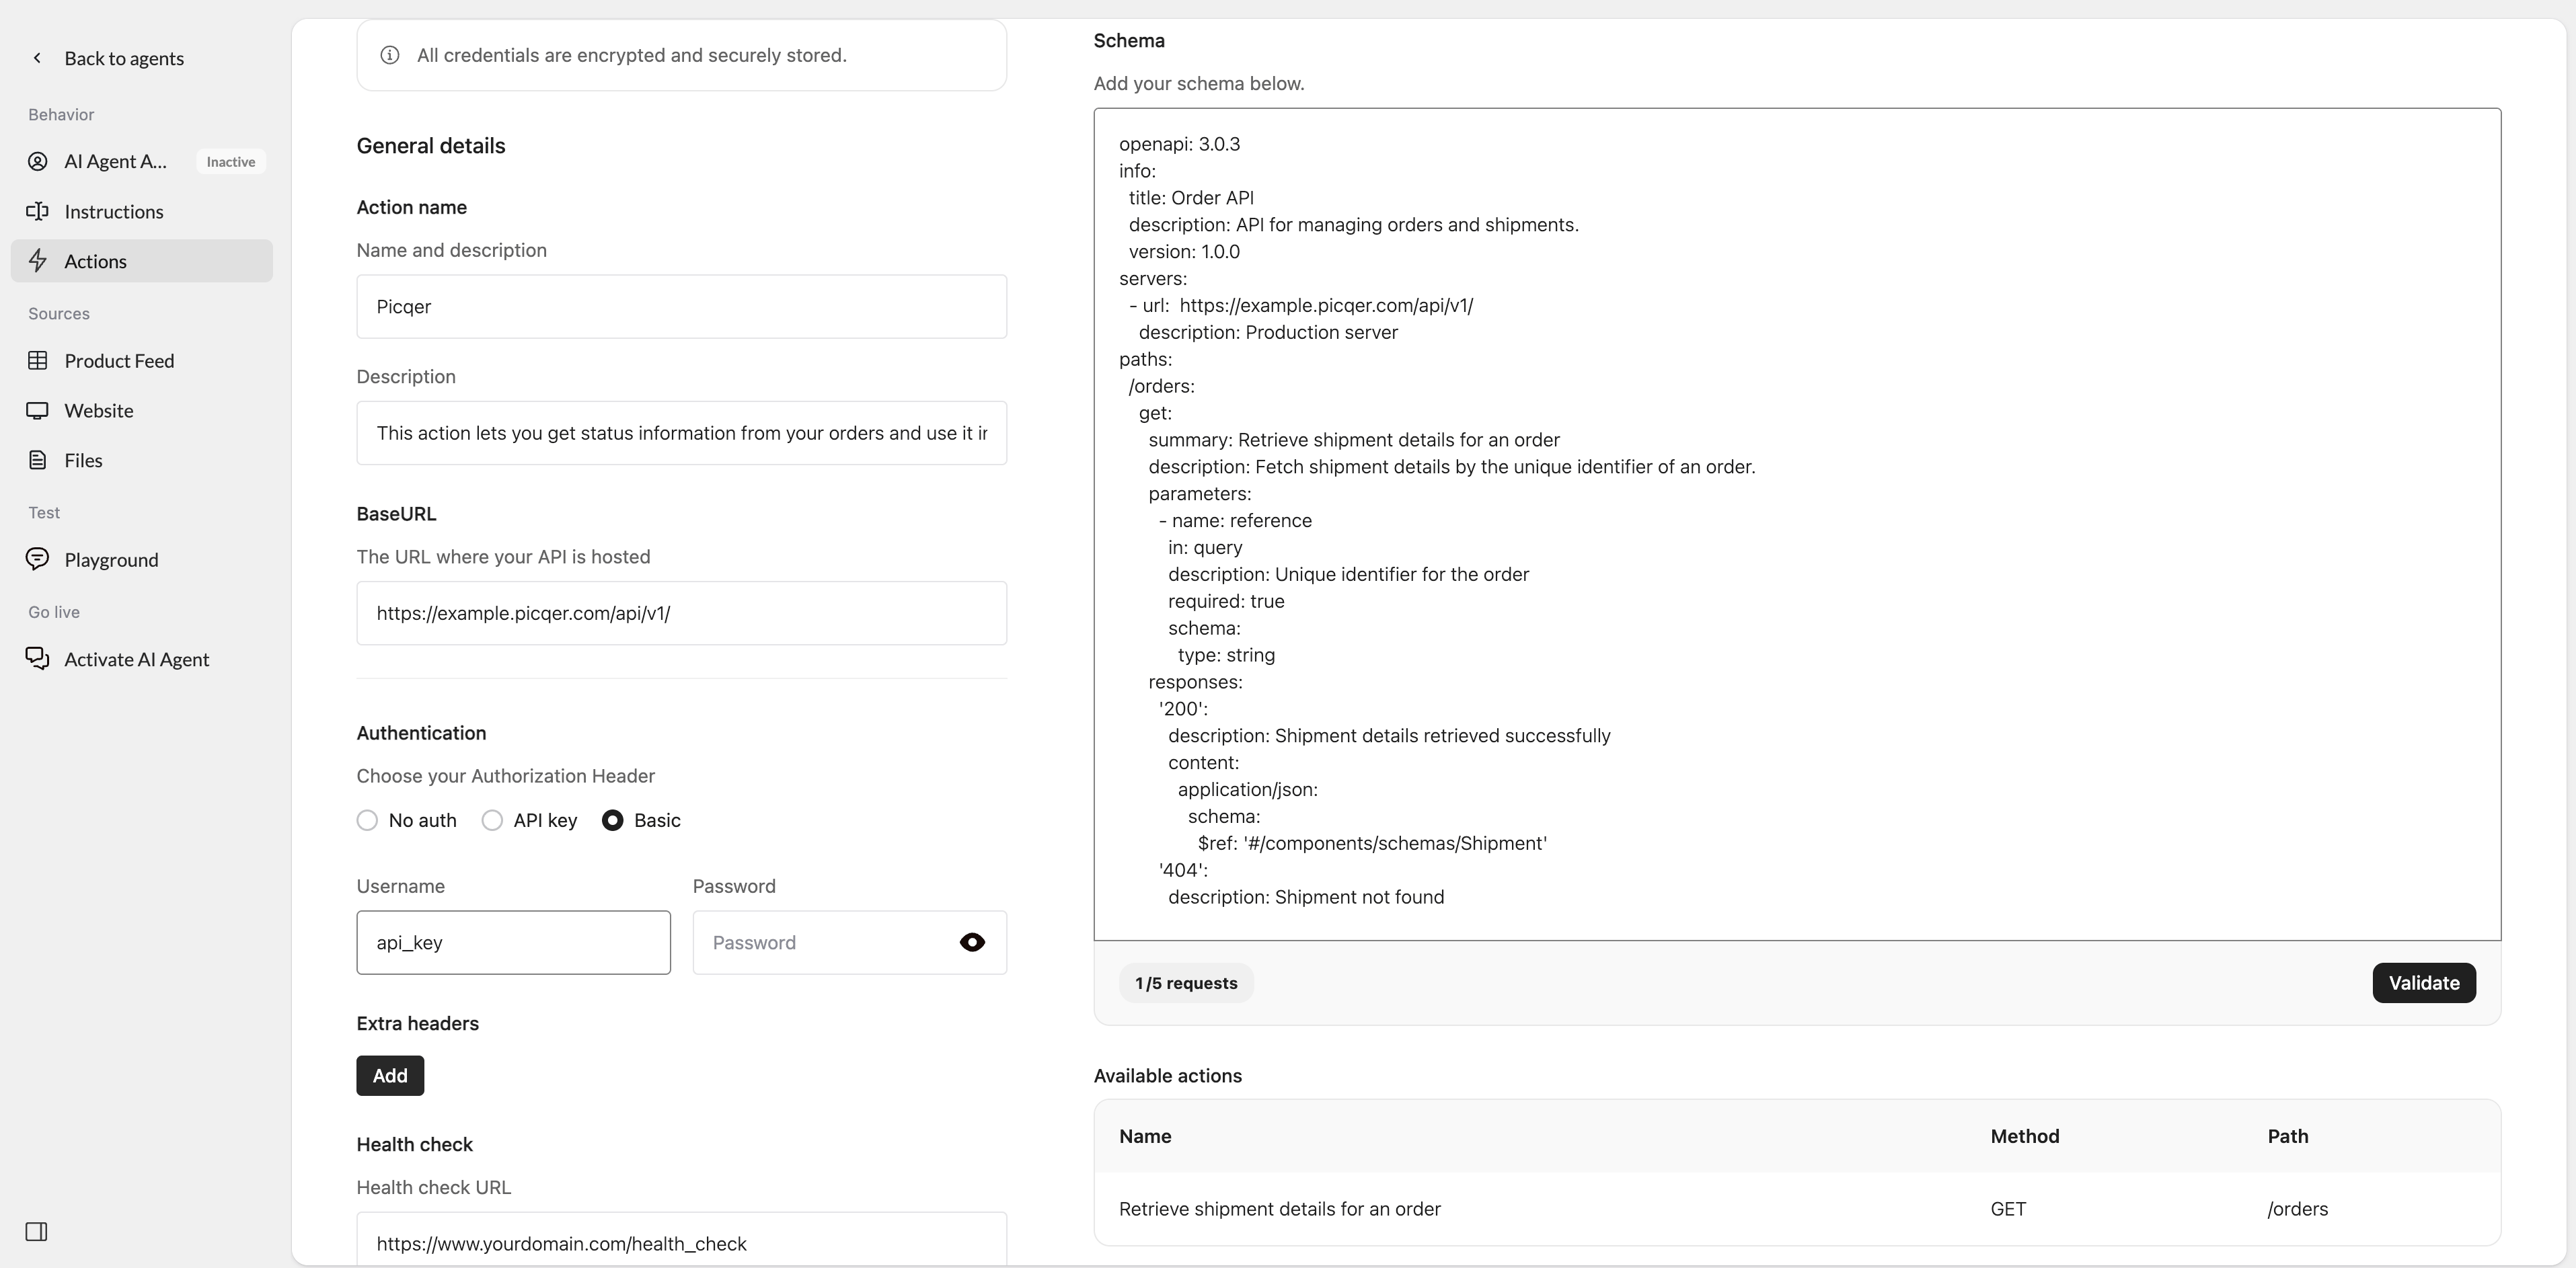
- A predefined OpenAPI schema for Picqer
- Basic authentication
- The required Picqer API BaseURL
- A health check configuration
Set up the action
- Go to Actions in Watermelon.
- In the Actions catalog, click Custom action.
- Click Create new Action.
- Fill in the fields below.
General details
Action namePicqer
DescriptionThis action lets you get status information from your orders and use it in your chatbot when customers ask for it.
BaseURLhttps://example.picqer.com/api/v1/
Replace example with your Picqer subdomain.
Authentication
For Authorization Header, select Basic. Usernameapi_key
Replace this with your Picqer API key.
PasswordLeave this field empty.
Health check
Health check URLhttps://www.yourdomain.com/health_check
Replace this URL with the health check endpoint you want Watermelon to use.
Instruction
You should respond with the following message or a similar variation: Sorry, something went wrong on our end. Can I assist you with anything else? Please let me know how I can help.
Schema
Paste the Picqer schema into the Schema field:Example in Watermelon