

- For visitors on your website – the widget appears for anyone browsing your site. Conversations will be saved in the browser via a cookie.
- For both visitors and logged-in users – the widget is available across your website and inside your platform or app. The widget will show information like customer names and previous conversations across devices.
Installing the widget for visitors on your website
Getting your Chat Widget snippet
Let’s first get your chat widget snippet, before we can place it onto your website. Follow the steps below:1
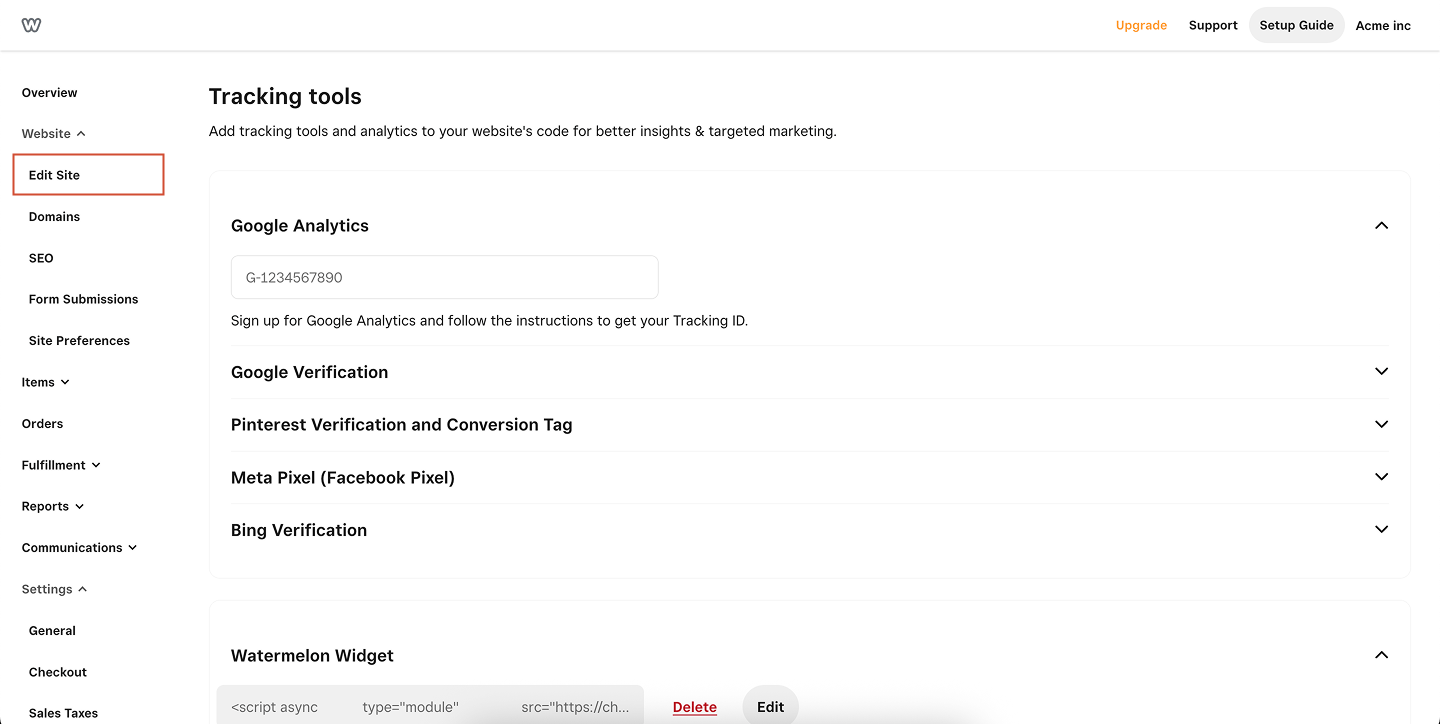
Open Integrations
Navigate to Integrations in the menu on the left-hand side of your Watermelon dashboard.
2
Open Chat Widget
Go to the section Channels, click on Chat Widget and select the widget you want to place on your website.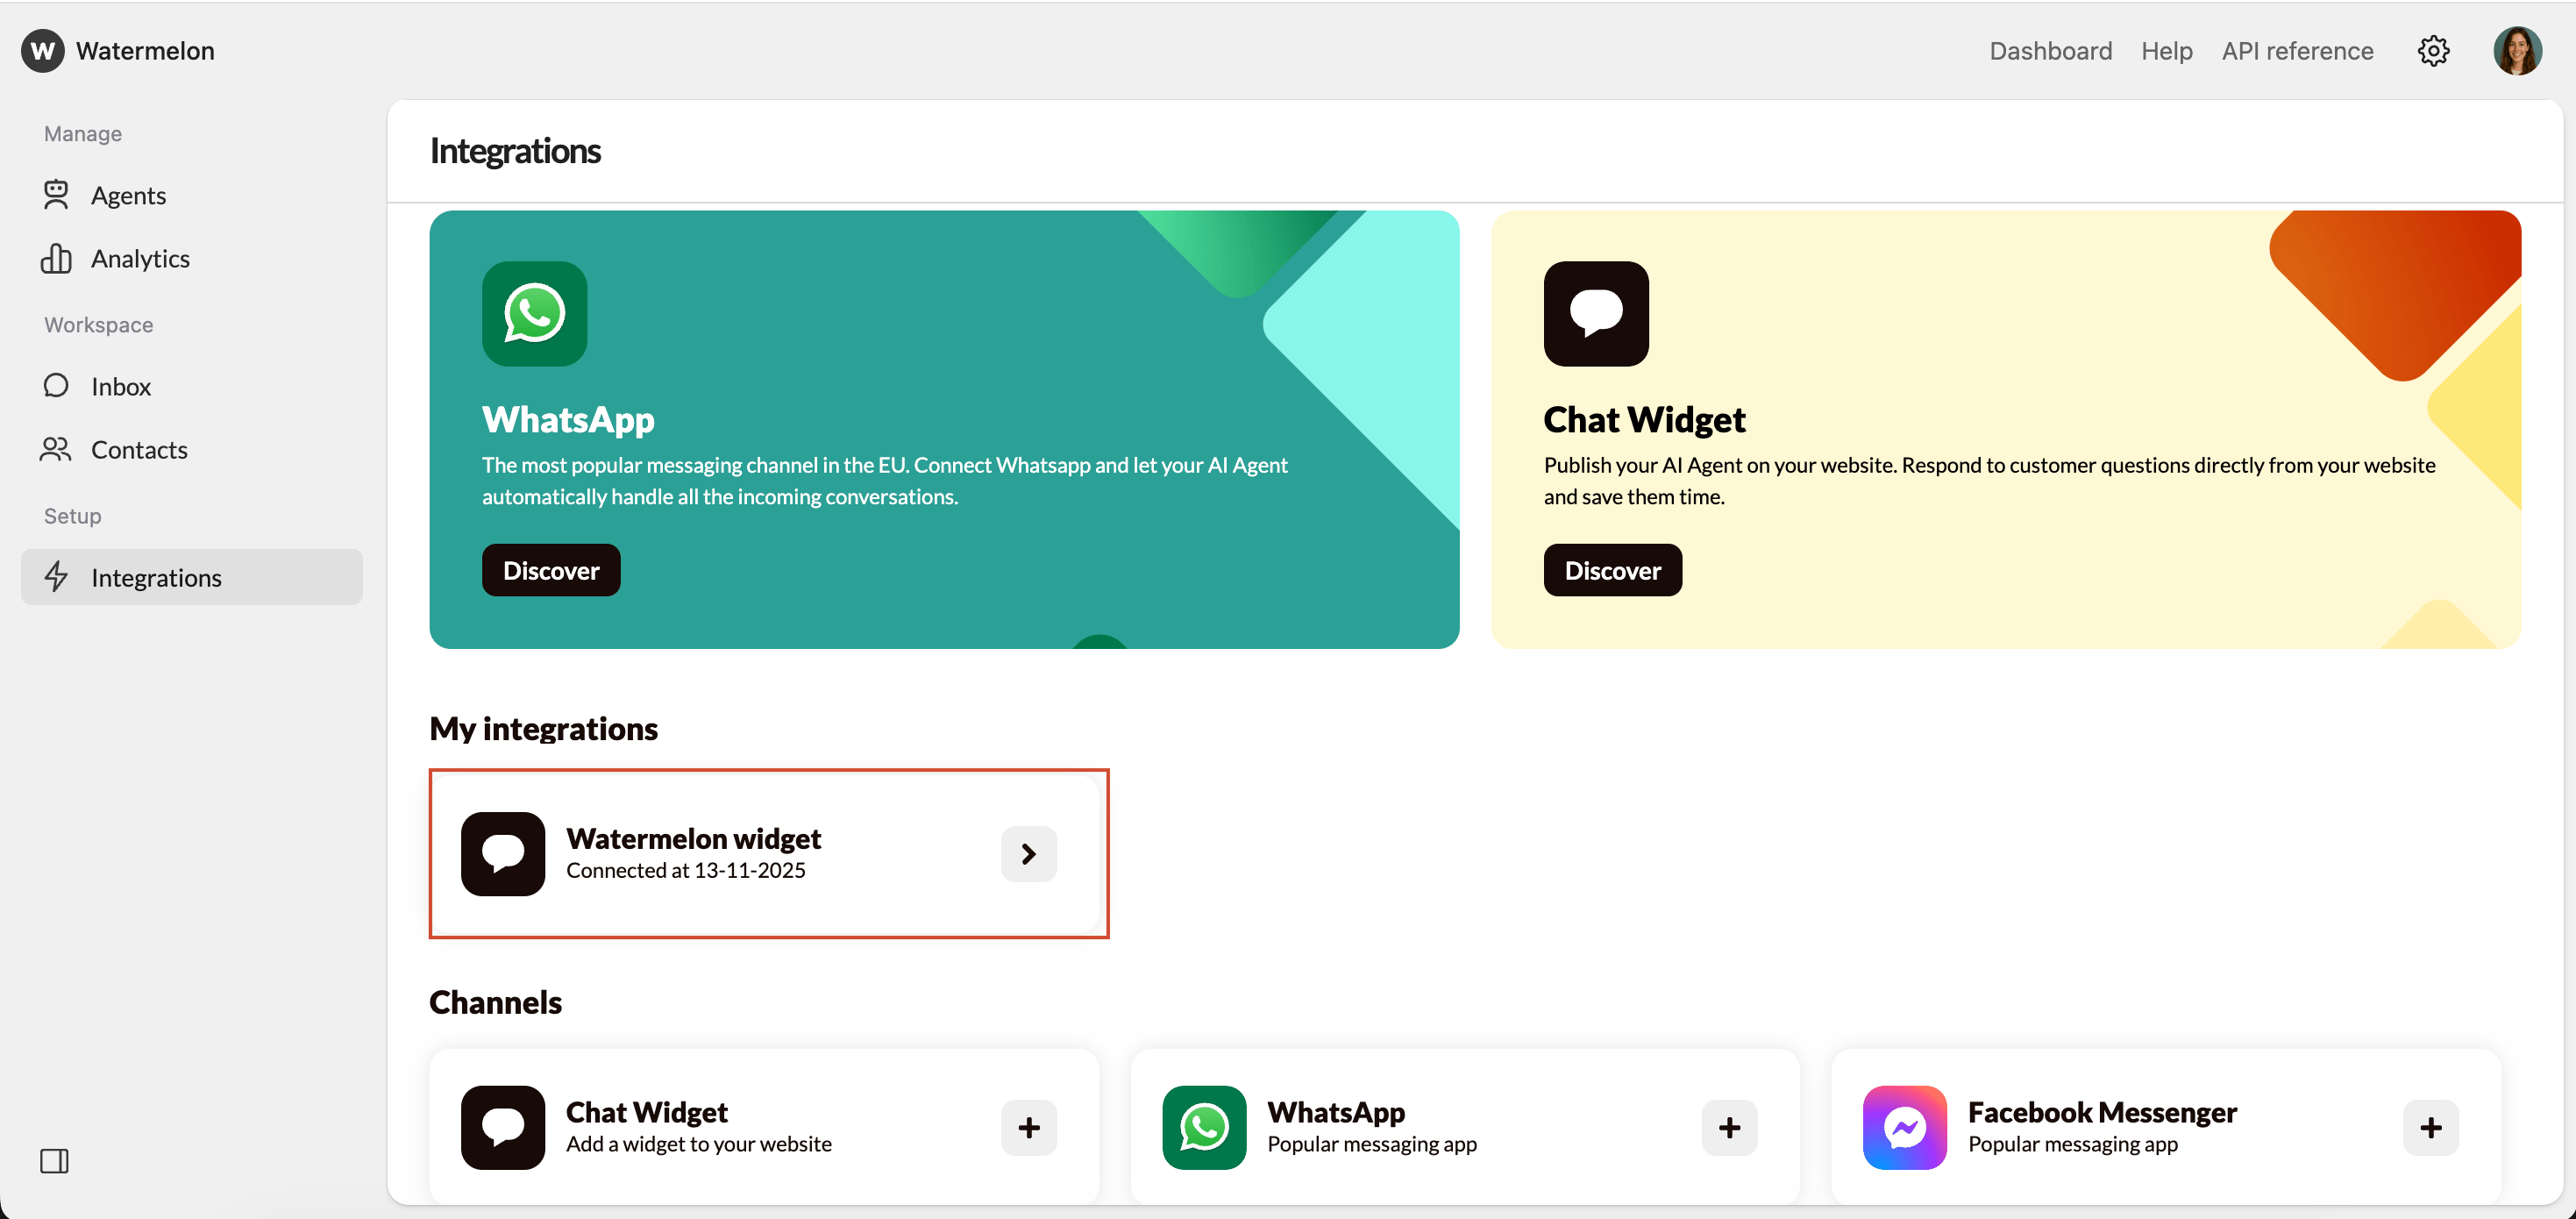
3
Go to placement
In the widget settings, open the Placement tab.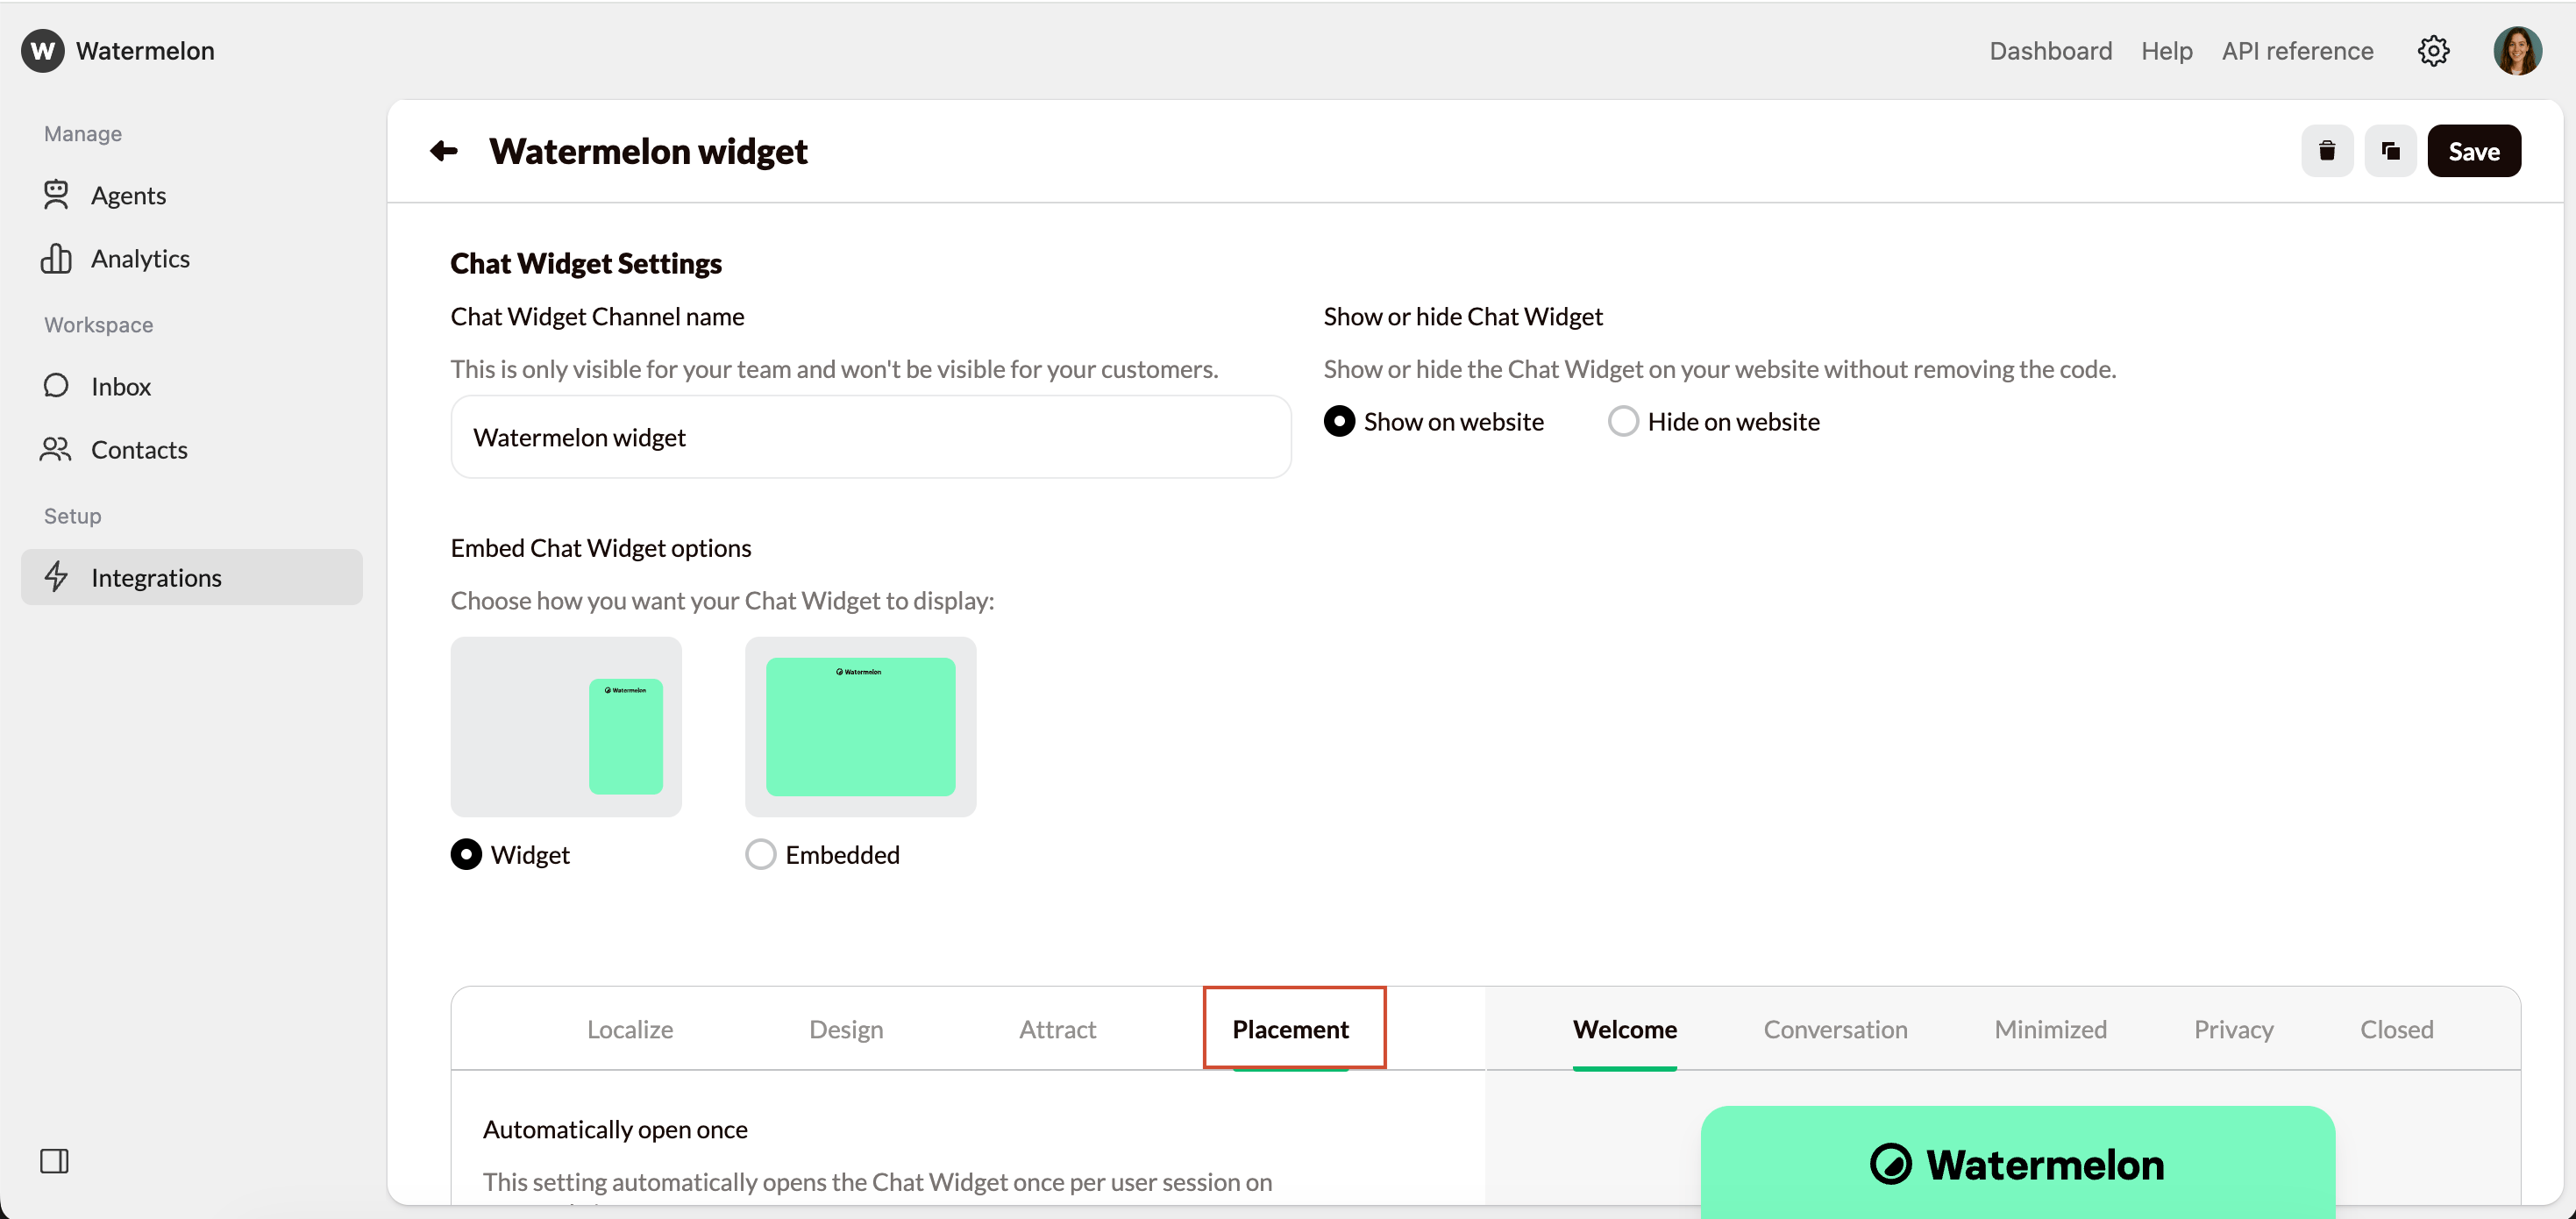
4
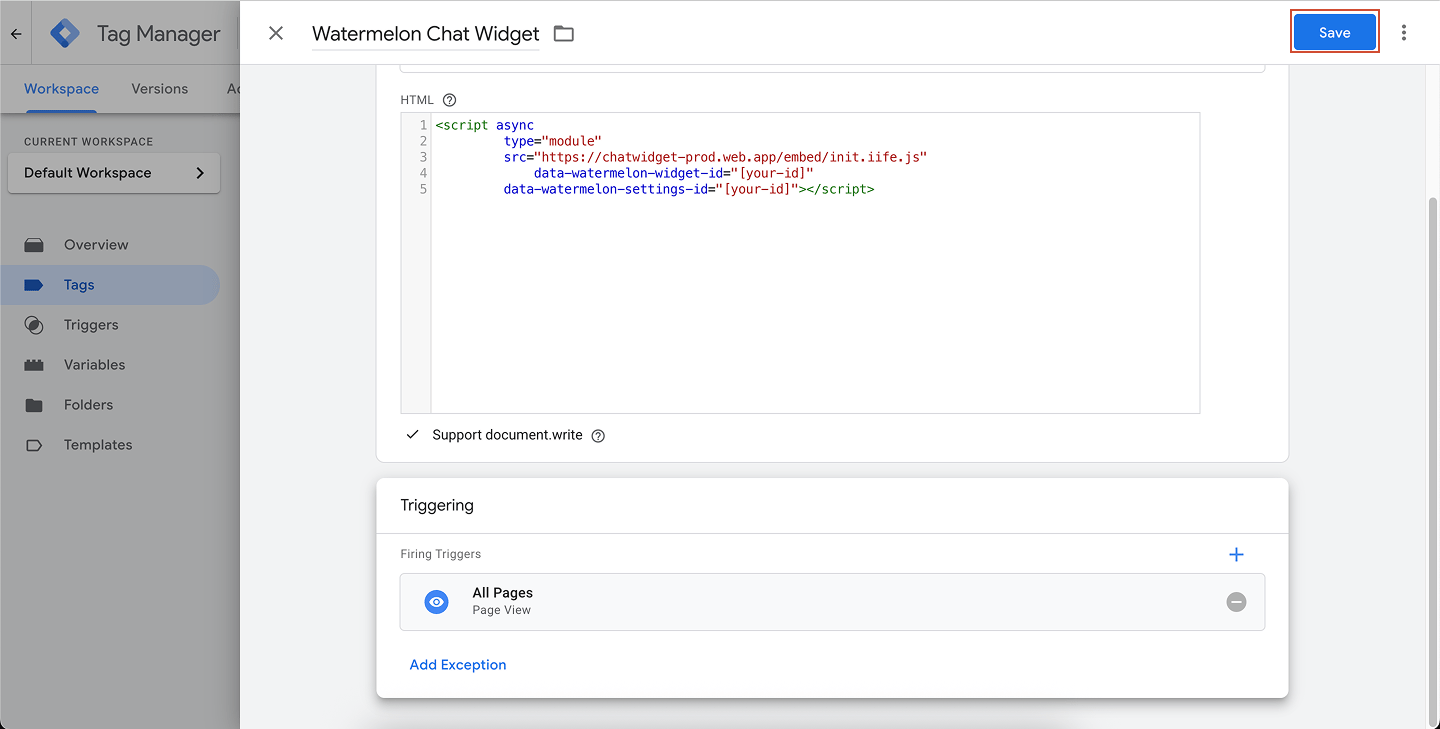
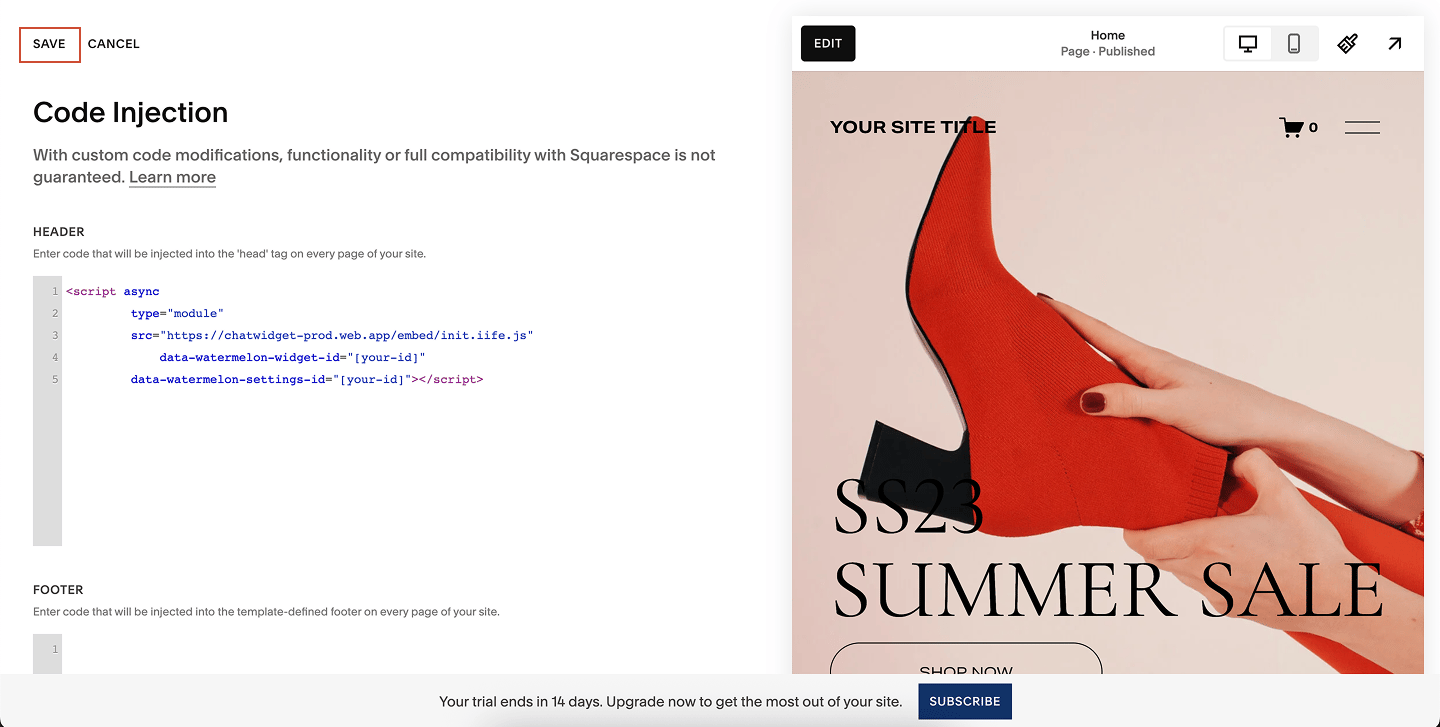
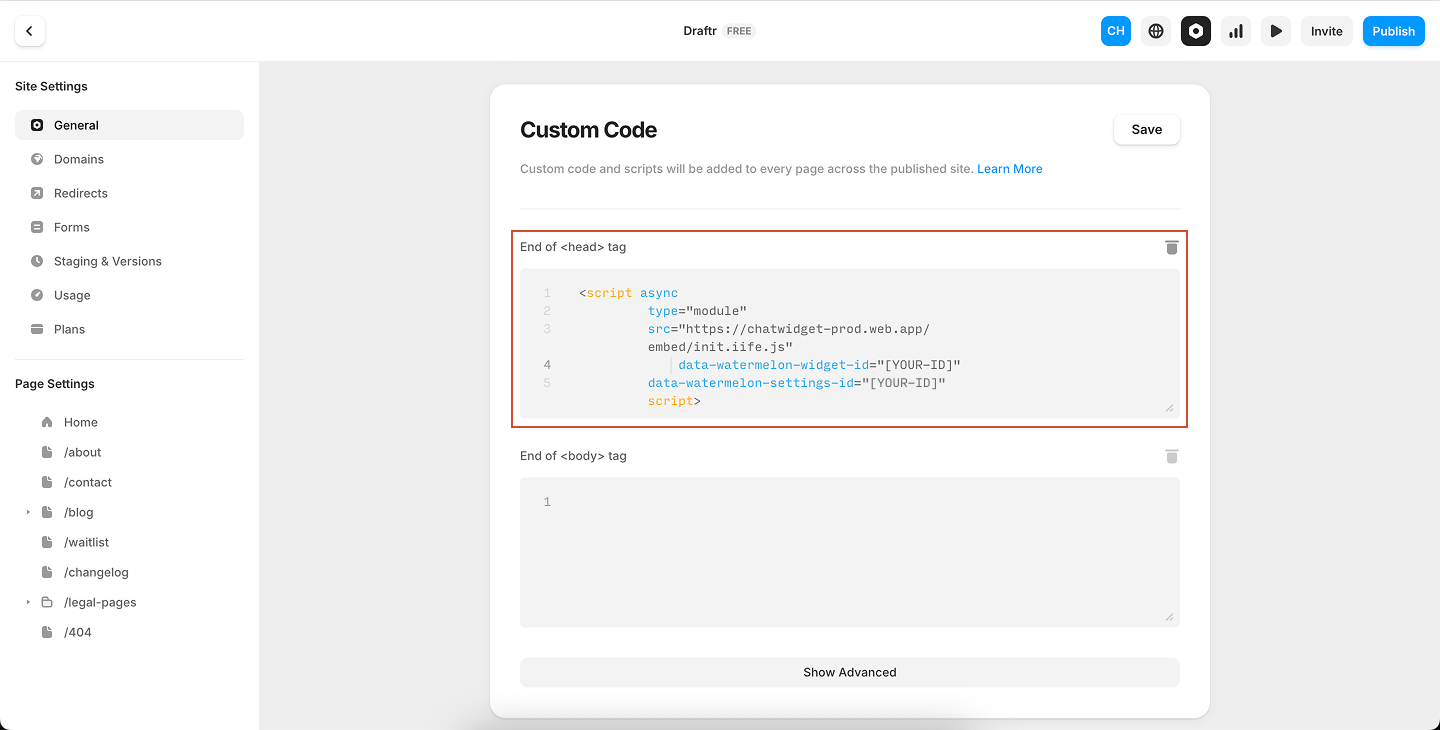
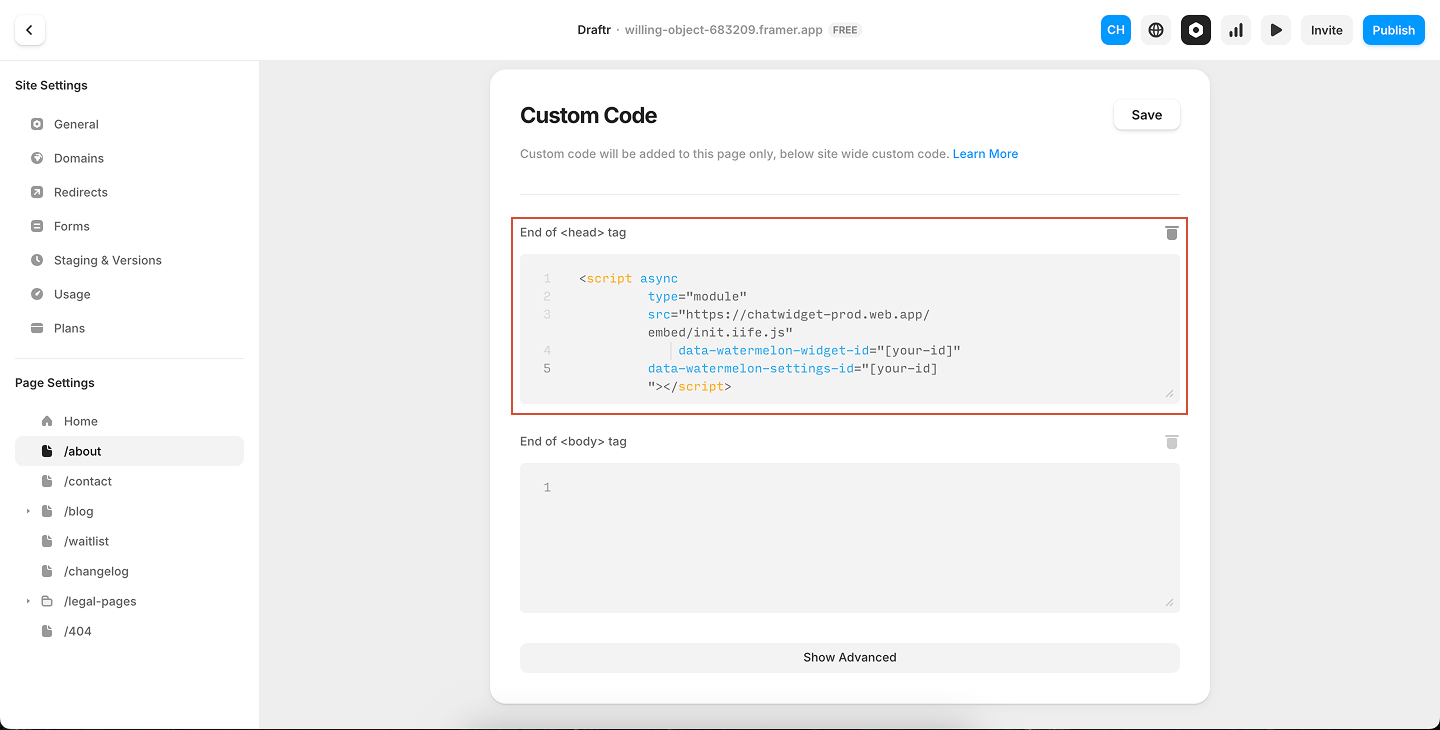
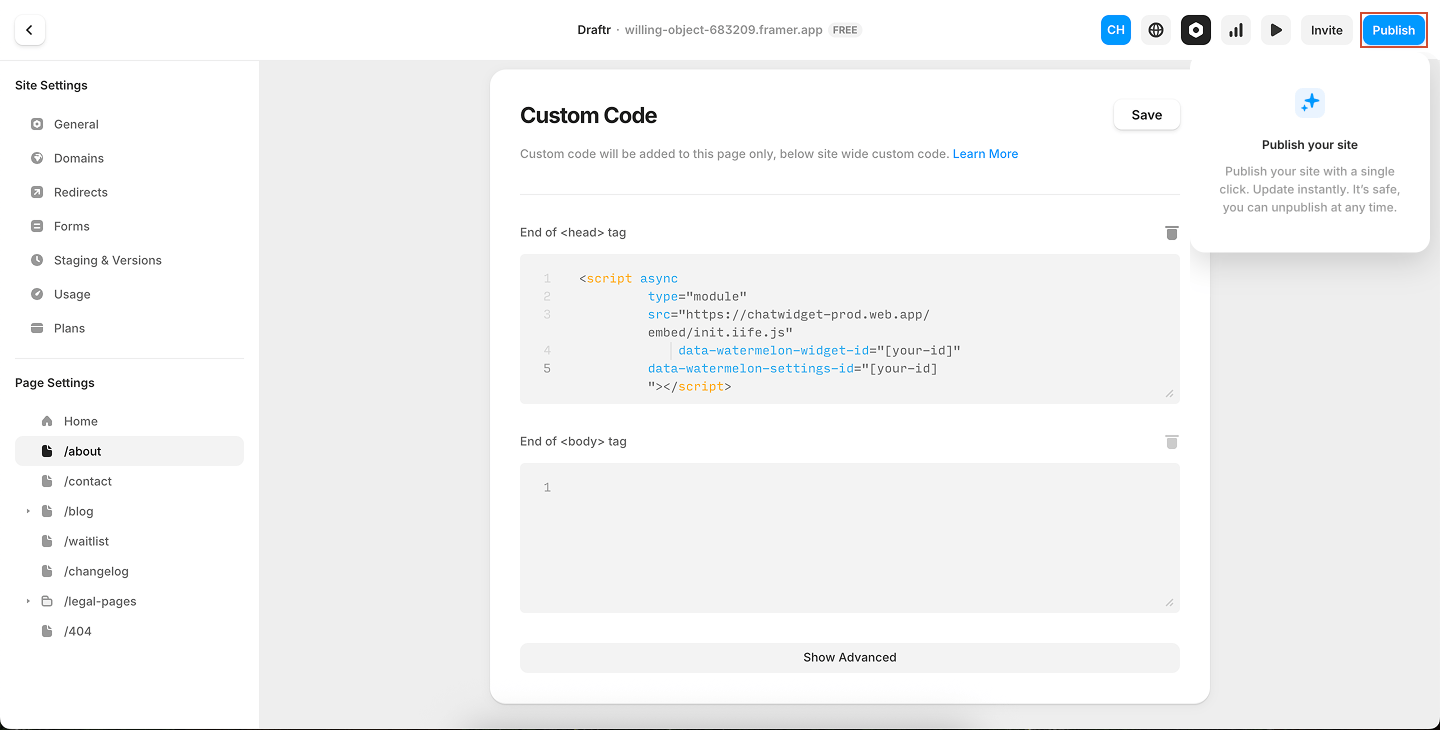
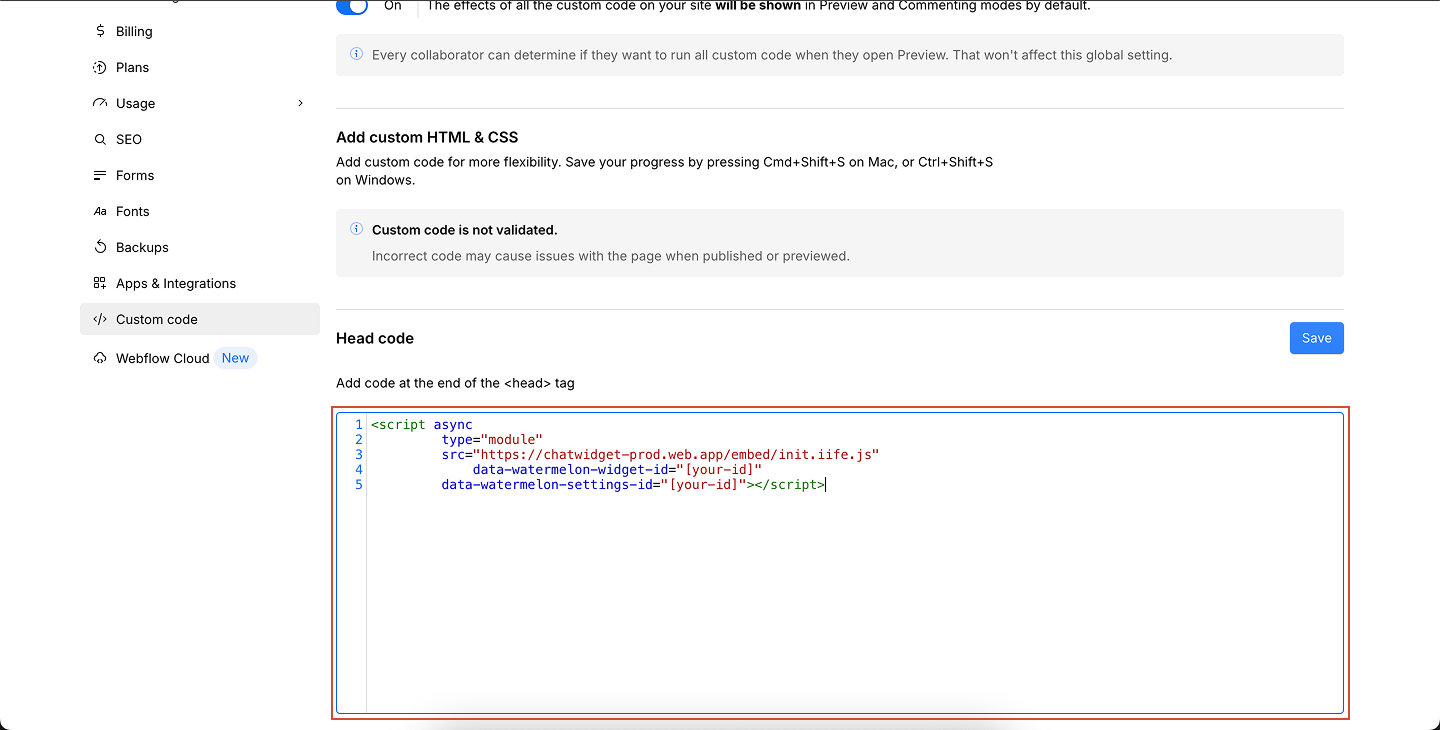
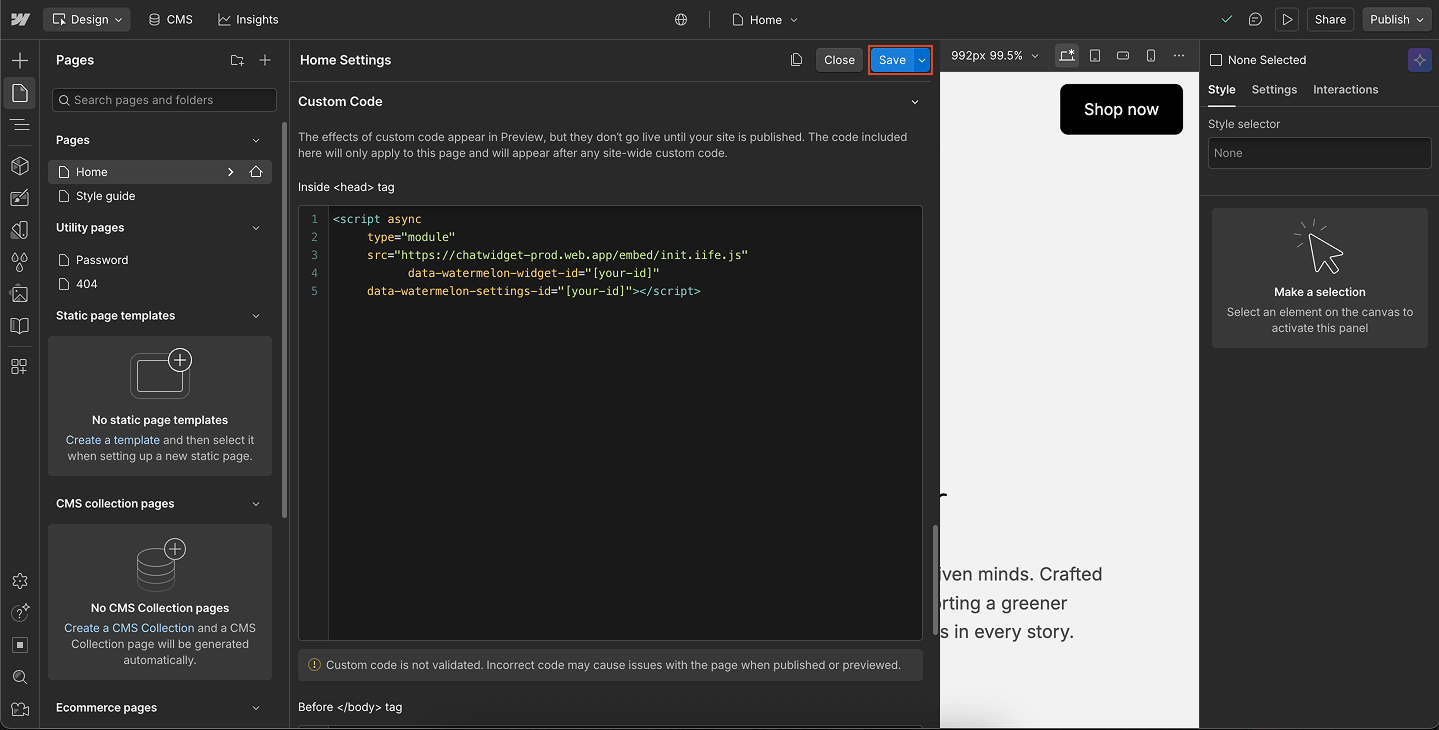
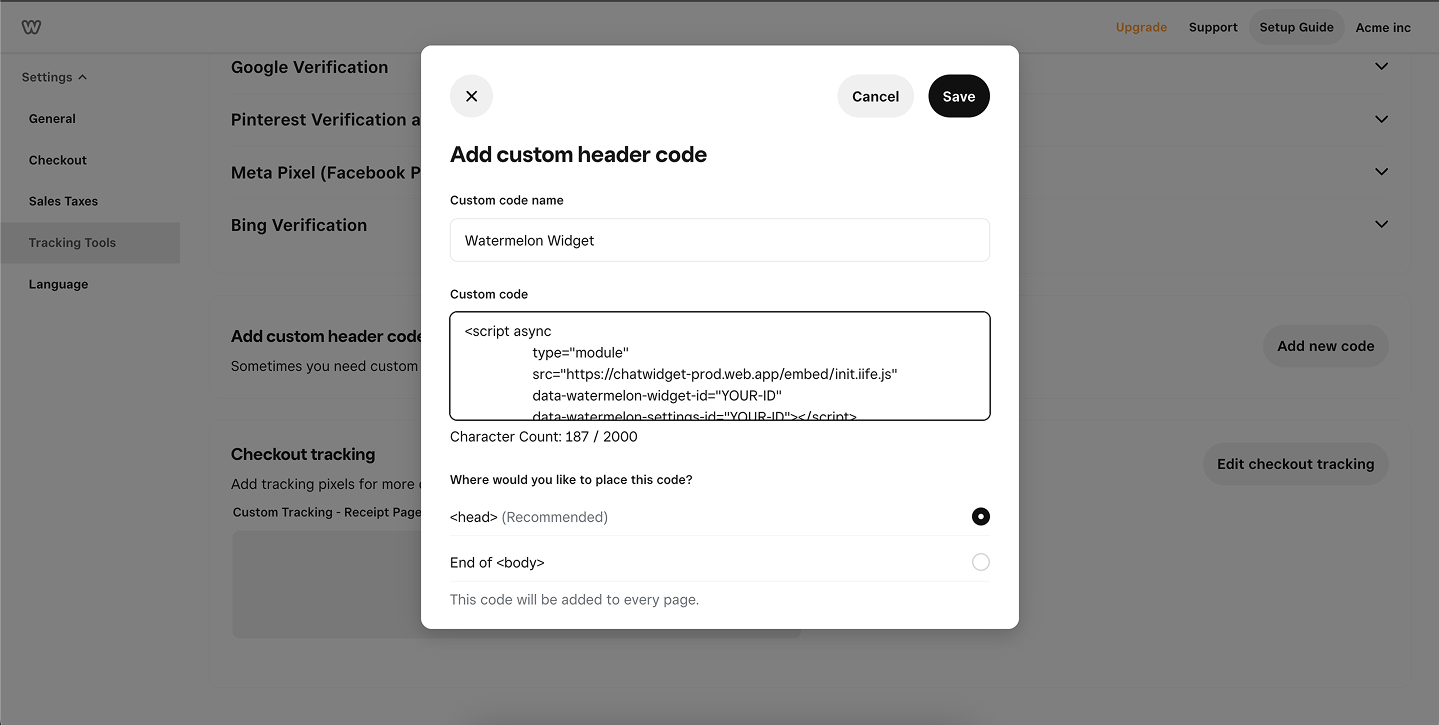
Copy your widget code
Under Code, you’ll find your installation snippet. Click copy code in the top-right corner to copy the code to your clipboard.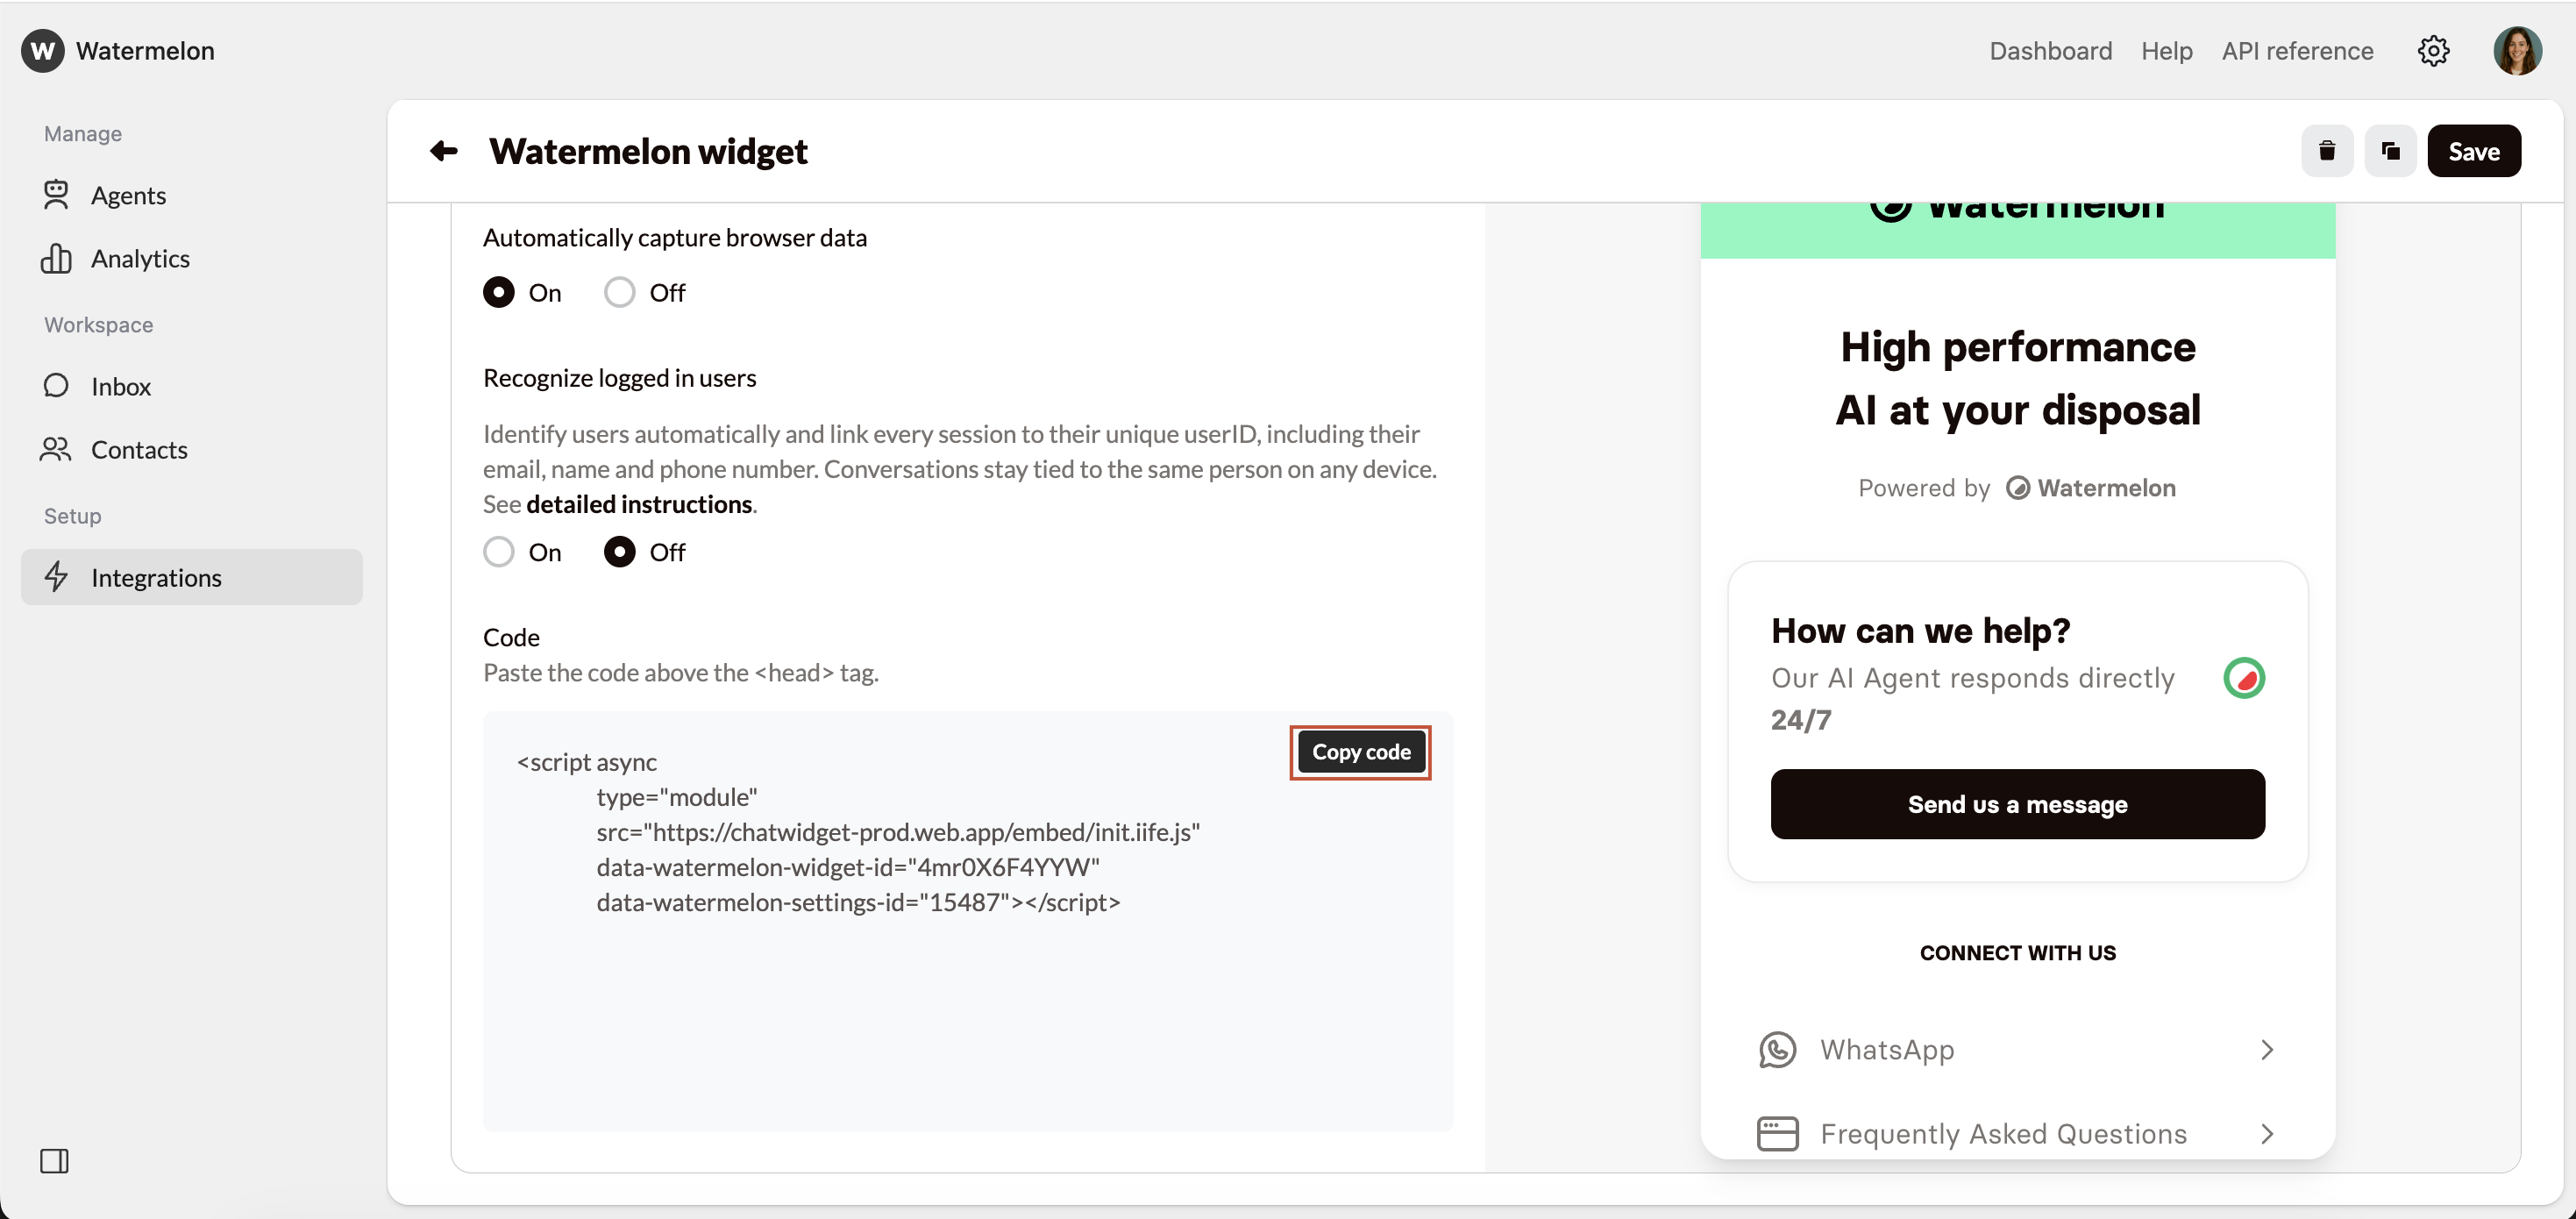
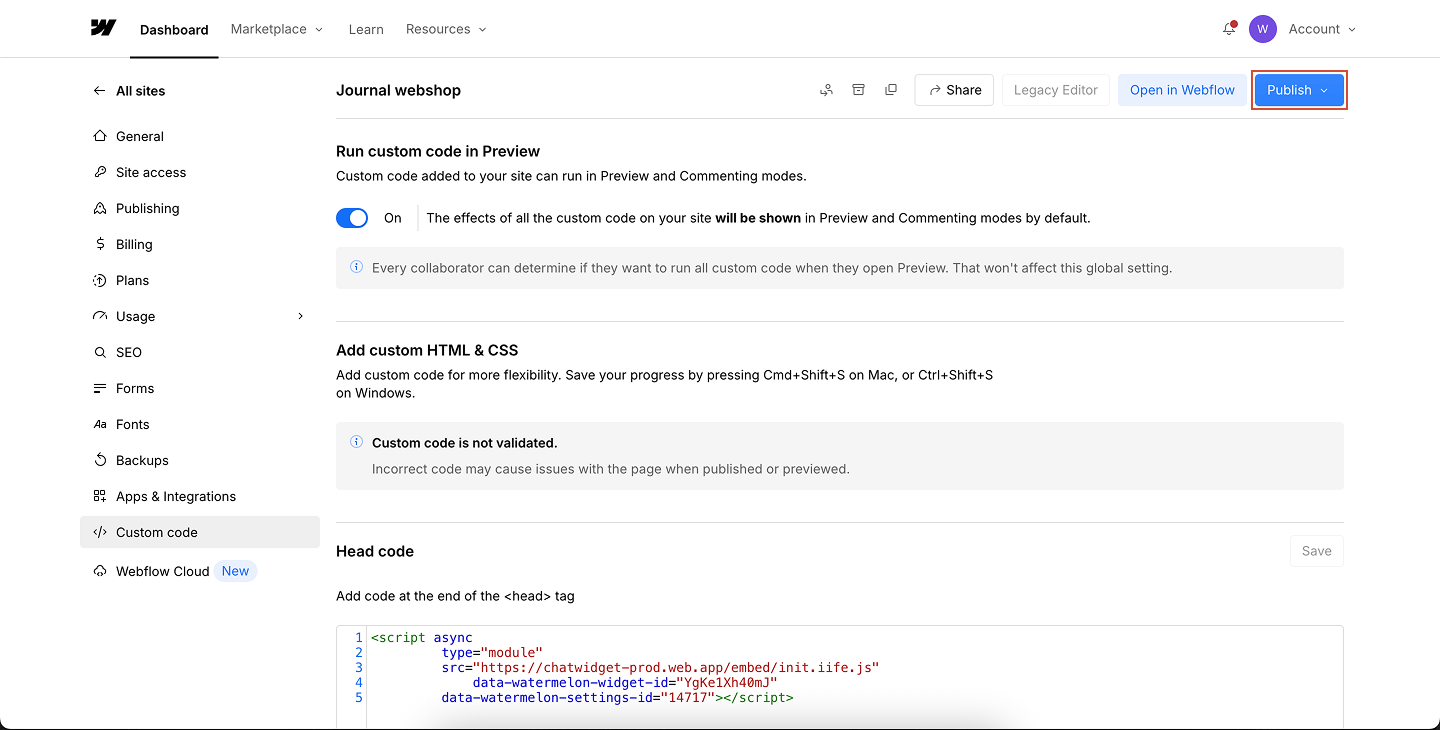
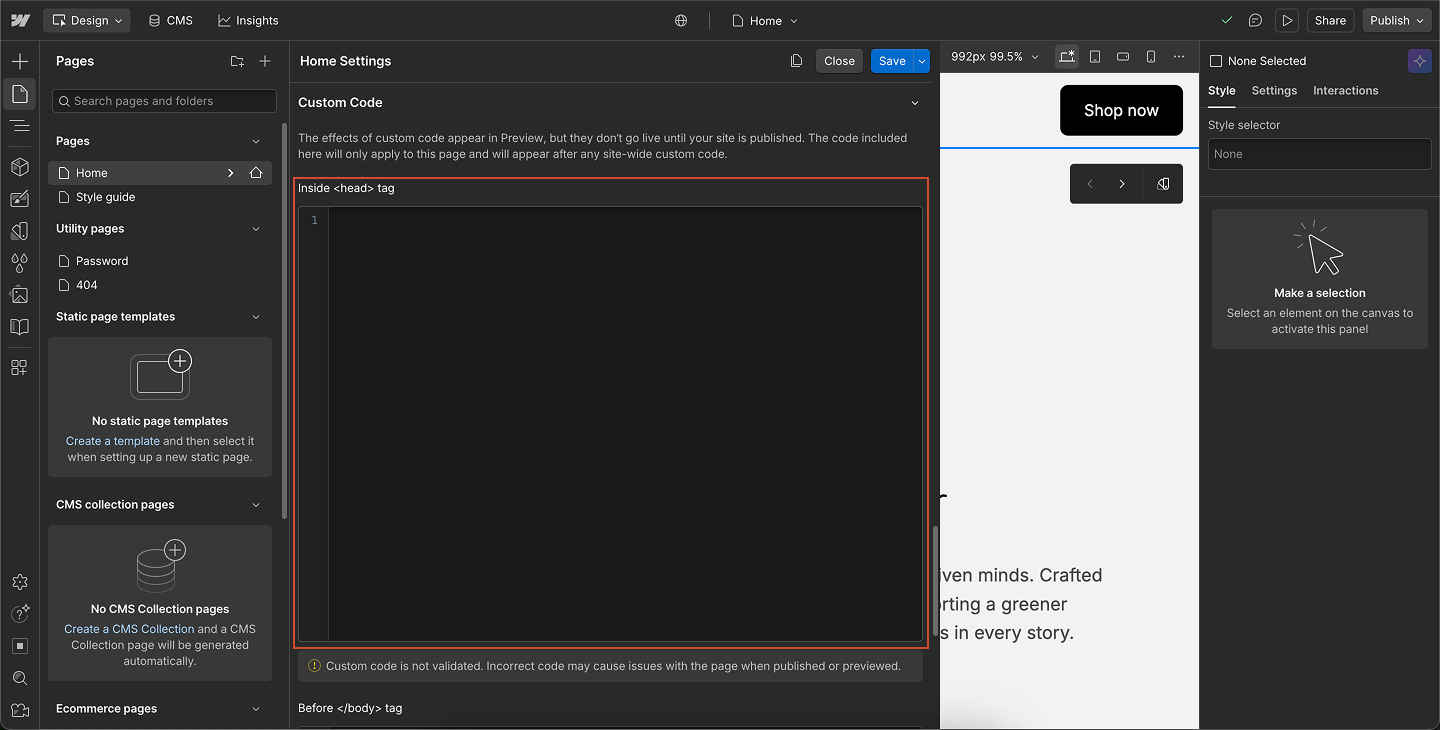
Install yourself
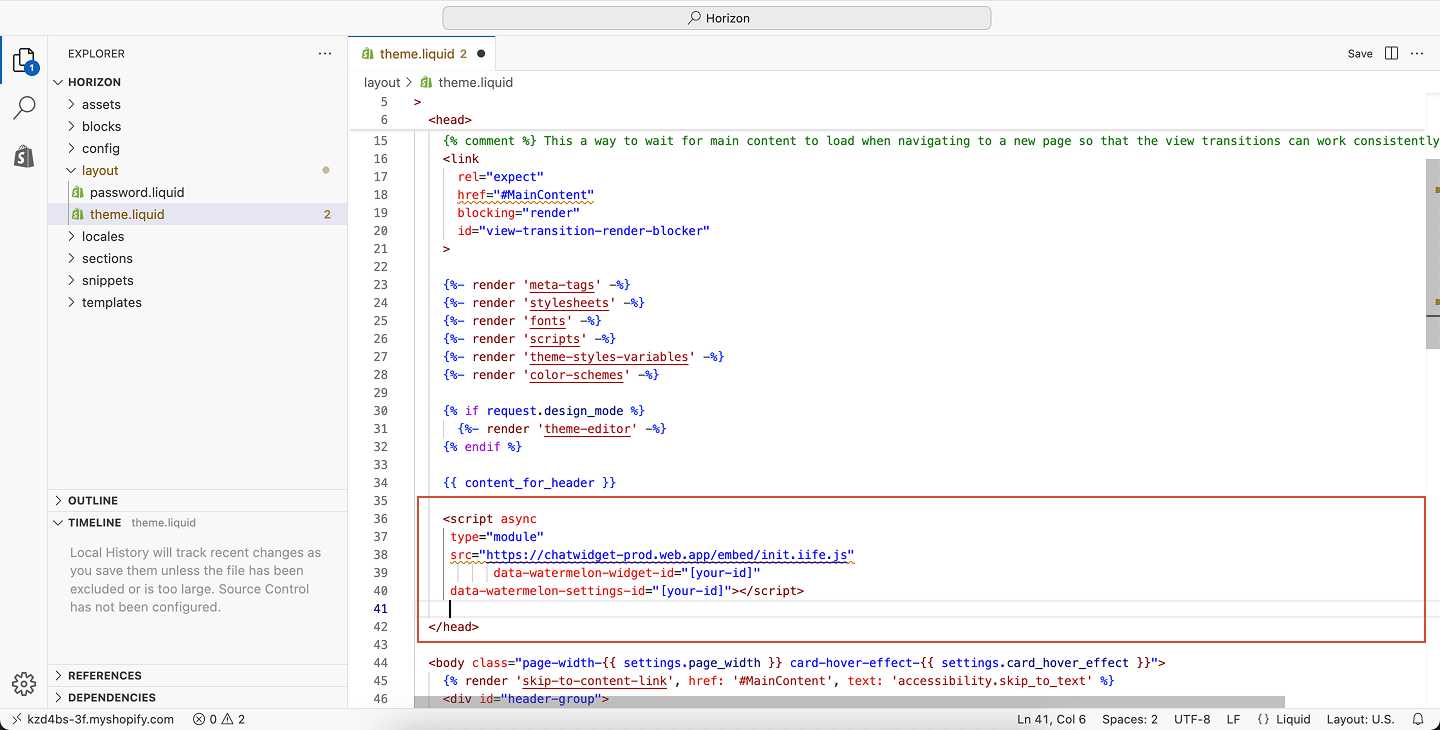
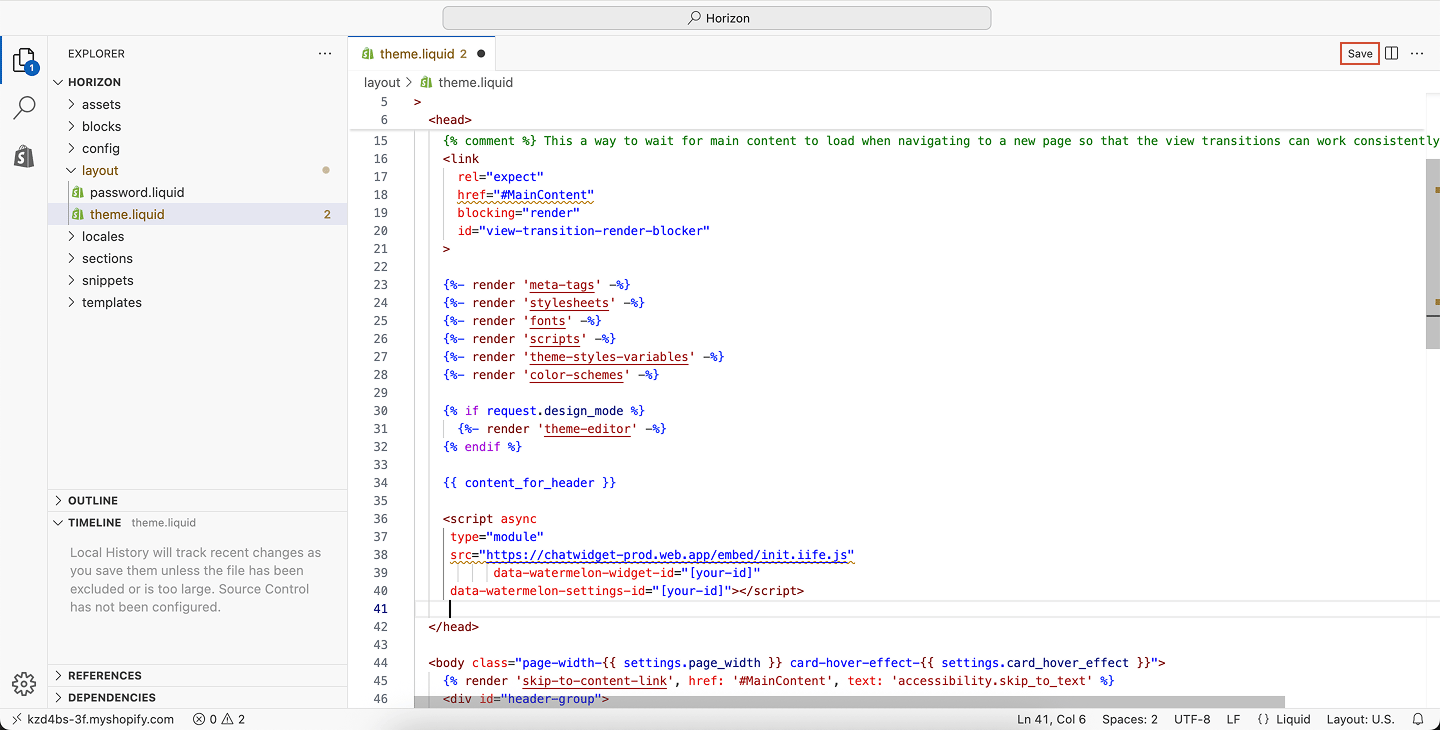
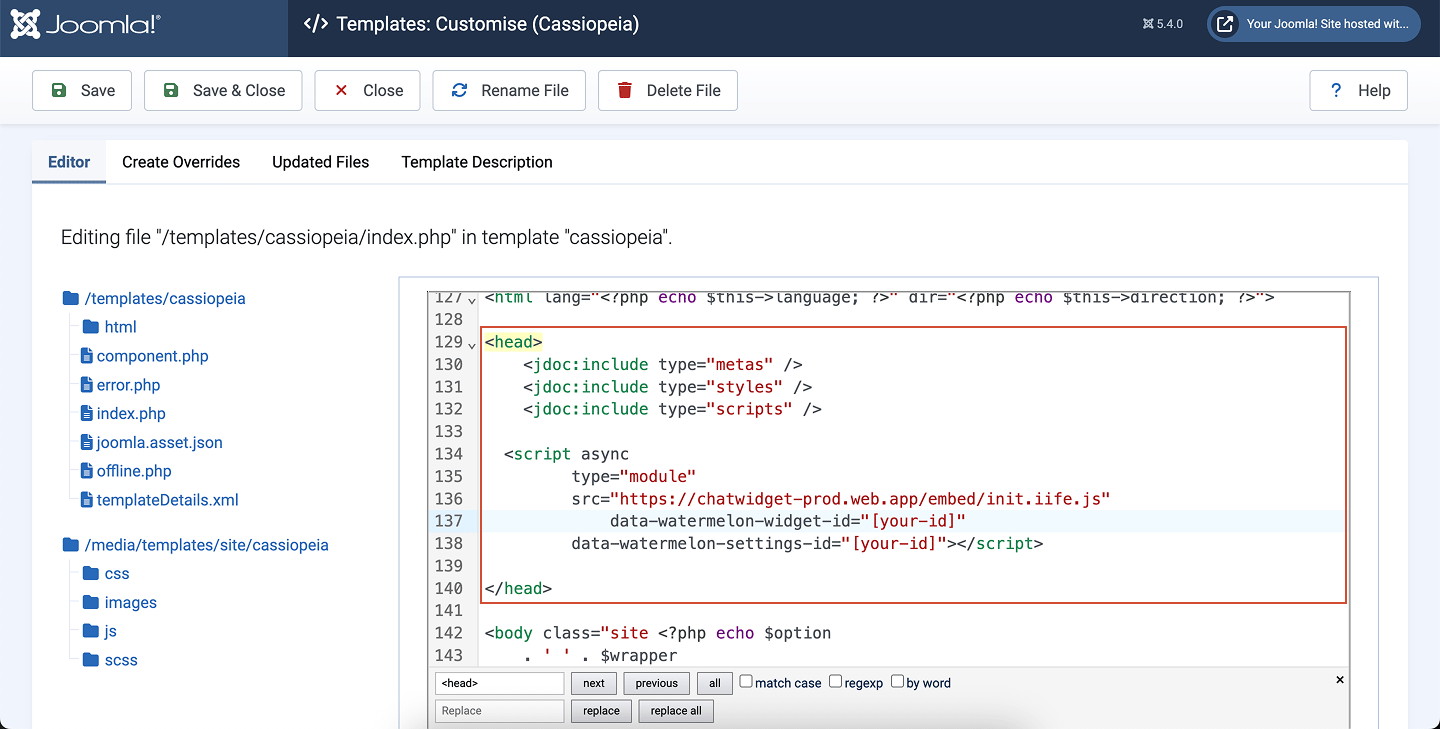
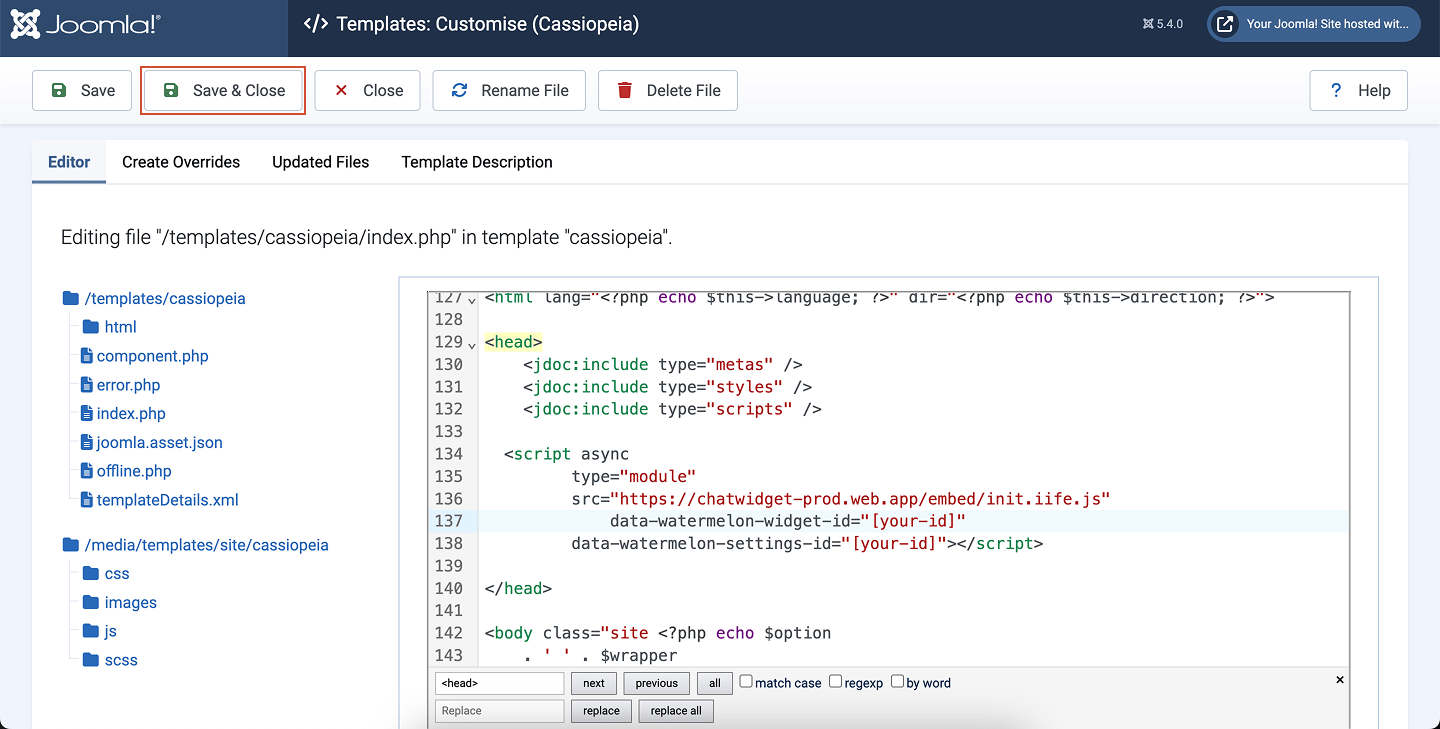
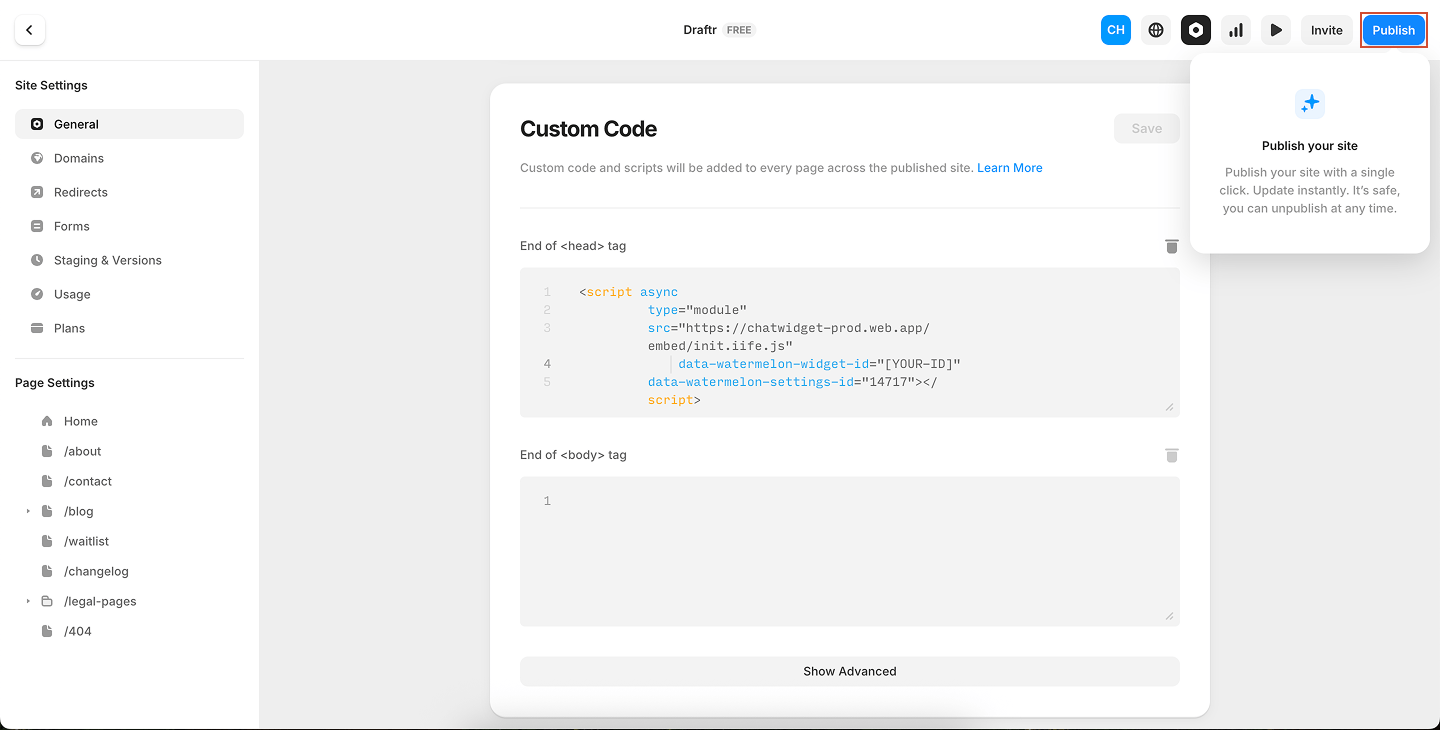
Click Copy code and paste it before the</head> tag on every page you want the Widget to appear on your app and website.
After adding the code, open your app and website and the Widget will appear.
You can also use one of our guides to install the widget in a CMS:
- Wordpress
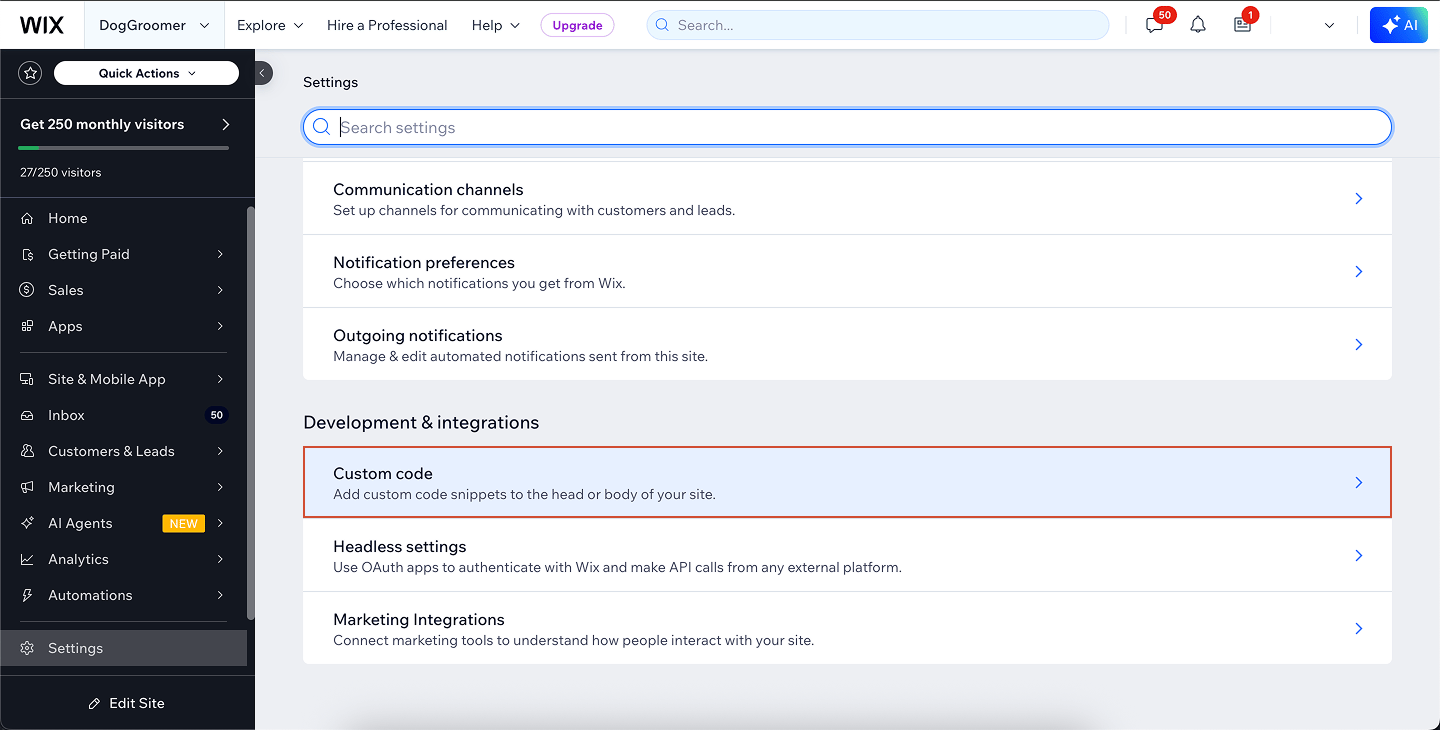
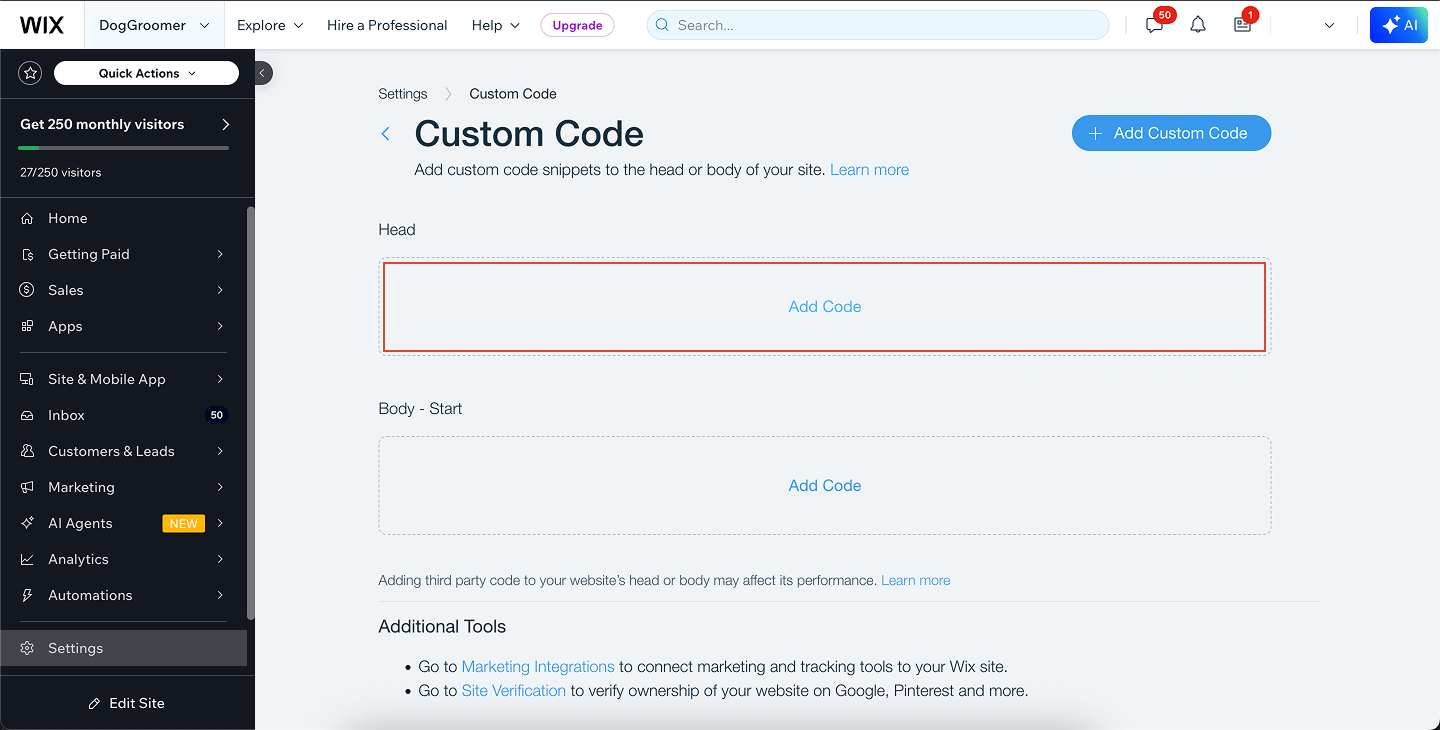
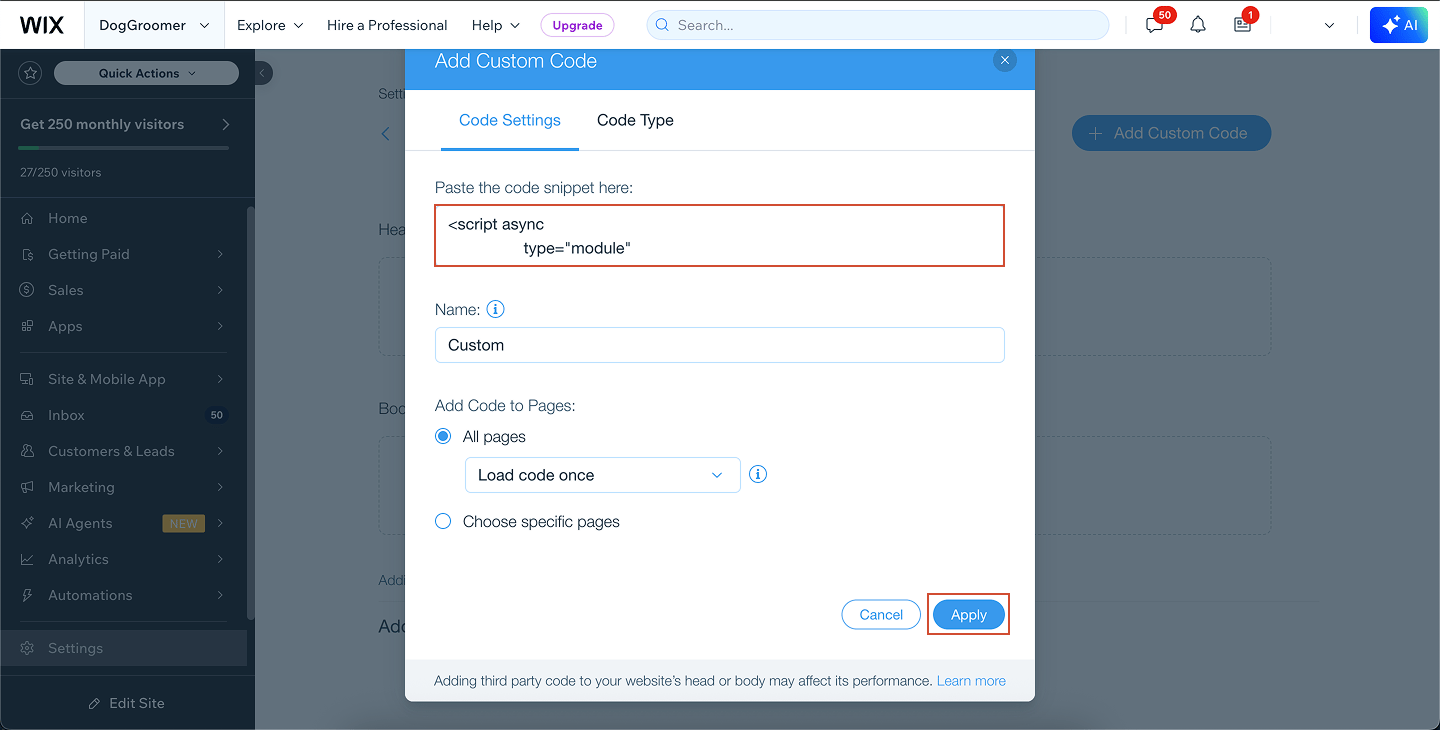
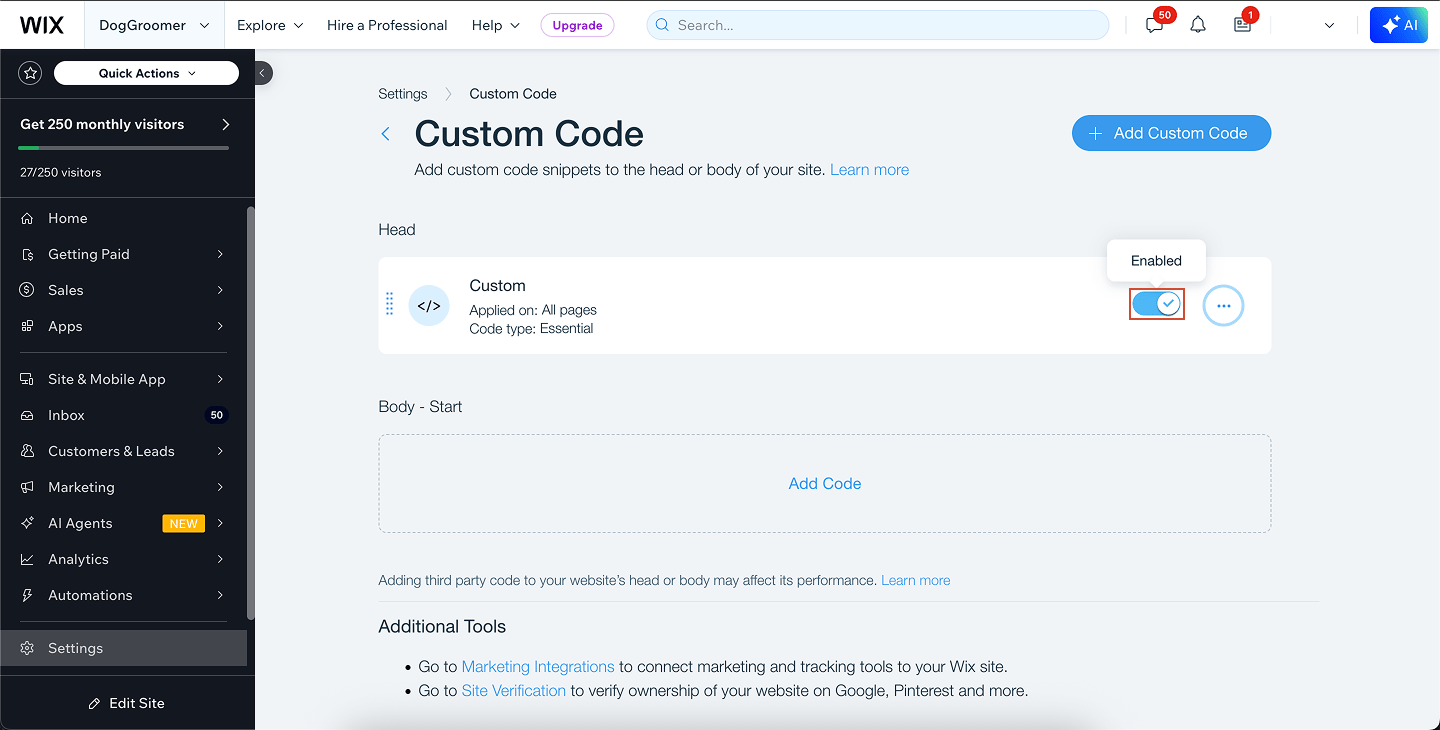
- Wix
- Lightspeed
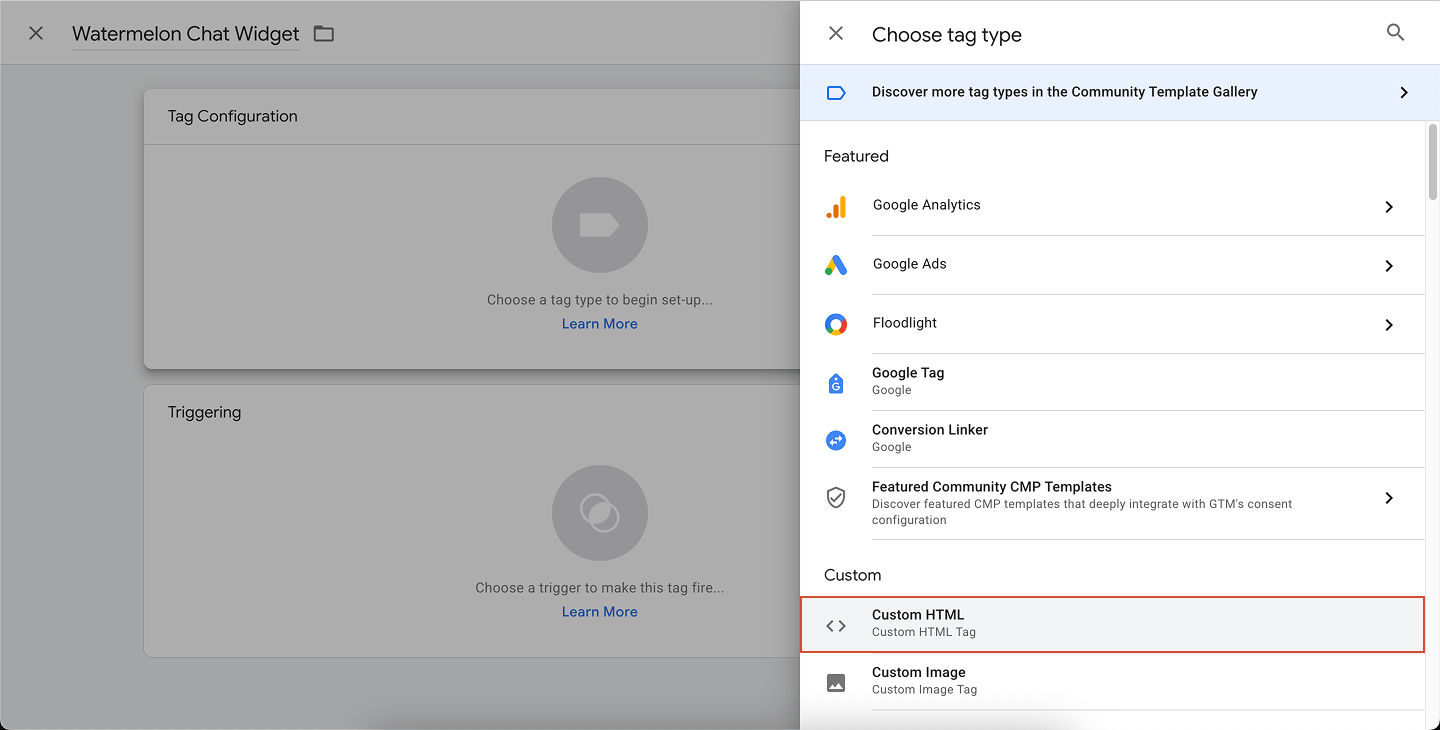
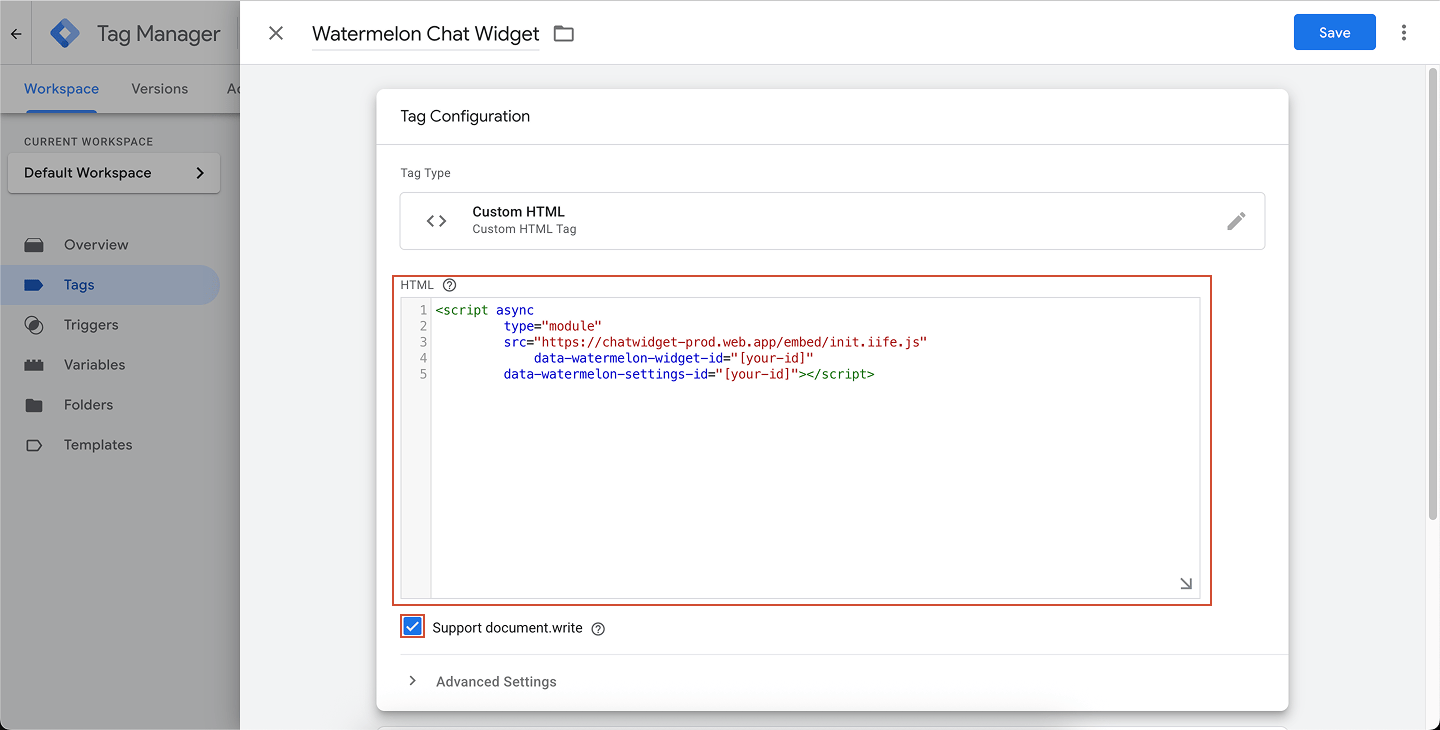
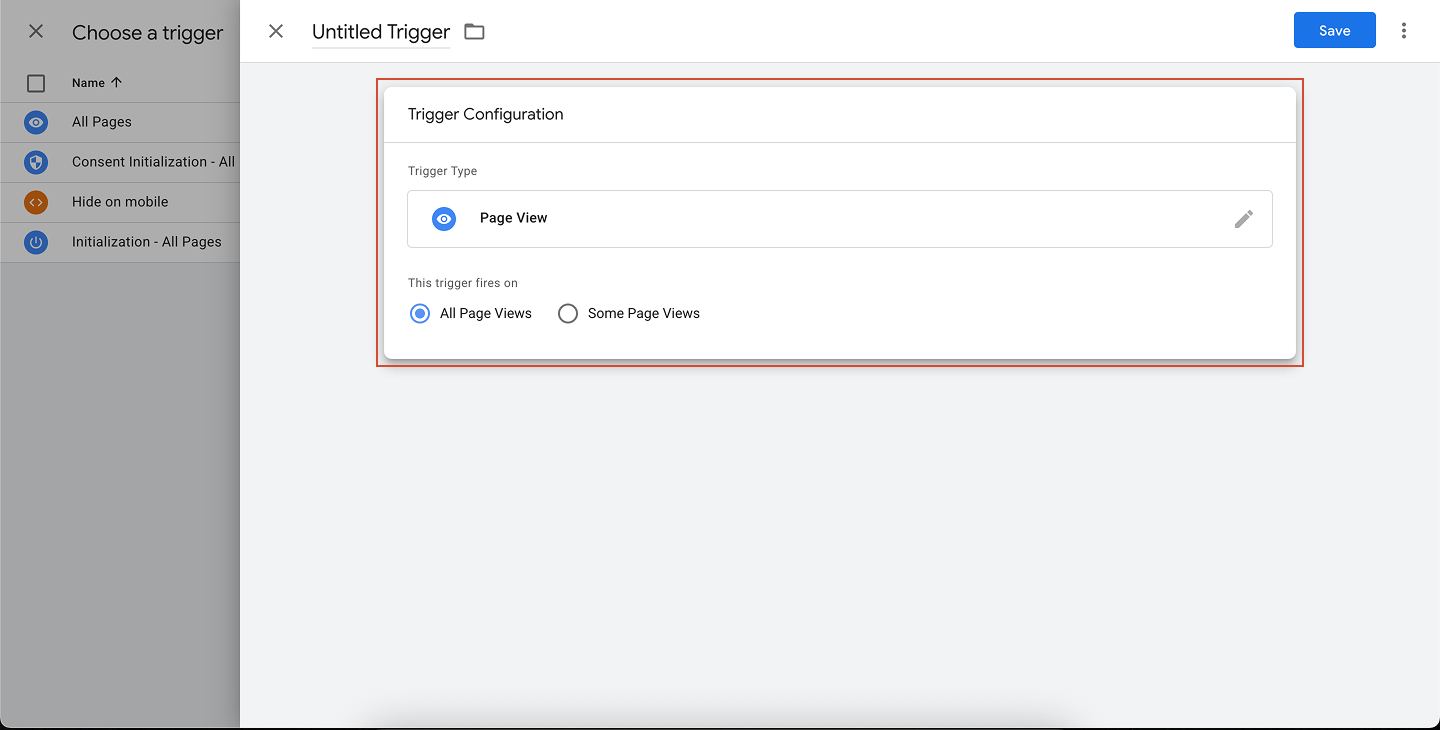
- Google tag manager
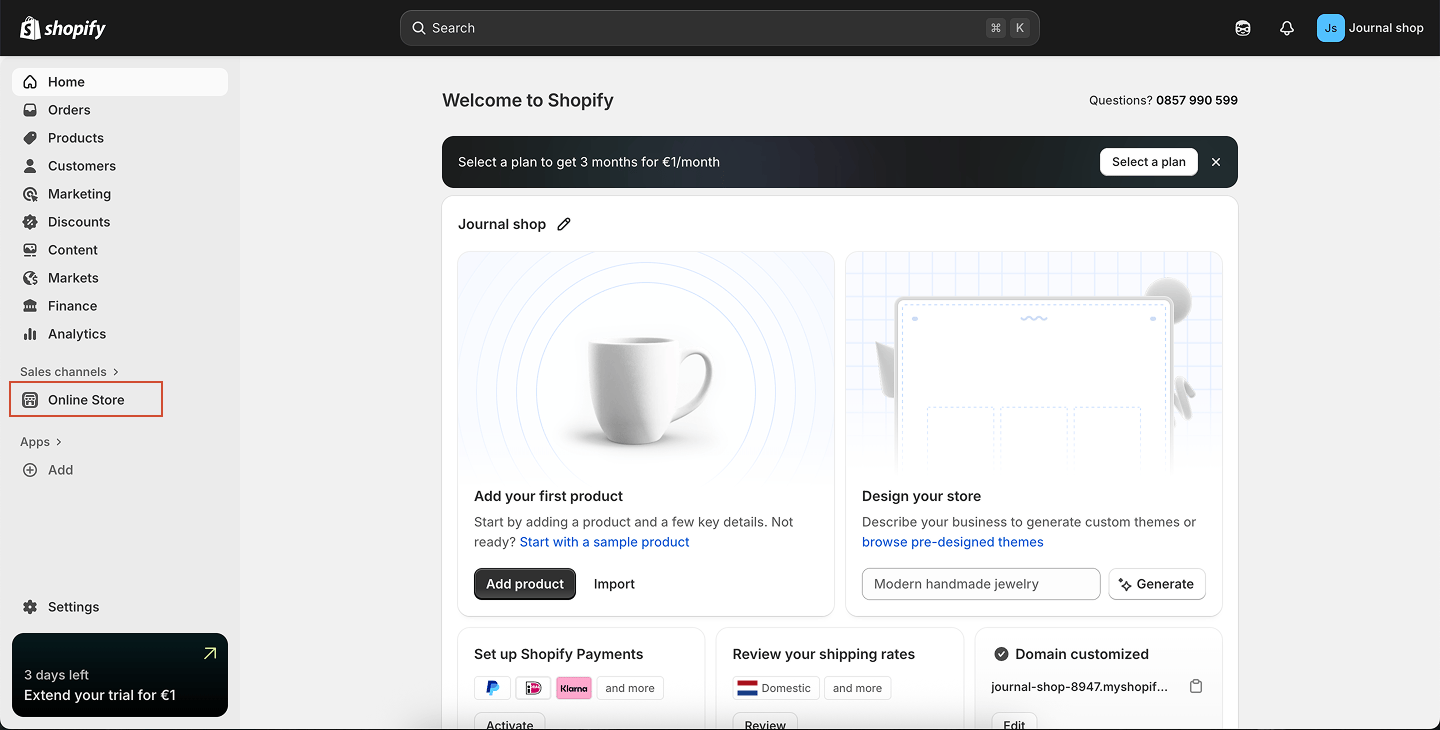
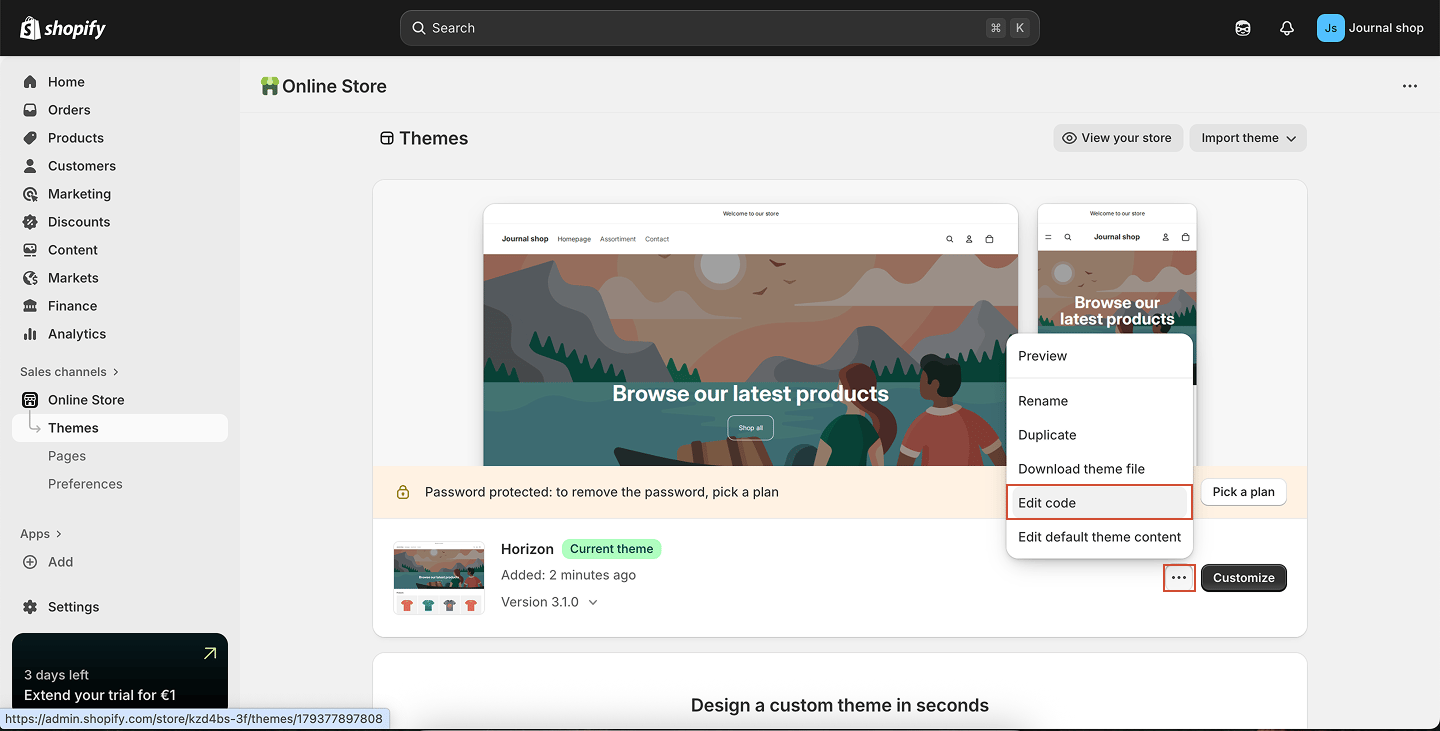
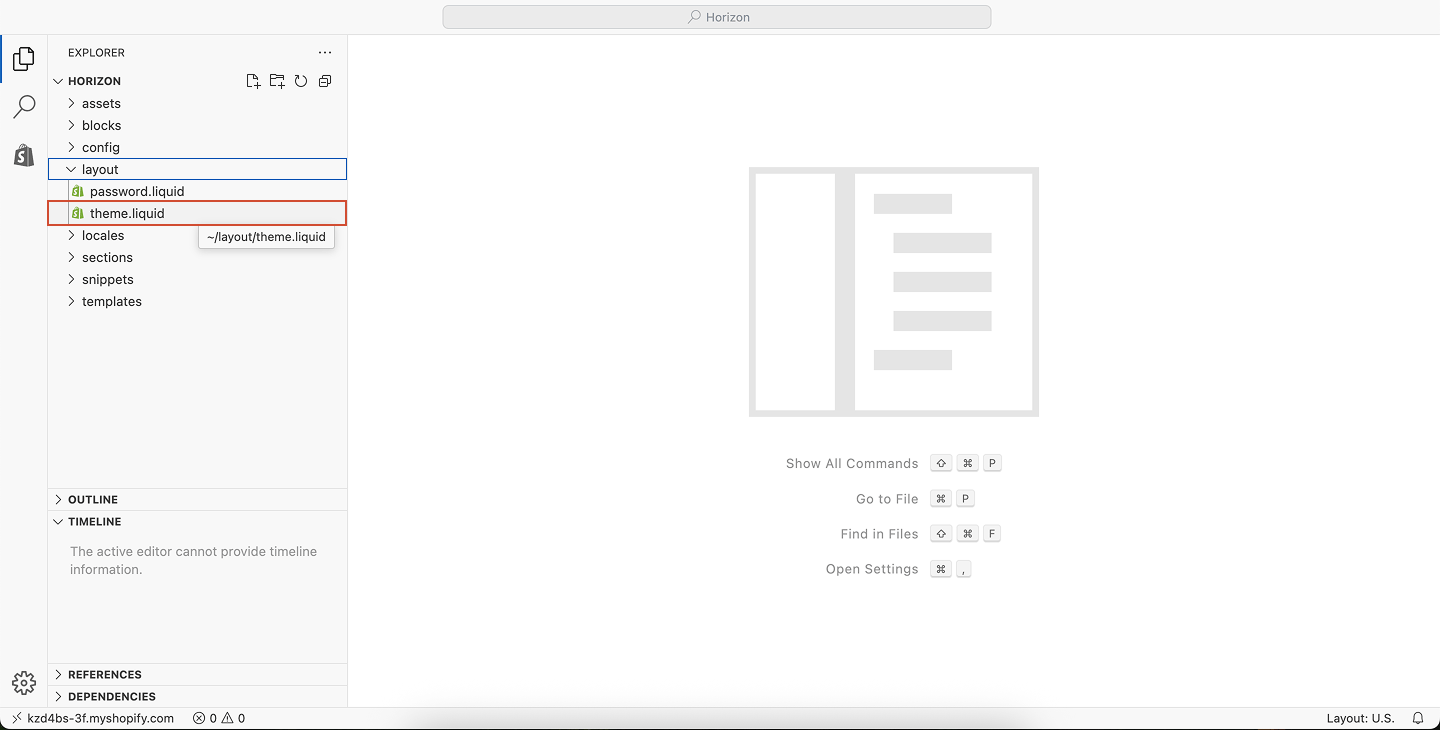
- Shopify
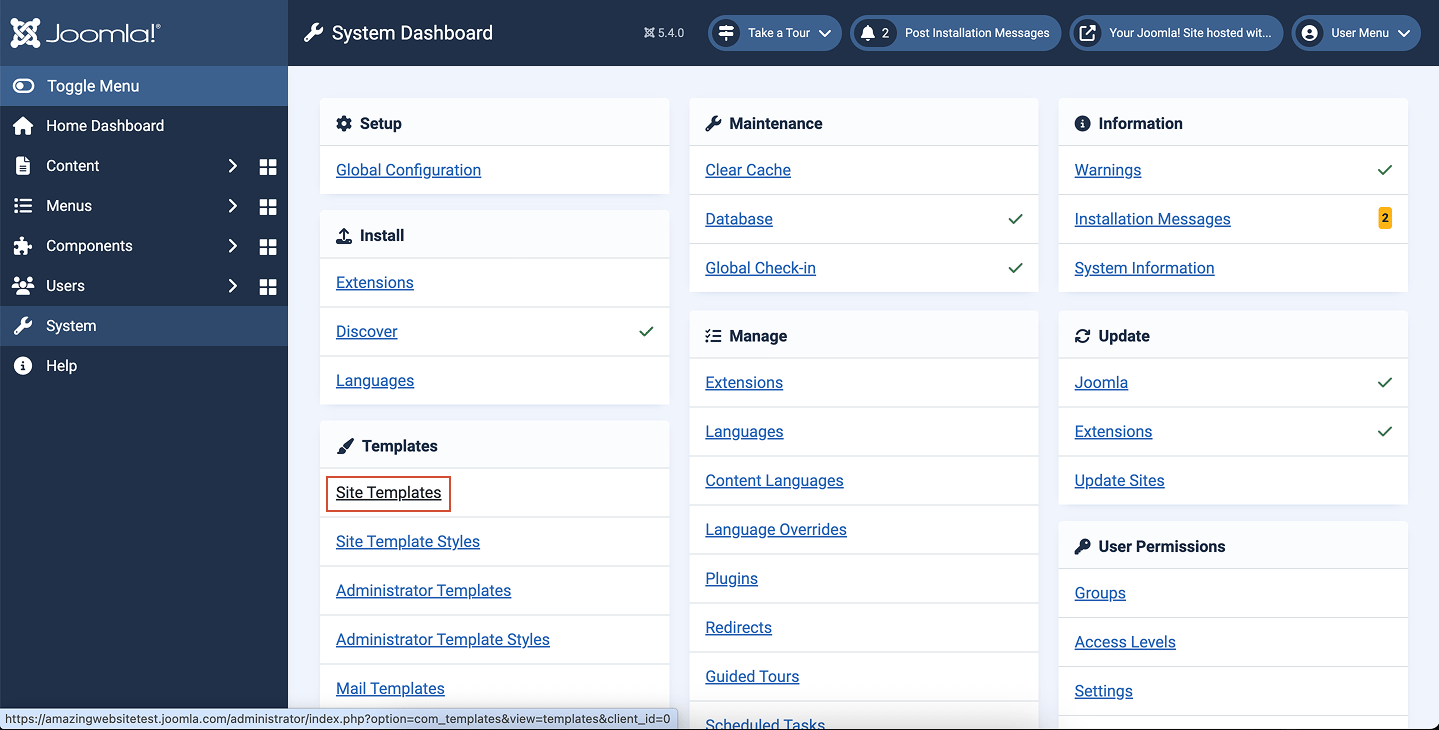
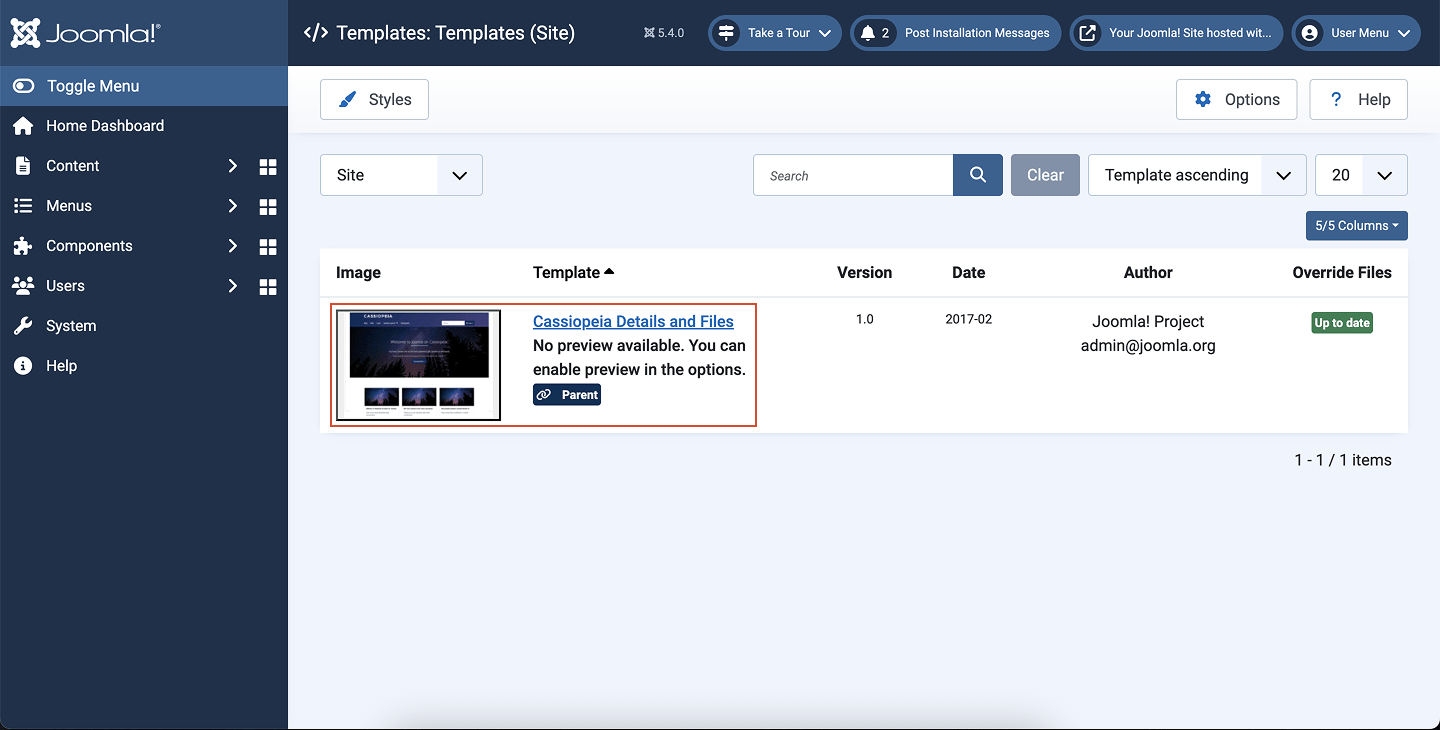
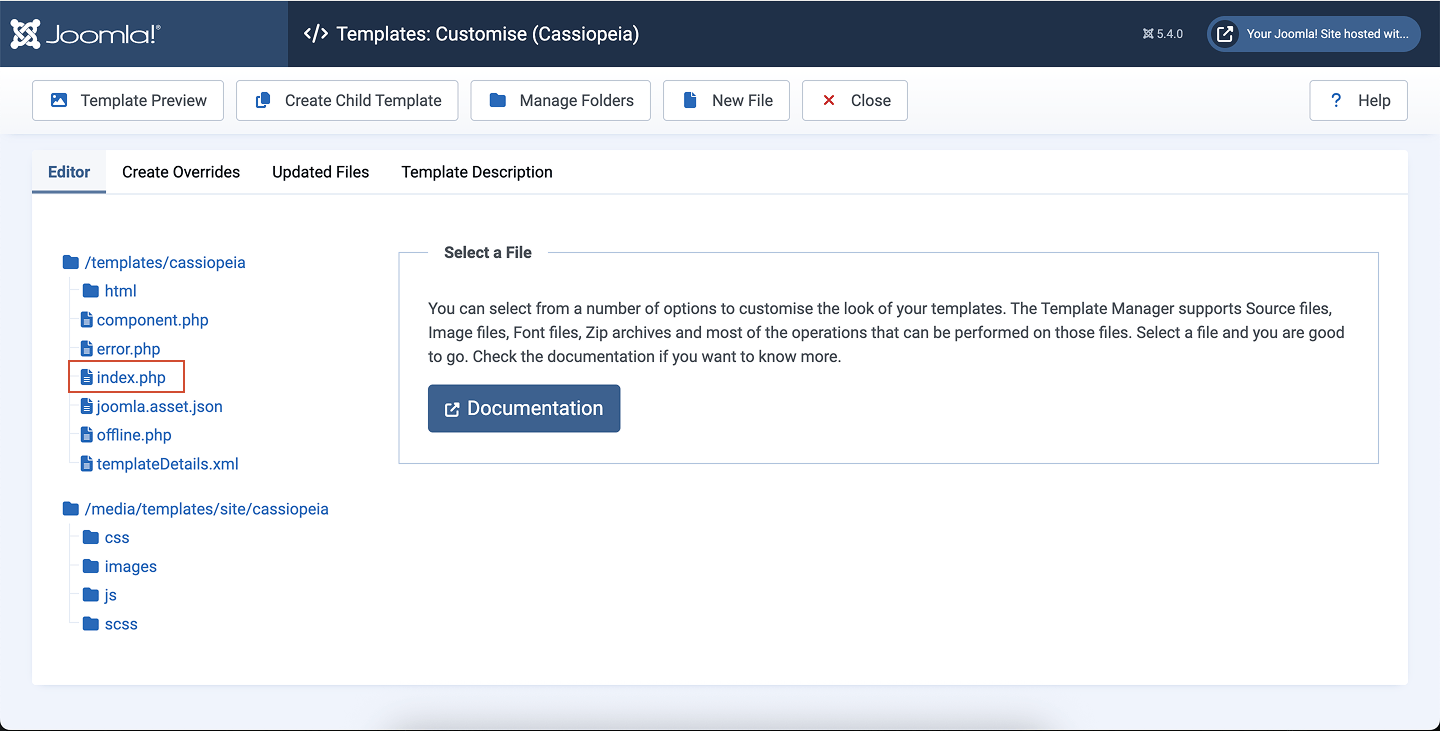
- Joomla
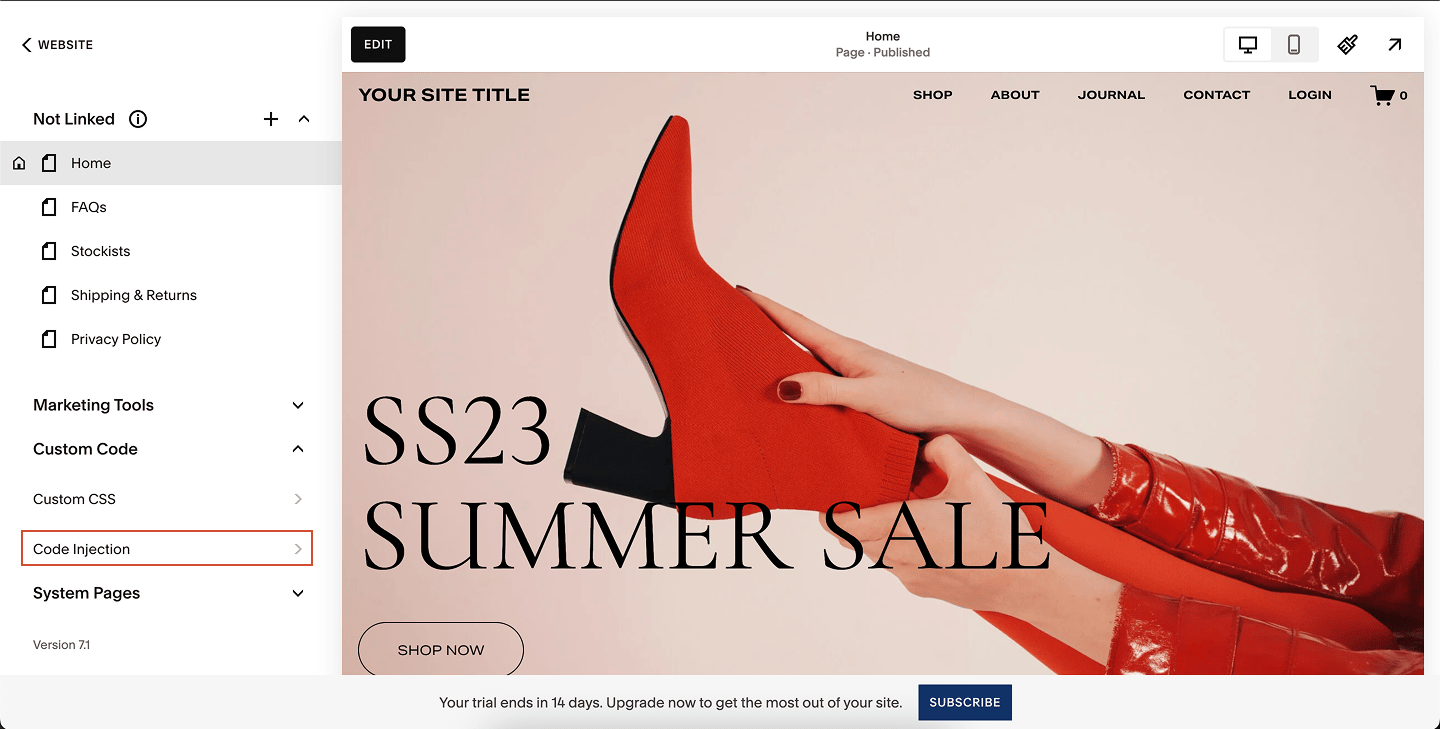
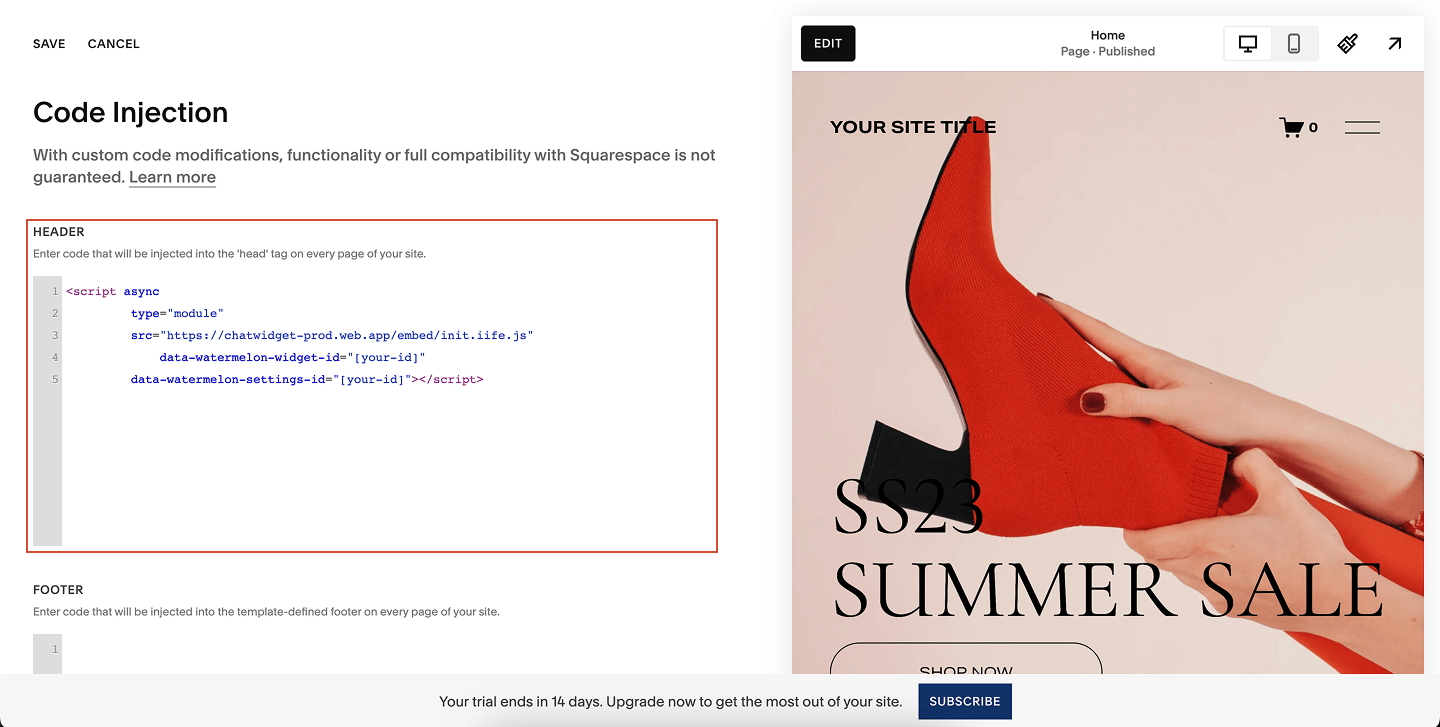
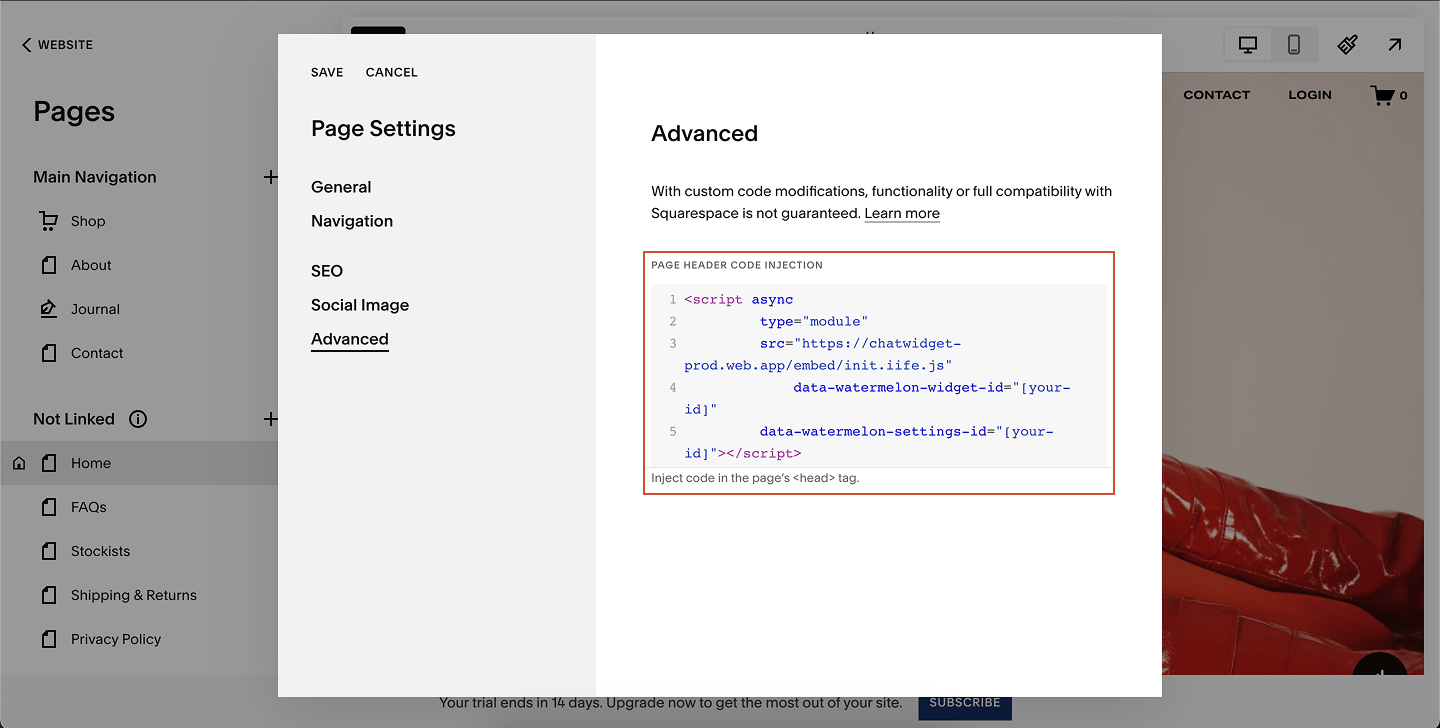
- Squarespace
- Framer
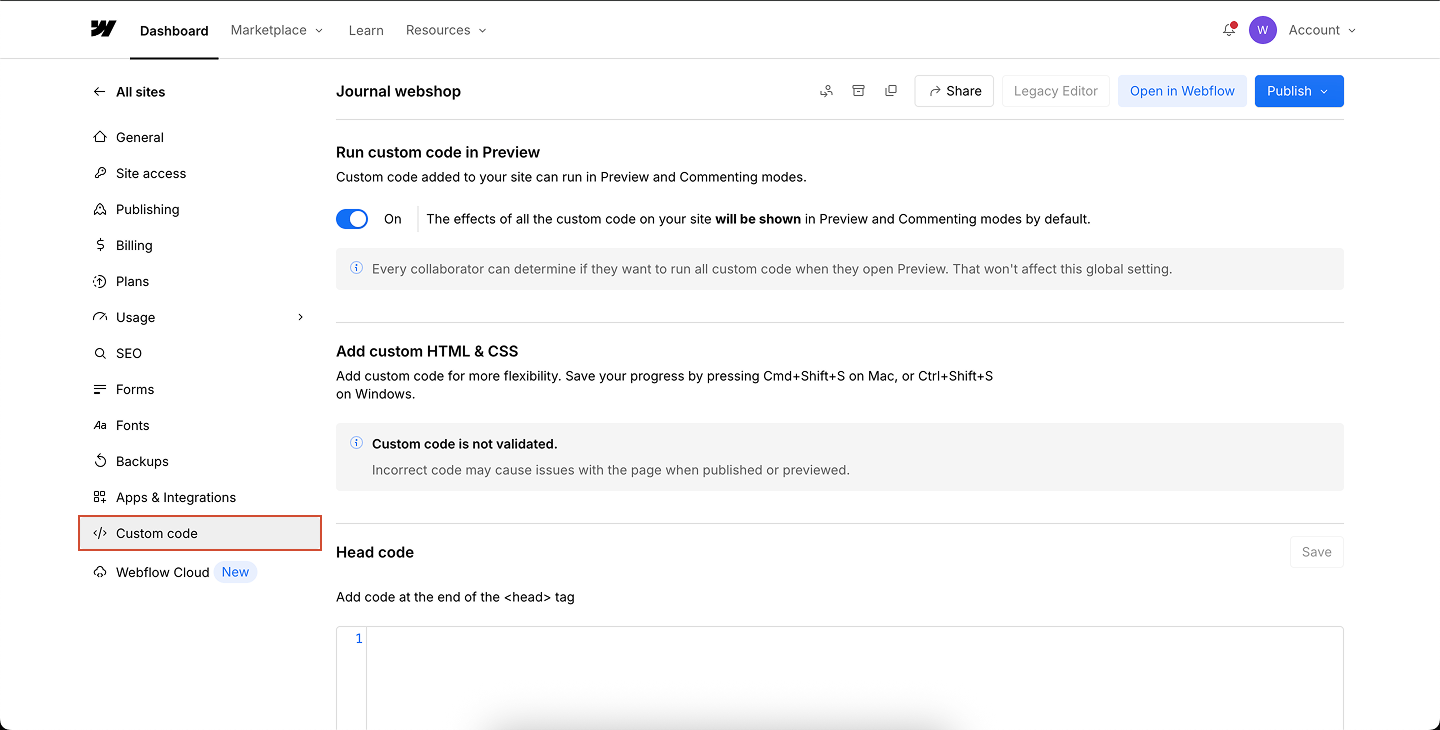
- Webflow
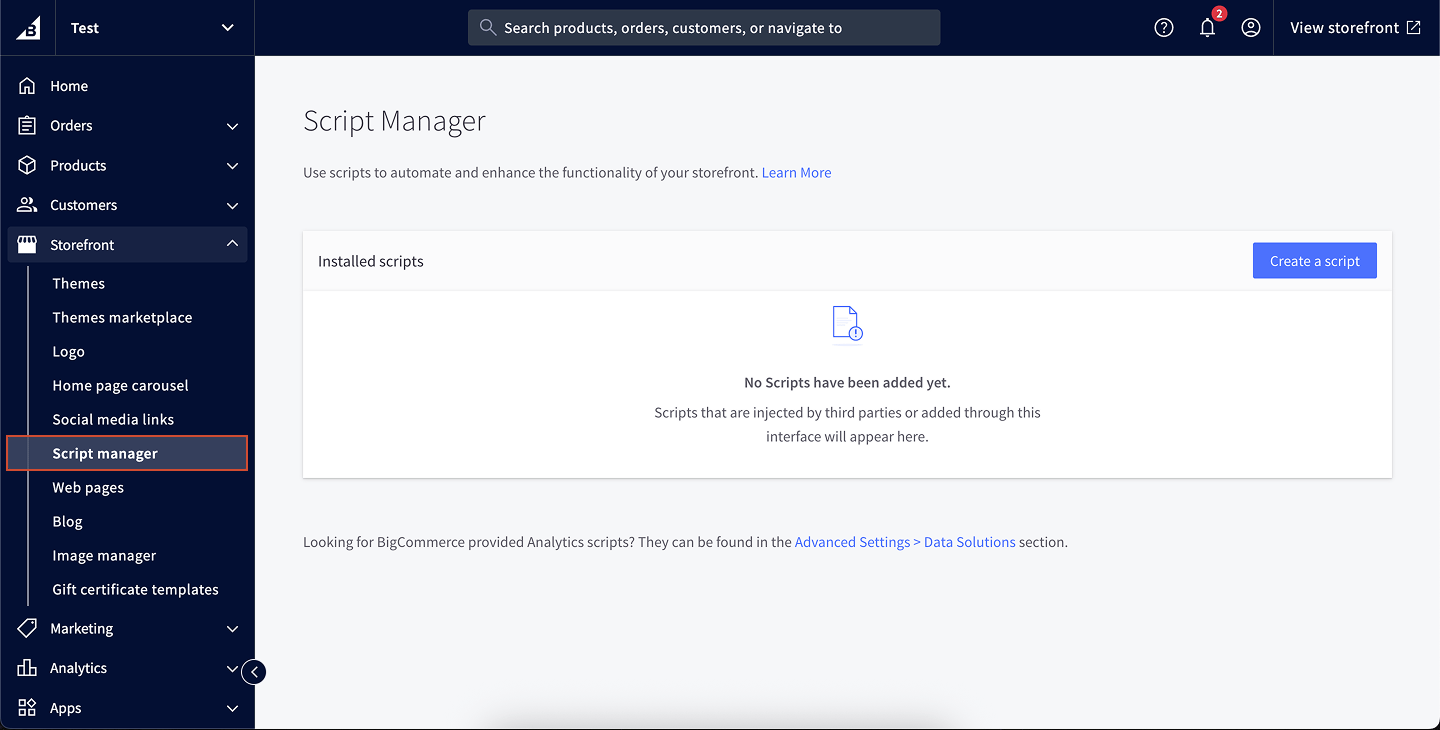
- BigCommerce
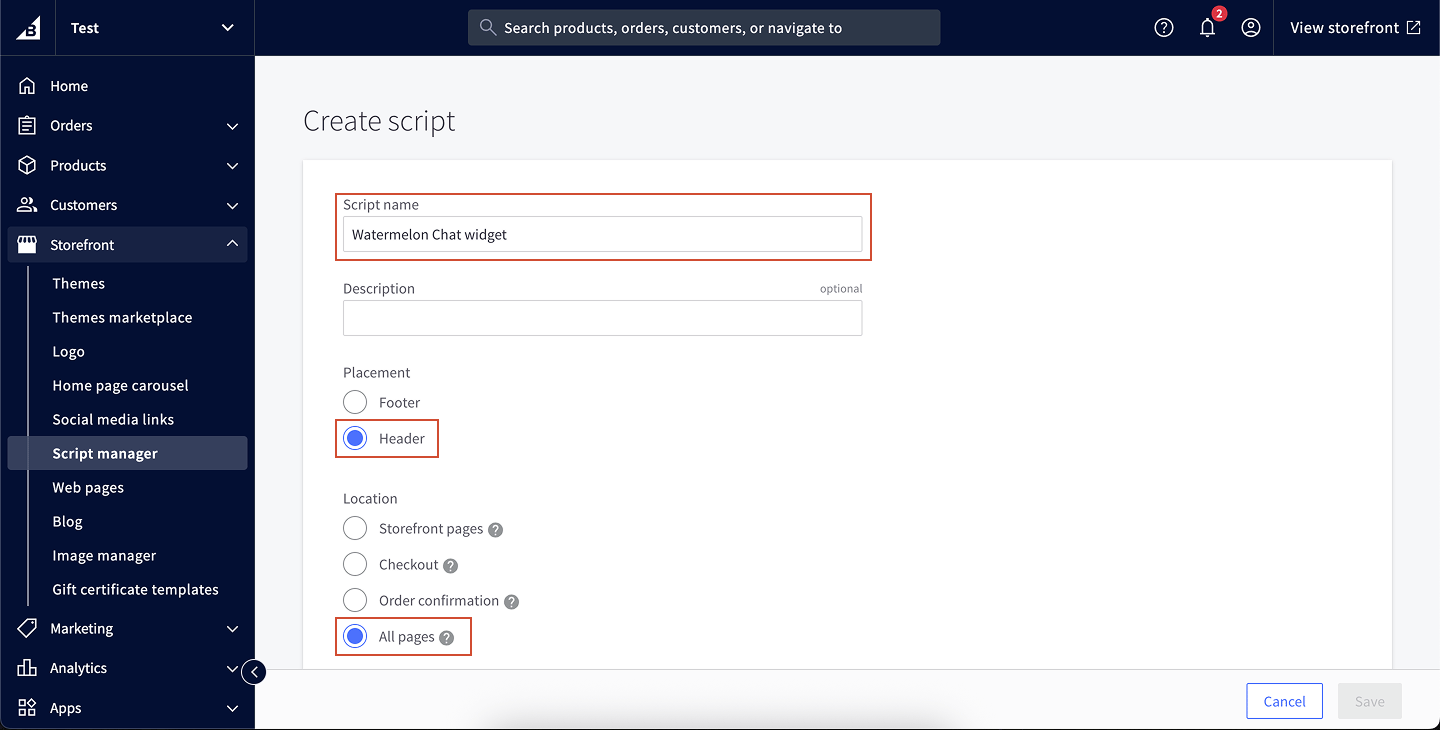
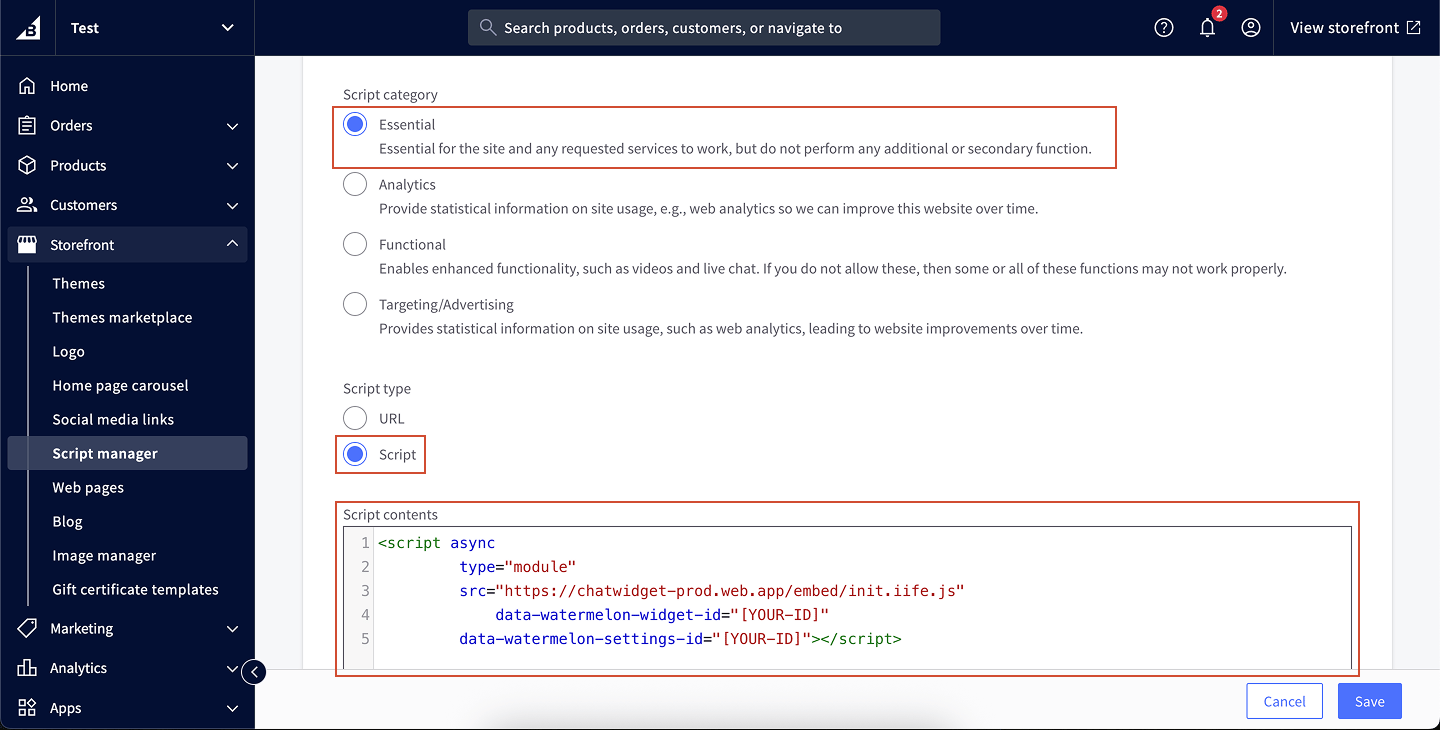
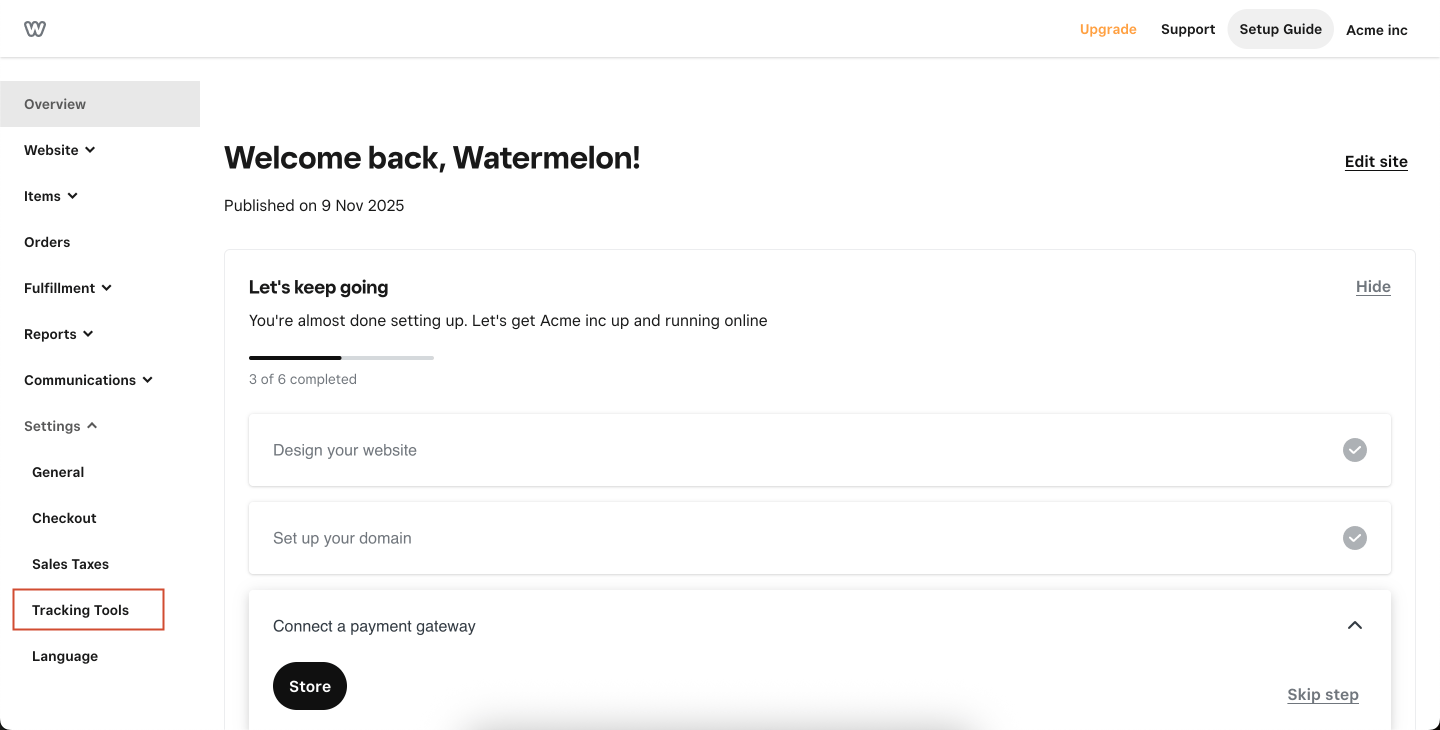
- Weebly
Add your chat widget to your WordPress website so visitors can chat directly with your team or AI Agent. You can install the widget in two ways: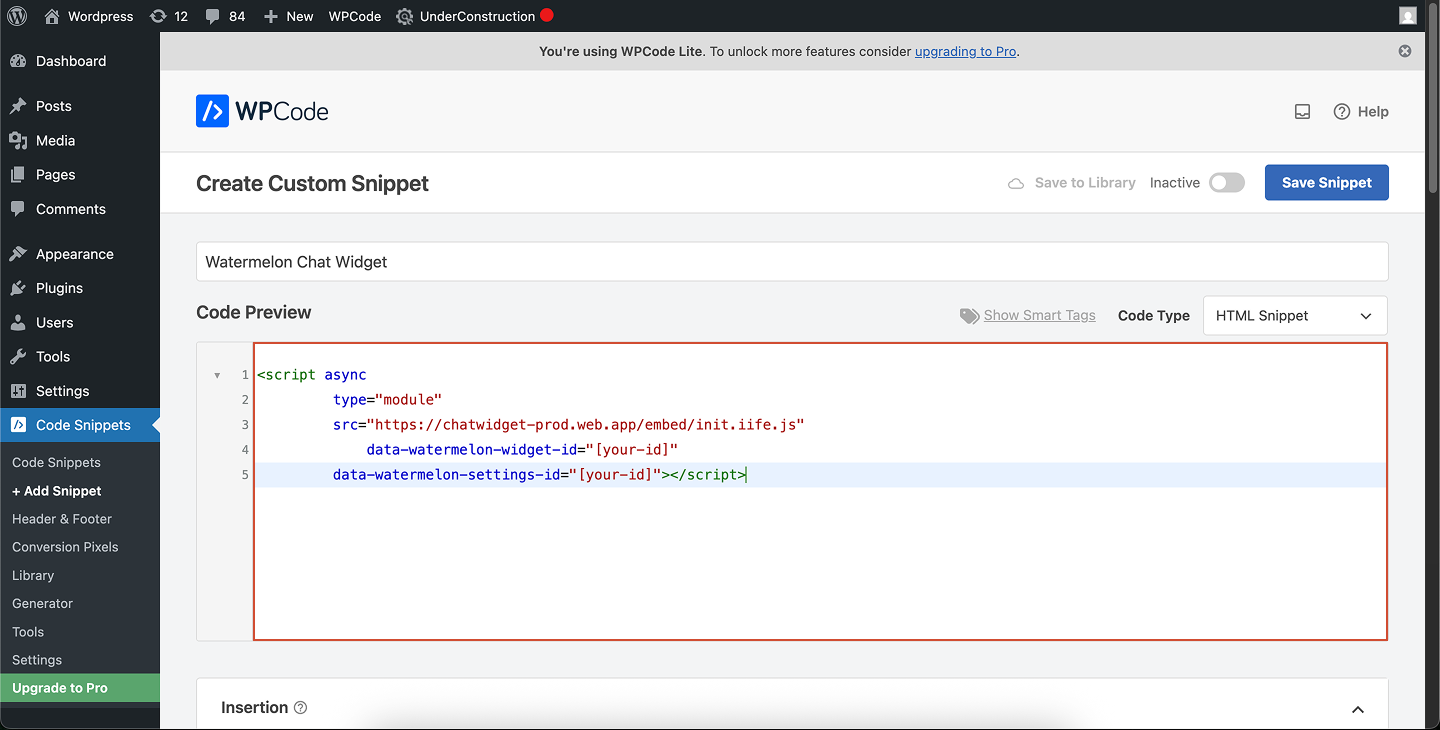
- By adding your snippet directly to your theme’s footer
- By using a plugin (recommended for most users)
Add your chat widget via your theme (Theme File Editor)
1
Open the Theme File Editor
In your WordPress admin panel, go to Tools → Theme File Editor.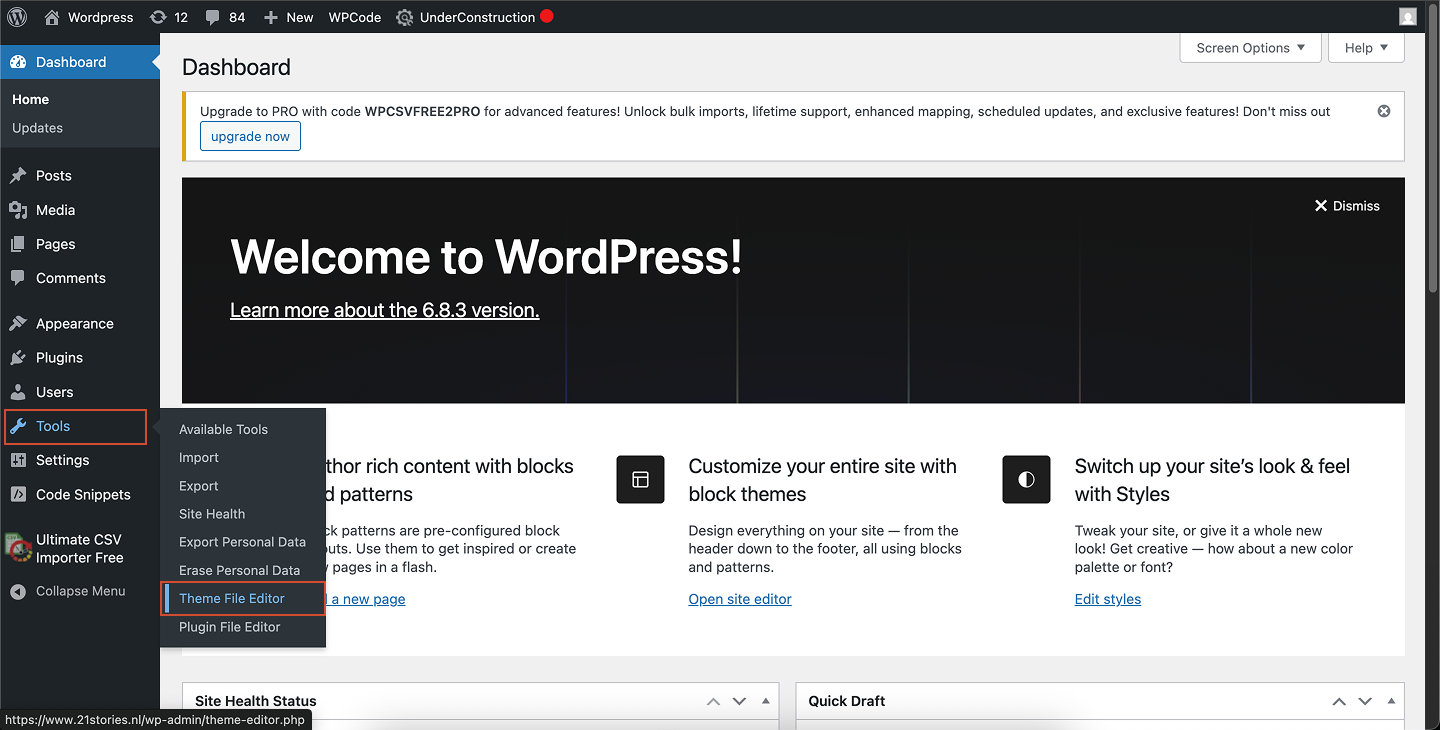
2
Open the footer file
In the file list, expand Patterns and select Footer-default.php.
3
Paste your chat widget code
Scroll to the bottom of the file and paste your chat widget snippet.Place it just before the closing </body> tag if present.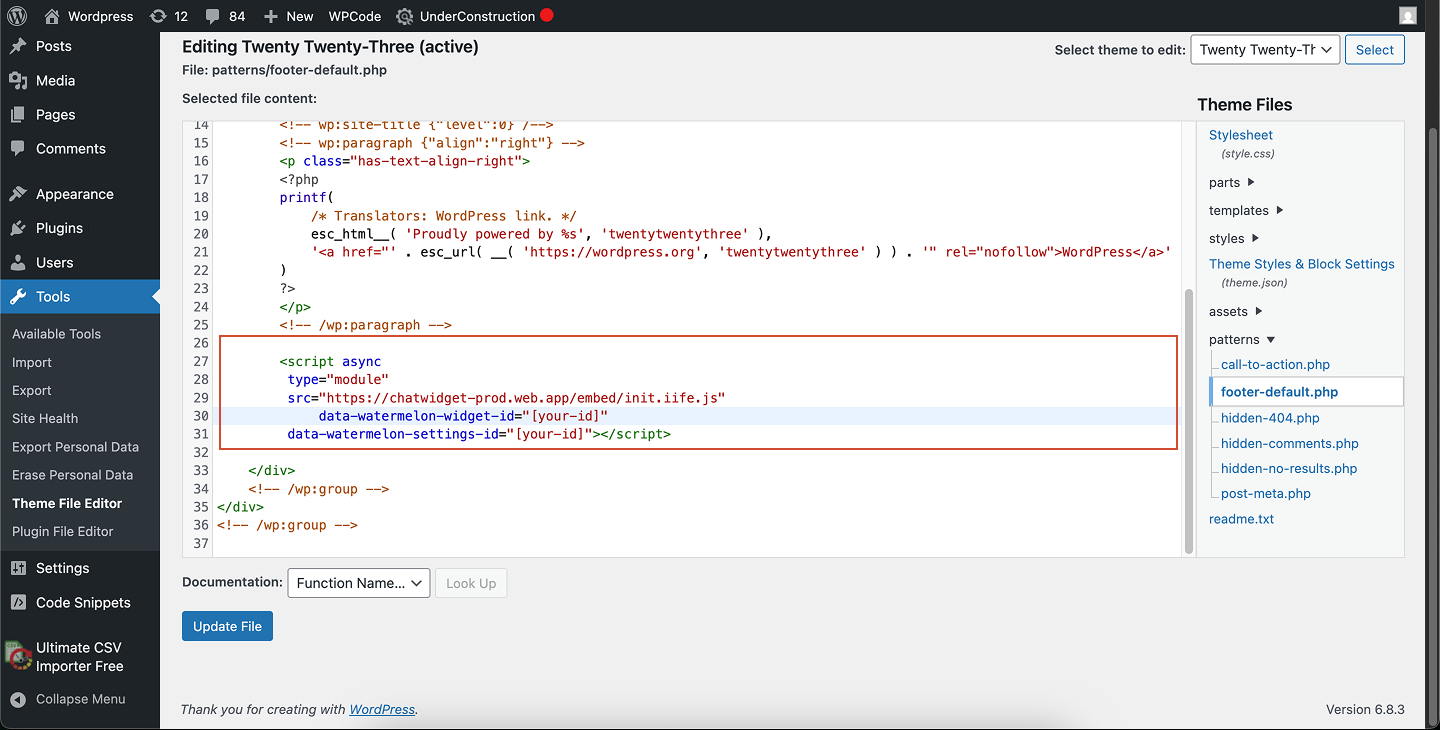
4
Save your changes
Click Update File at the bottom of the code editor to apply your changes.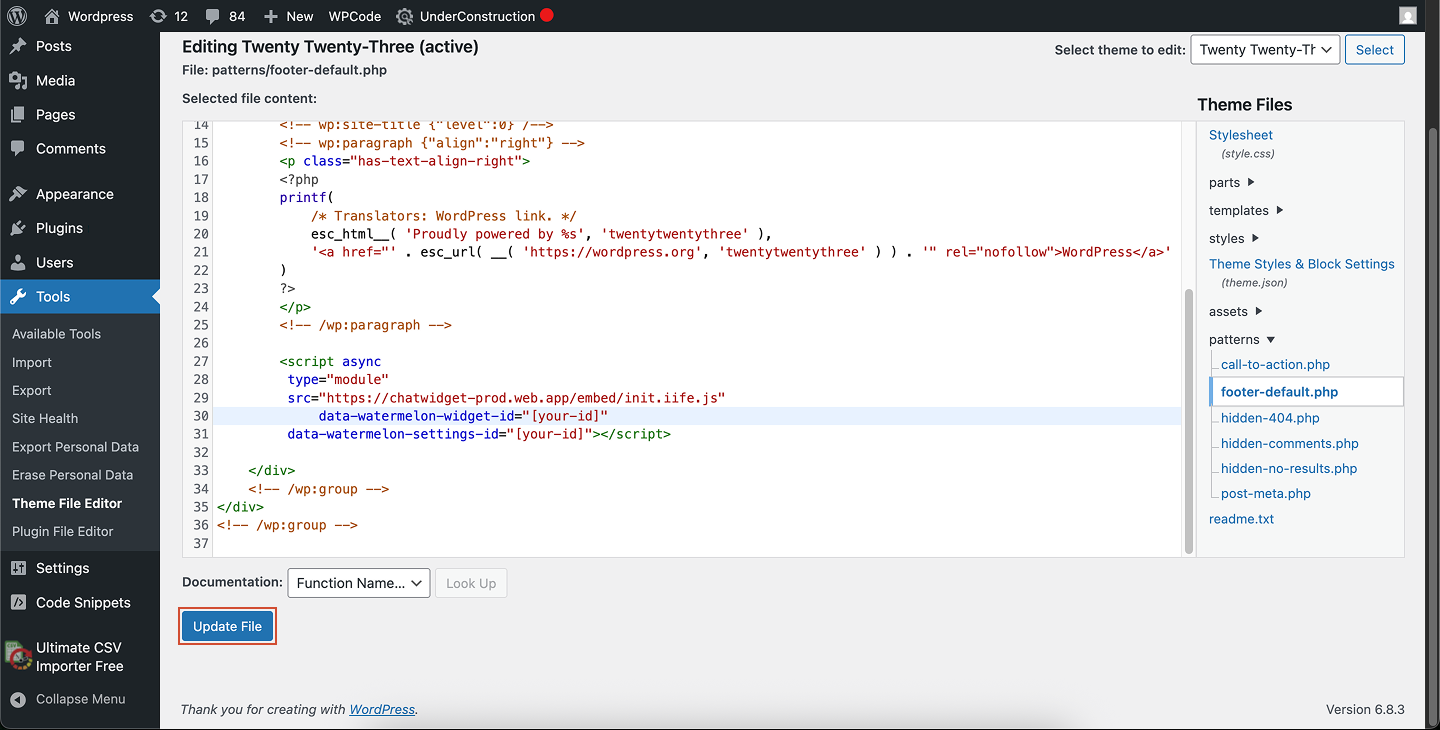
5
Preview your site
Open your website in a browser (not the editor preview) to confirm your chat widget is now live.
Editing theme files directly requires caution. If you switch or update your theme, your changes may be lost.If you prefer a safer option, use the WPCode plugin instead.
Add your chat widget using the WPCode plugin (recommended)
1
Install WPCode
Install and activate the WPCode plugin (formerly Insert Headers and Footers).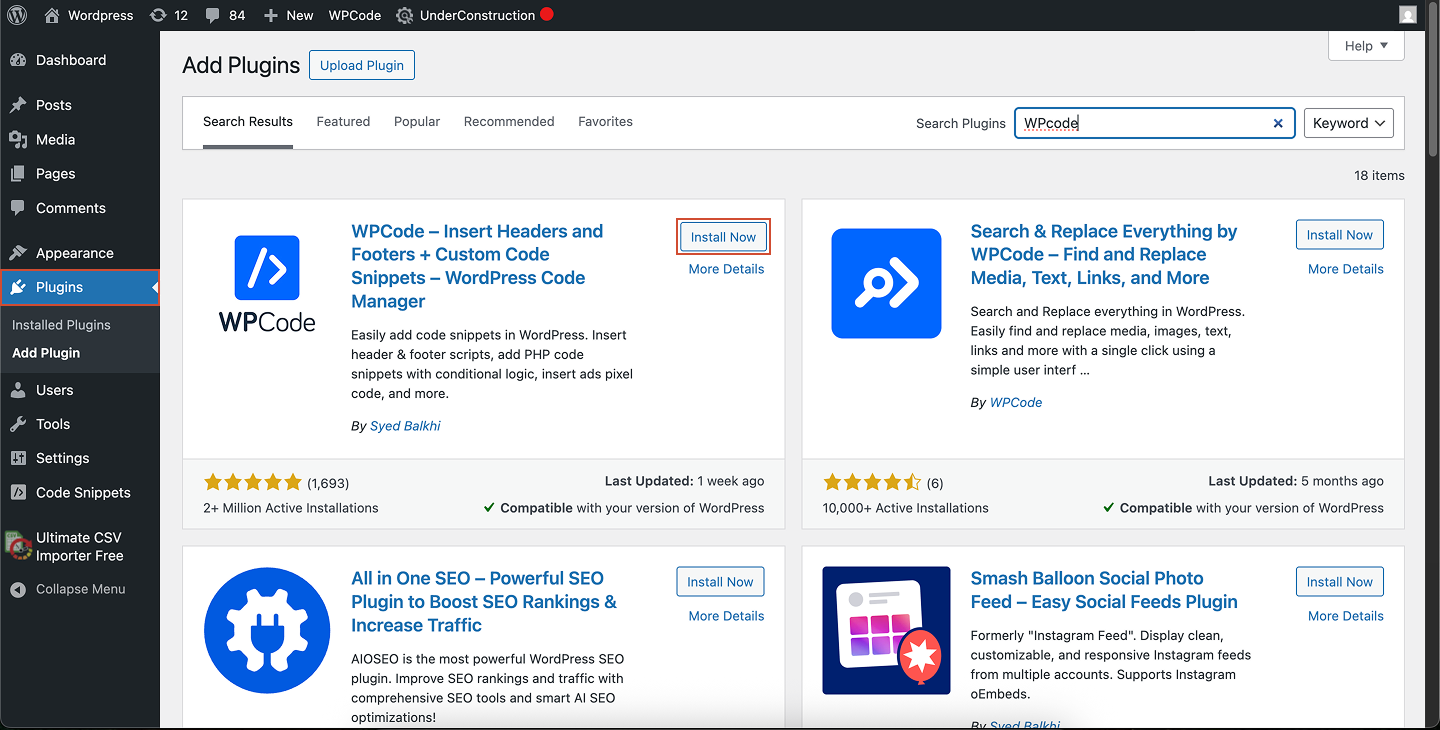
2
Create a new snippet
Go to Code Snippets → + Add Snippet.Hover over Add Your Custom Code (New Snippet) and click Use Snippet.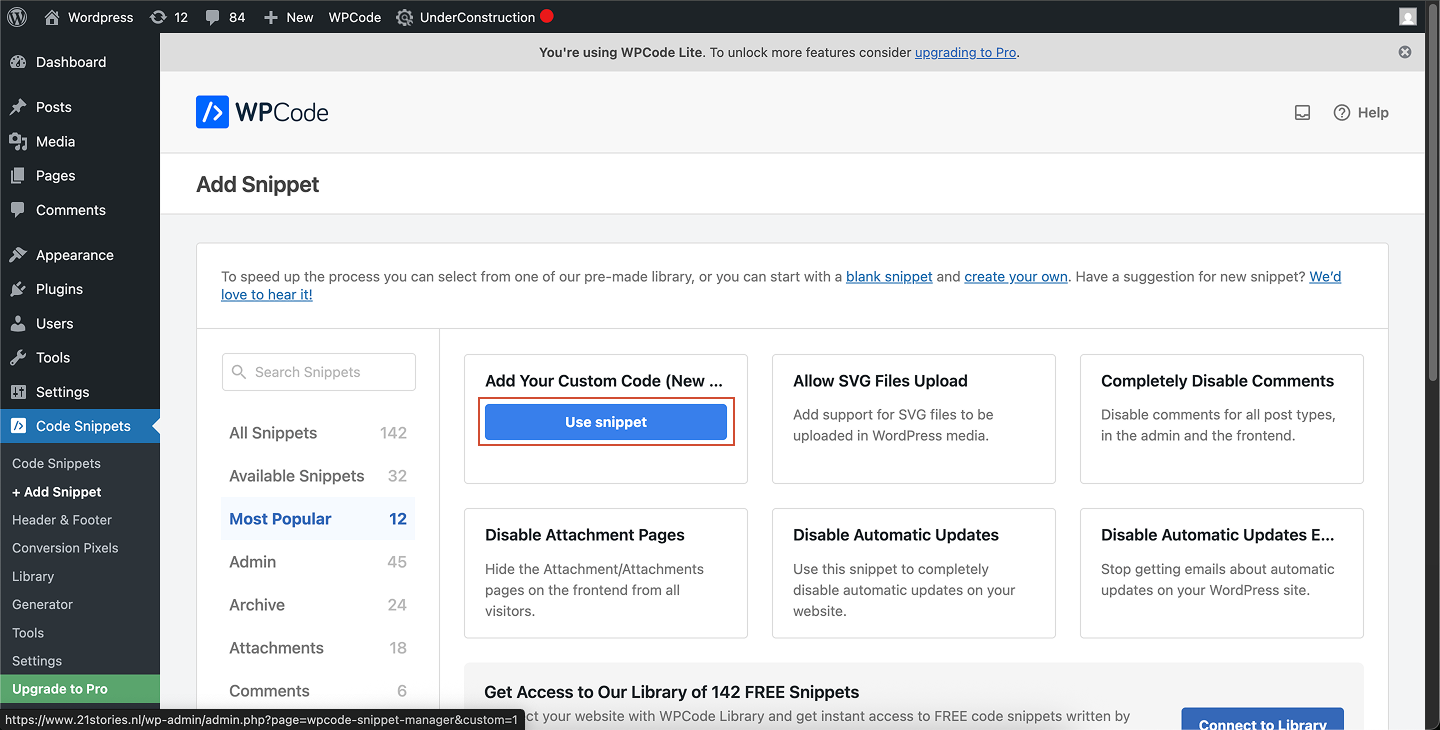
3
Configure your snippet
- Give your snippet a title (e.g., “Chat widget”).
- Set Code Type to JavaScript Snippet.
4
Choose where to load the snippet
Under Insertion, select where the script should appear:
- Header (most reliable)
- Footer (better performance)
- Or target specific pages using WPCode’s conditional logic

5
Save and activate
Click Save Snippet, then switch the toggle to Active.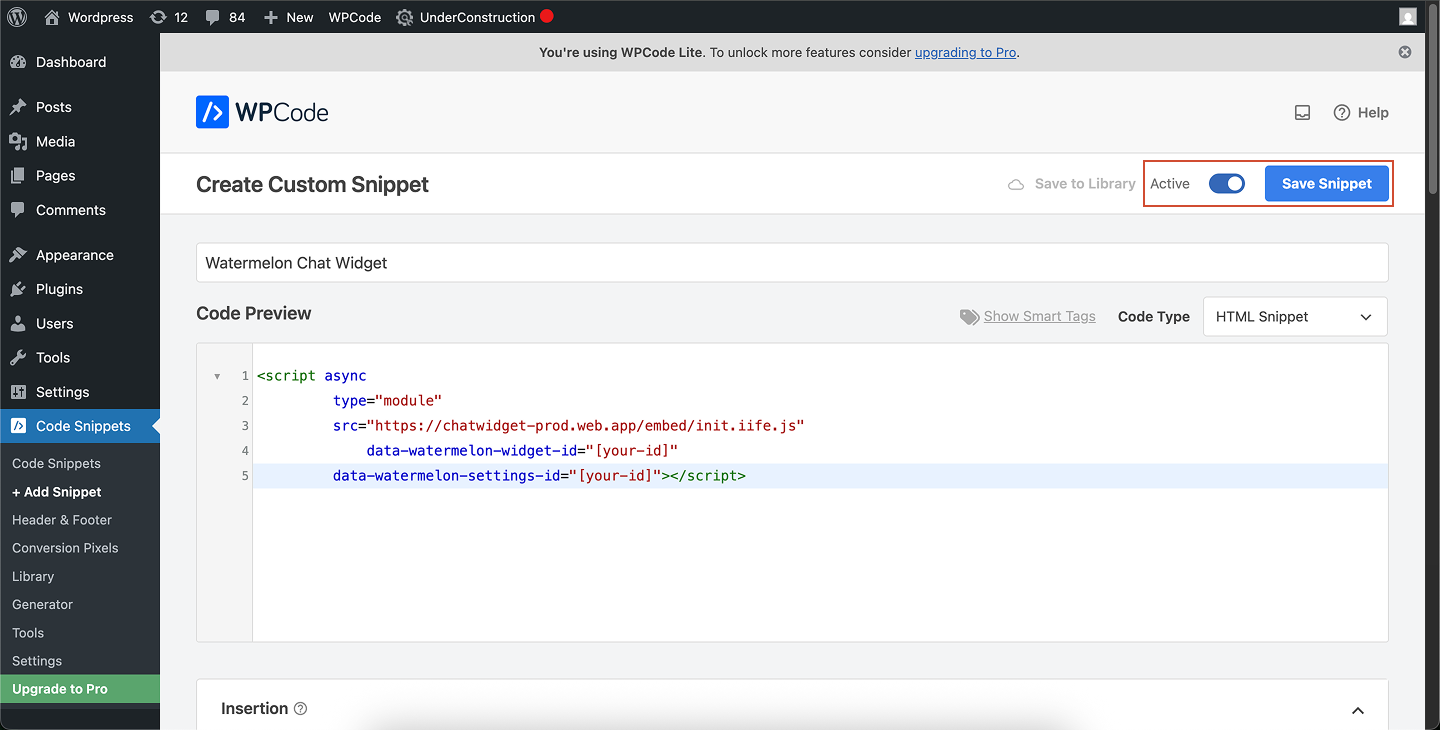


Installing the widget with Content Security Policy (CSP)
If your website uses a Content Security Policy (CSP) that restricts external styles, you need to allow Watermelon’s widget styles. The widget loads its CSS from:- style-src-elem (recommended), or
- style-src if you’re not splitting directives
Ask your developer to help (optional)
If you’d prefer someone else from your team to take care of the installation, you can add them to Watermelon so they have direct access to the code. Alternatively, you can share the code and this documentation guide with a developer, they’ll be able to handle it from there.Installing the widget for both visitors and logged-in users
You can install the widget directly using our NPM package, which works with any framework. The package includes a script to embed the widget into your application. Add Watermelon to your application using the following command in your terminal:</body> tag on every page you want the Widget to appear on your app and/or website.
Then edit the code to send Watermelon the email address, name, or phone number of the user who is currently logged in.
After adding the code, open your app and the Widget will appear.
Passing values for custom fields
In addition to the standard user attributes (first name, last name, email, phone and user ID), you can also pass custom fields to Watermelon. These fields allow you to attach additional information about the logged-in user. Custom fields must first be created in your Watermelon dashboard before they can be sent from your application. Once the fields exist, you can include them in the login payload when initializing the widget. Field names within the Watermelon application can be stored with spaces, uppercase and lowercase letters. And in the custom fields page there will also be displayed internal name which is how the name of field needs to be passed in the payload in order to map it correctly. Example: sending custom fields Below is a simple example showing how to pass custom fields along with the standard login payload. In order to pass the custom fields value, they need to be added to the initialpostMessage payload and then sent to the iframe using a second postMessage call after the widget is initialized. Field values passed in that payload need to be of string value. If in your system the value is stored as a number or boolean, make sure to convert it to a string before sending it to Watermelon using methods like toString().
Shut down your user sessions on user logout
This step should take place either right before or after the logout call — the order doesn’t matter. Two postMessage calls are required:- The first one hides the widget from the top-level iframe.
- The second one tells the iframe app to clear everything from local storage and reset its state, such as conversation ID and contact ID.