

The pre-chat form is available on paid plans only. It is not available on the Free plan.You can add up to 5 fields to the form.When Form required is enabled, visitors must complete the form before they can start chatting. This option is enabled by default.
Set up the pre-chat form
1
Go to Integrations
In your Watermelon dashboard, go to Integrations.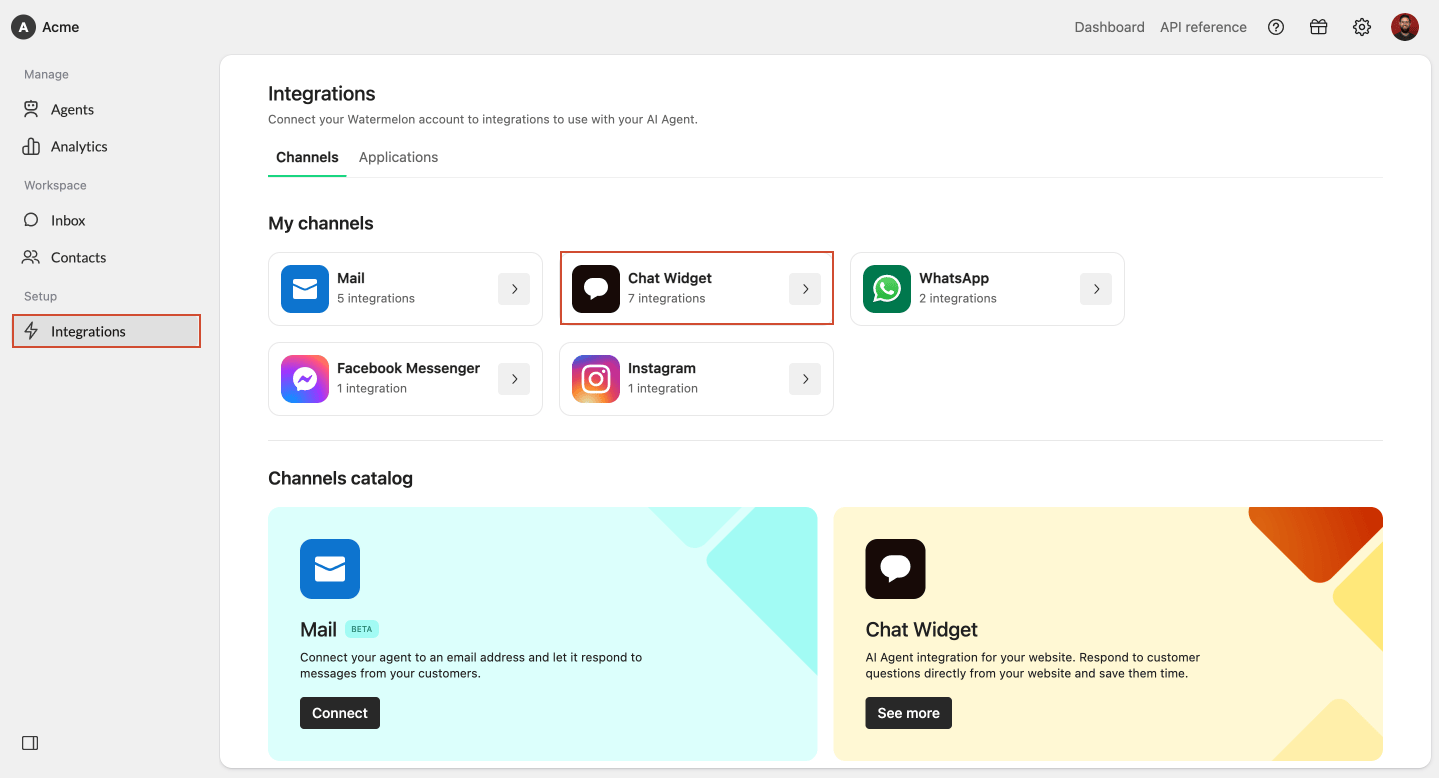
2
Open Chat Widget
Select Chat Widget from the integrations overview. Open the chat widget you want to edit.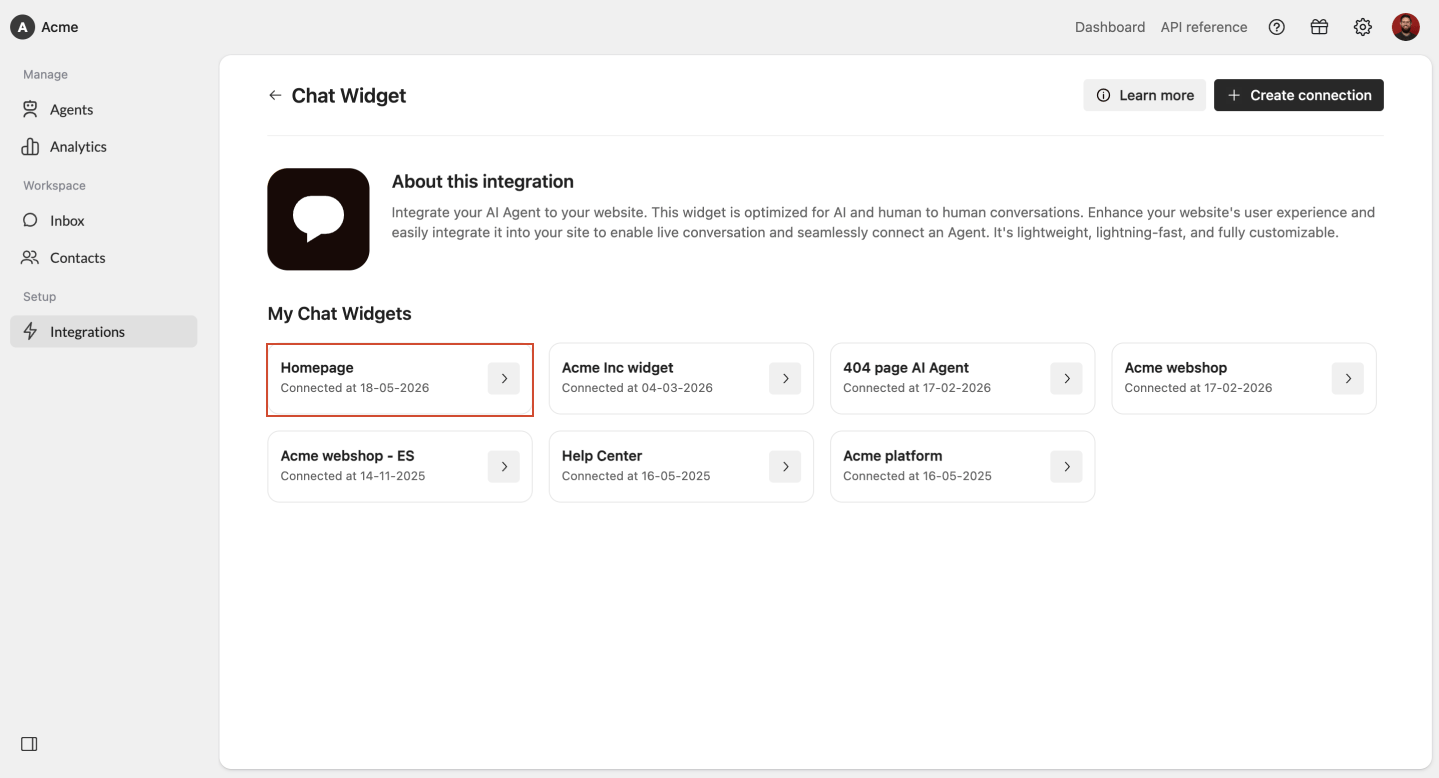
3
Open Attract
Click Attract in the chat widget settings.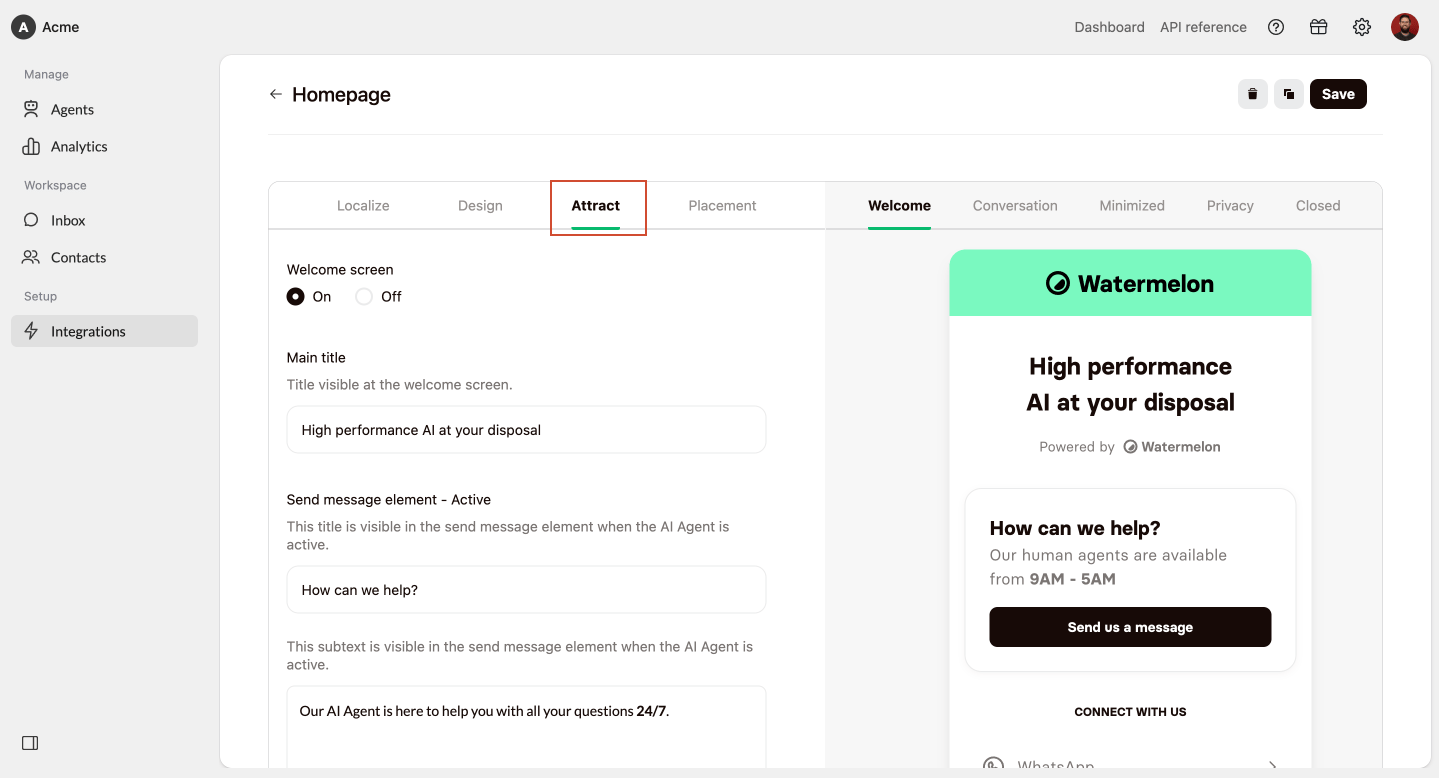
4
Enable Form
Scroll down in the Attract settings till you see Form. Click on the toggle at Form to enable the pre-chat form settings.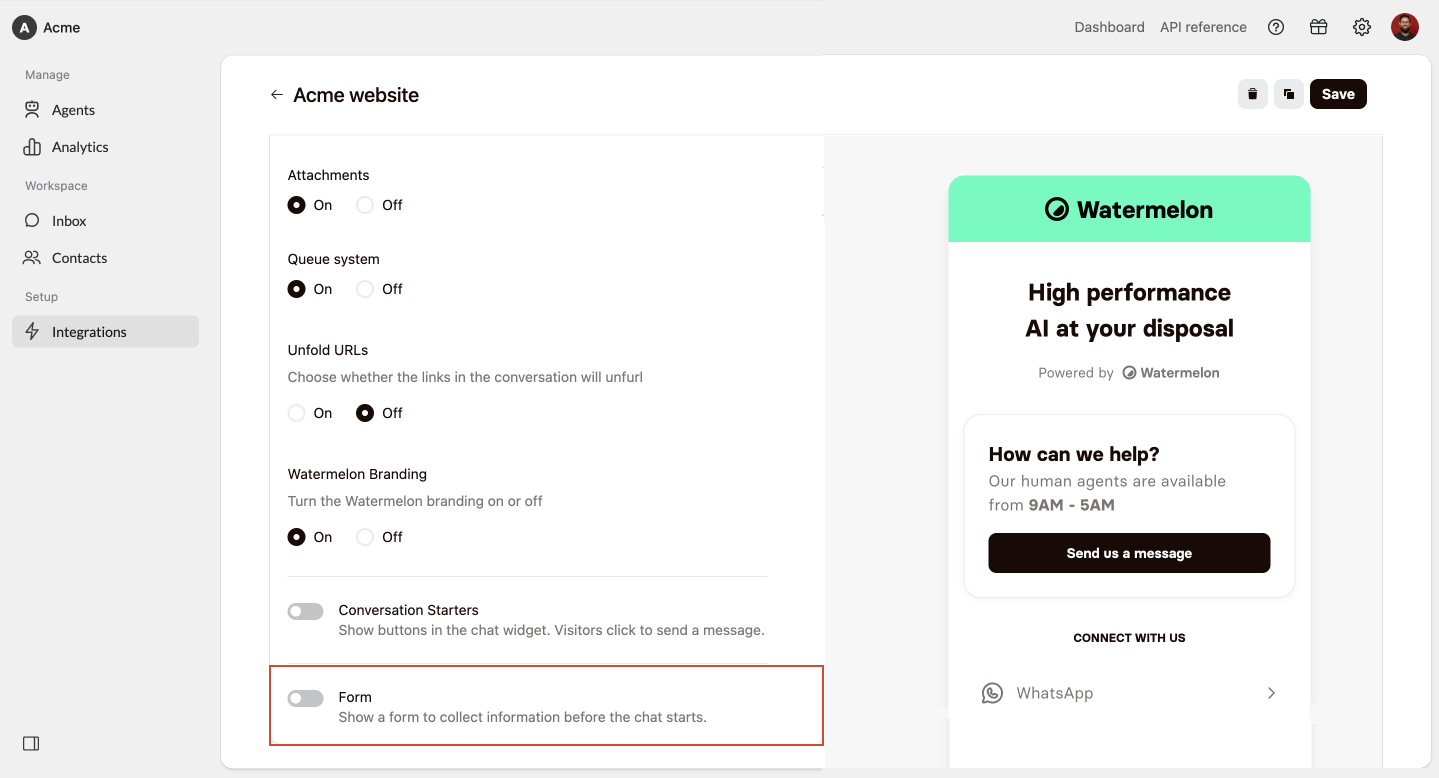
5
Choose whether the form is required
Keep Form required enabled when visitors must complete the form before starting a conversation. This option is enabled by default.When you disable it, visitors can skip the form and start chatting without entering their details.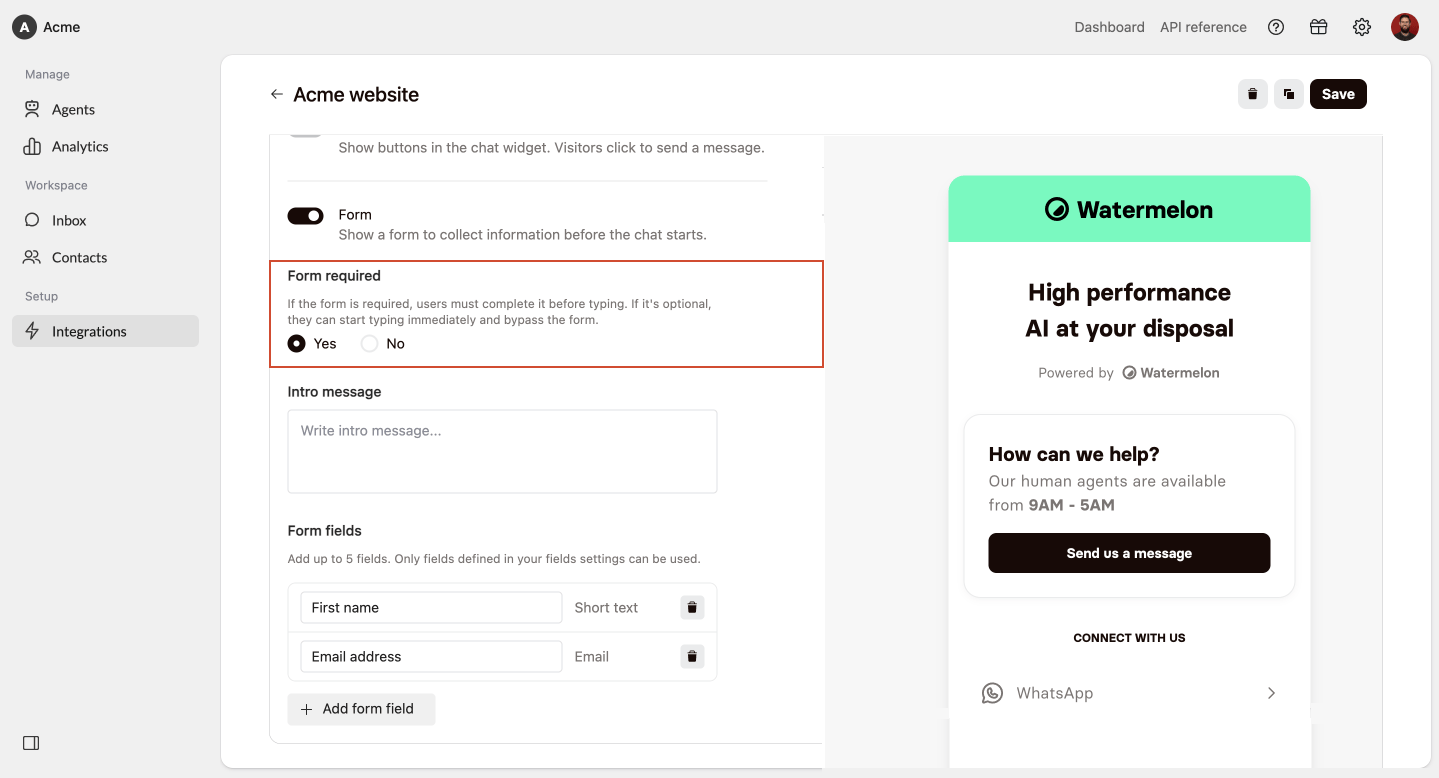
6
Add an intro message
Enter an intro message to explain why you are asking visitors for their information.The message appears directly above the form fields in the chat widget.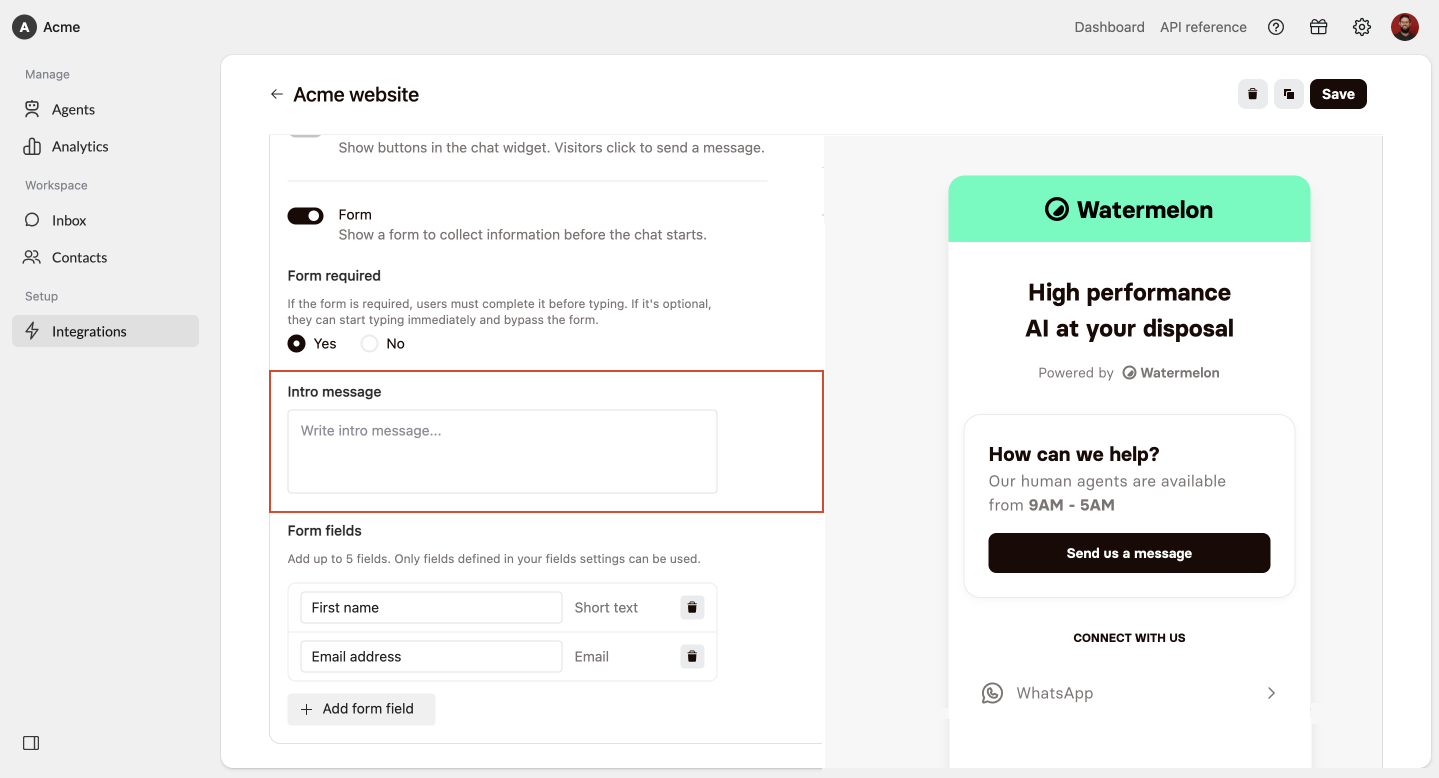
7
Select your form fields
Add up to 5 fields for visitors to complete.You can use default fields, such as First name and Email address, or select custom fields you created to collect information specific to your business.You can adjust the placeholder the end user sees in the widget, by adjusting the text in the added field underneath Form fields.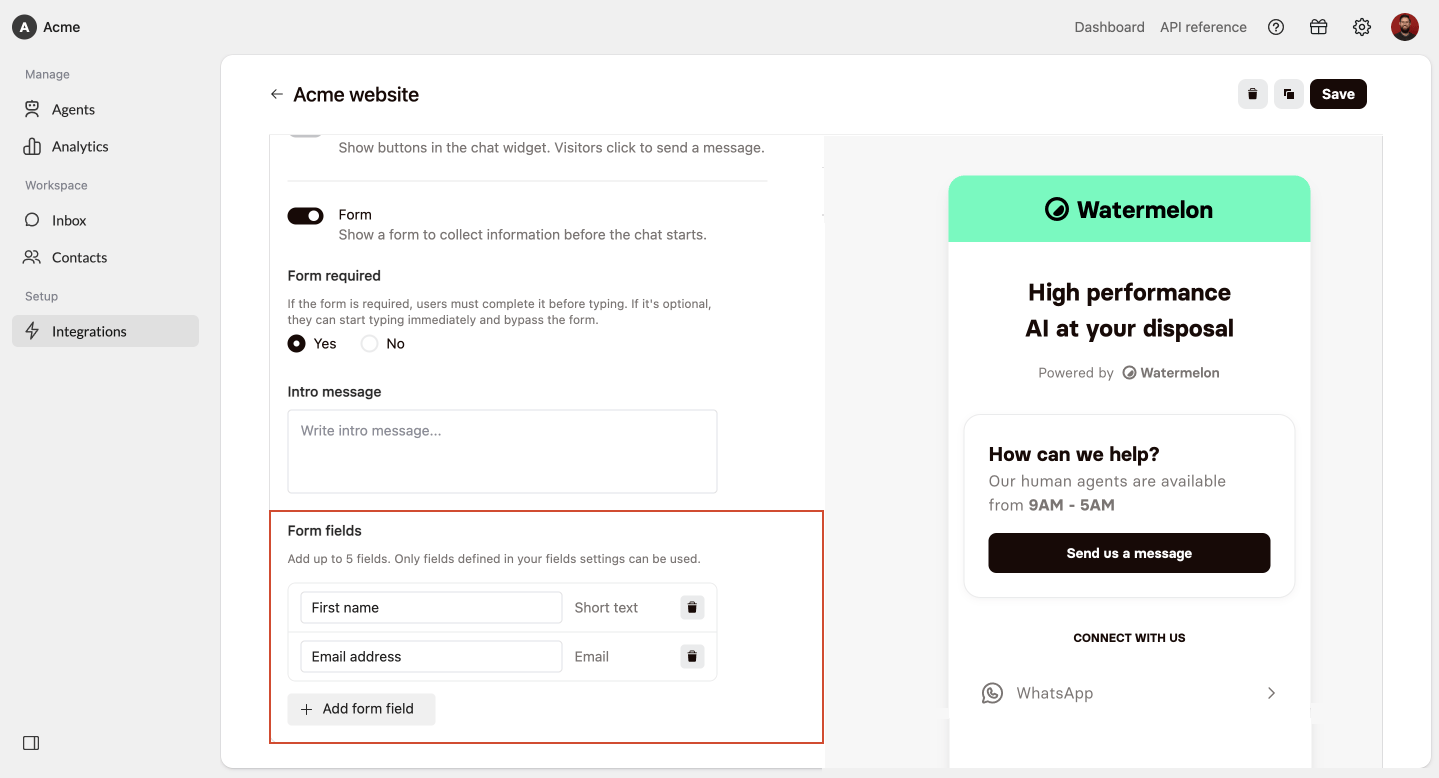
8
Save your changes
Click Save to publish the changes to your chat widget.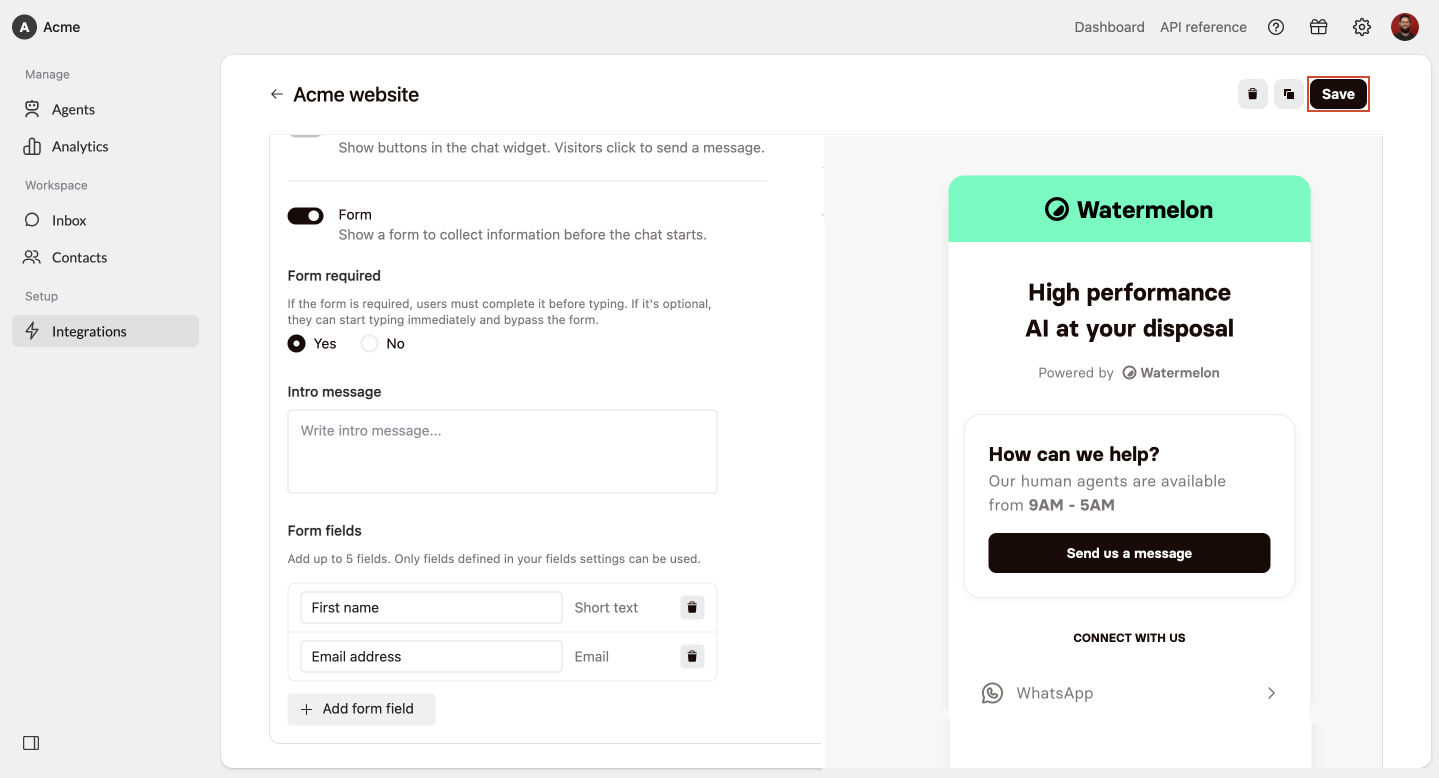
Disable the pre-chat form
1
Go to your chat widget
Go to Integrations > Chat Widget and select the chat widget you want to edit.
2
Disable form
Click Attract, and scroll down till you see Form. Click on the toggle to disable Form.
3
Save your changes
Click Save to save your changes.
Best practices
Keep the form short
Only add fields that are necessary. Short forms are faster to complete and create less friction.
Explain why you need the details
Use the intro message to tell visitors how their information will help you assist them.
Use custom fields
Add custom fields when the information helps you identify, route, or support the visitor more effectively.
Use clear field names
Make sure each field is easy to understand, so visitors know exactly what information to enter.